Let’s face it. The average guy isn’t gonna jump at the idea of spending an afternoon ironing a pile of clothes. It feels like a time waster and it’s obviously easier to have it done for you.
However, there are times and circumstances when the deed needs to be done.
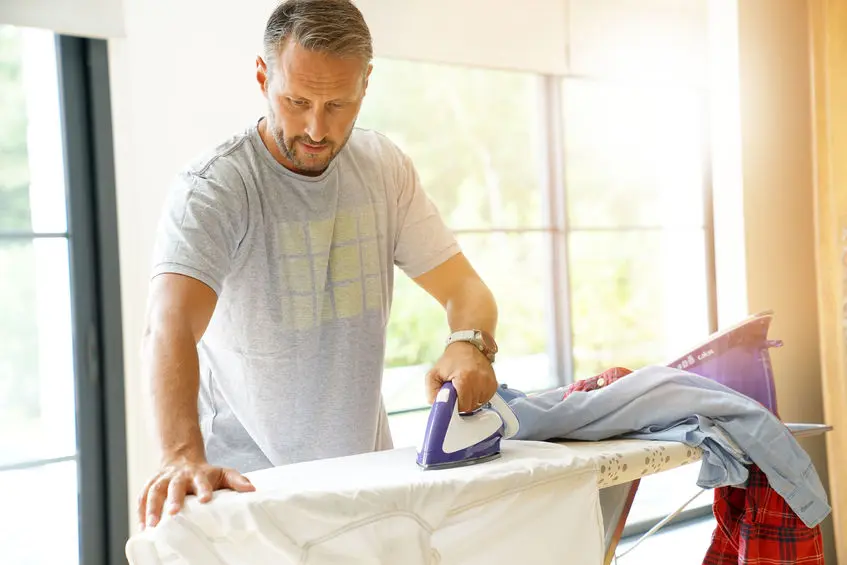
Whether its desperation… or a return to the self-reliance and pride found in military officers from decades past, ironing is a skill that must be learned if you’re to call yourself a well rounded gentleman.
It’s what separates the men from the boys… and it can be a powerful statement of self worth.
You May Also Like…
Are you enjoying this article? You might want to read this one next:
How to Take Care of Your Clothes (In-Depth Guide)
Don’t worry, it opens in a new window 😉
Many entrepreneurs and top execs find the process of ironing their work shirt the night before a big meeting, a truly meditative process. It’s focused time that helps them achieve a calm focus where they can visualize the successful outcome of the meeting.
But what if you’ve never even picked up an iron? Thankfully, in this article we’ll be looking at exactly what you’ll need to know to master the art of ironing.
What’s the Best Iron to Use?
The first thing you’ll need is a decent iron.
Now, most irons will do just fine but if you’re serious about the task and want it to be more than just a laundry burden, you should invest in a quality steam iron. The only brand which truly stands out is Rowenta.
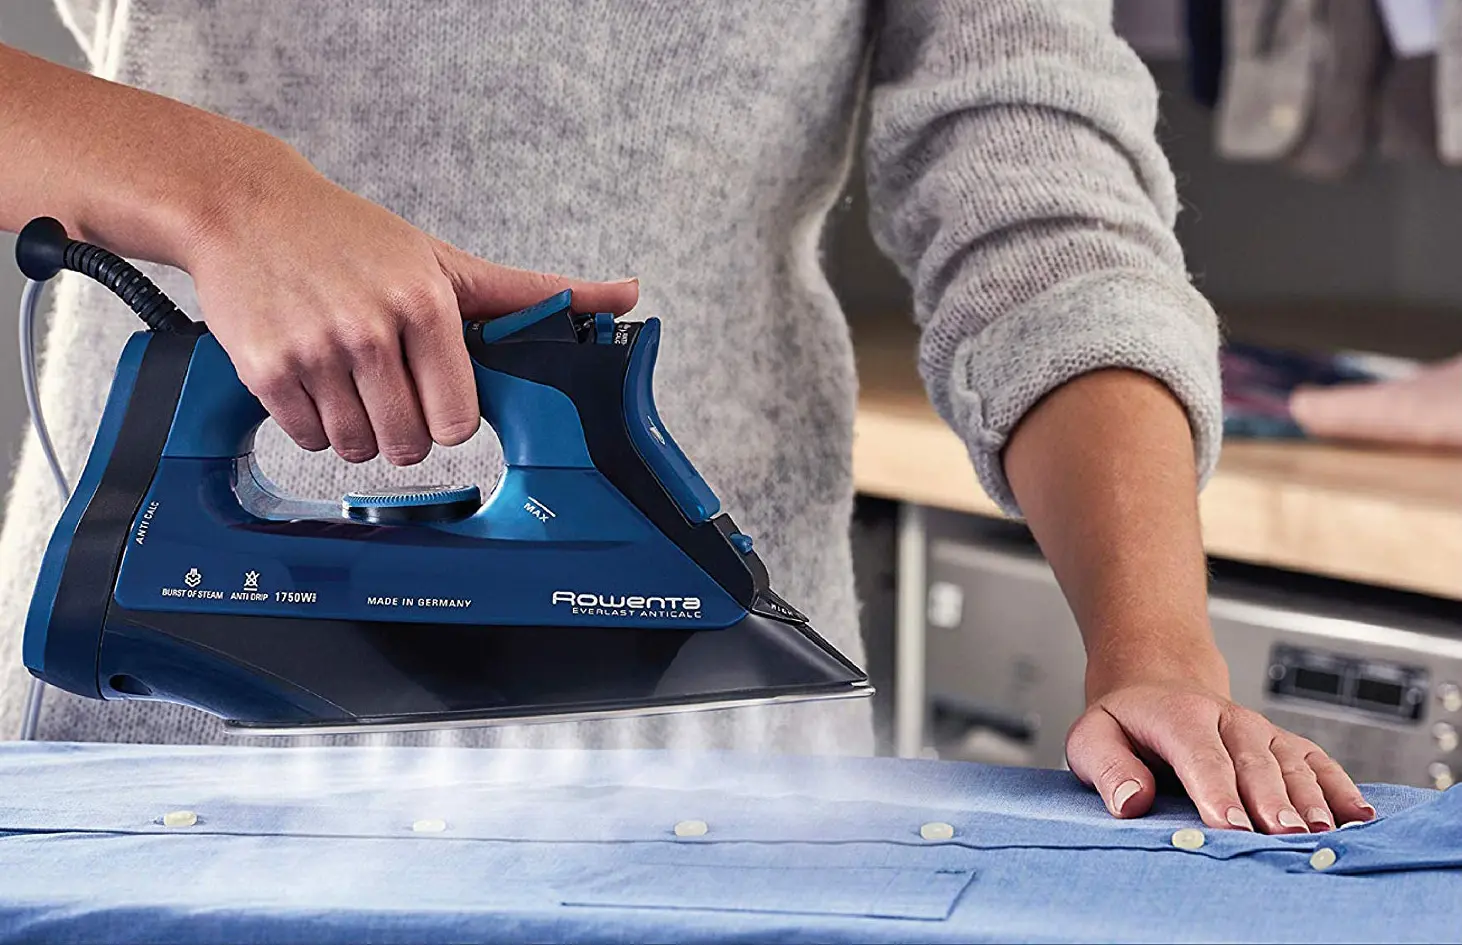
Their German-made irons far outshine any Chinese-made competitors and you can absolutely feel the difference. The smooth and precise buttons and dials are accompanied by considerable power and steam output. You’ll get a crisper finish in a much faster time.
Serious buyers should consider the Rowenta Steamforce DW9280, while slightly more budget conscious individuals can check out the Rowenta Focus DW5080.
Now that you have your first step down, let’s look at some other gear…
What Else You’ll Need
The next item on your list is a sturdy ironing board. You’ll want a surface that’s wide enough so that you don’t have to keep repositioning the clothing while ironing.
If you want to save some space, you could opt for a table top ironing board which folds away much smaller. Better still, is a heat absorbing ironing pad, which you simply lay down on any table and iron clothing over it.
Lastly, you’ll need an ironing cloth (a.k.a. pressing cloth) that will help create a barrier between the iron and your clothing to avoid any scorch marks or shiny, burnt areas from accidentally occurring.
Ok… You’re all geared up. Now let’s iron!
How to Iron
Learning how to properly iron is definitely worth your time. Here’s what you need to know…
Check the Label for the Correct Ironing Temperature
The first step is to check your garment labels for the types of fabric. (Natural fabrics like Cotton or Wool can handle a much higher temperature than synthetic fabrics like Polyester.)
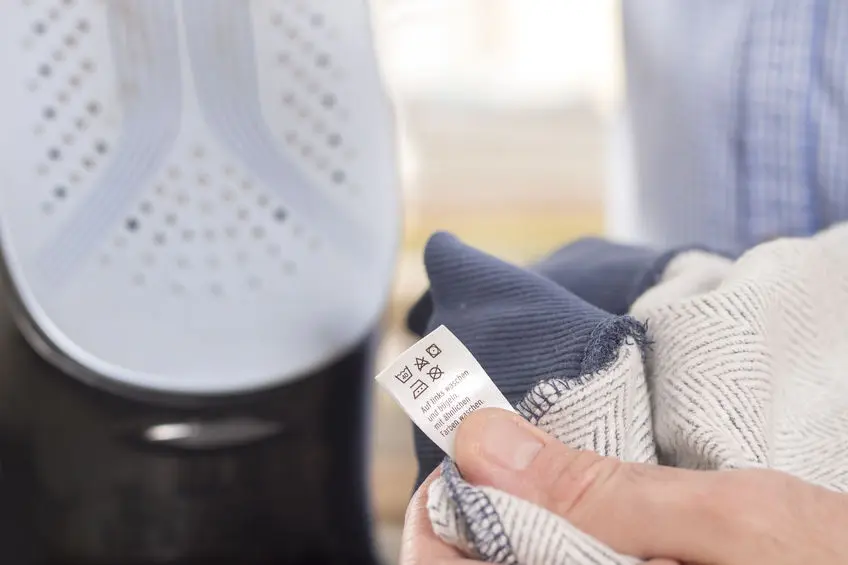
Your label should show at which temperature it can be ironed. This is usually indicated by an iron graphic with 1, 2 or 3 dots… 3 representing low, medium and high heat respectively.
Separate the garments into piles of similar fabrics.
Fill Your Iron With Water
Tap water is usually fine but some irons might require a 50% dilution with distilled water which you can easily pick up at your local convenience store.
This is because the minerals in the water can calcify and damage the iron, especially in “hard water” areas. (Check your iron’s instruction booklet.)
Heat the Iron
Start with the iron on its lowest setting and tackle the sensitive fabrics first. Then work your way up to the more resilient items.
Most irons will have a dial which can be set to the fabric type, whether it be Linen, Cotton, Wool, Silk, Polyester, etc.
It should have an indicator light that will flash when you set the temperature dial and stop flashing as soon as the iron reaches its desired temperature. Once the light stops flashing, you can start ironing.
Don’t use the steam iron before it’s reached the correct temperature or it could spit water that has not yet turned to steam and leave water marks on your clothing.
Protective Measures
Always iron an inconspicuous corner of the garment first to ensure that the temperature is not too hot and might cause damage to the material.
In the case of Cotton or Polyester, make sure that the fabric is slightly damp before ironing. This will make removing creases a lot easier. You can add some moisture with the spray button on your steam iron if needed.
For Wool, Silk or Polyester, a slightly damp ironing cloth must also be placed in between the iron and the fabric to protect it from damage.
Tip: You could also iron any expensive items inside-out to be extra safe in case they burn.
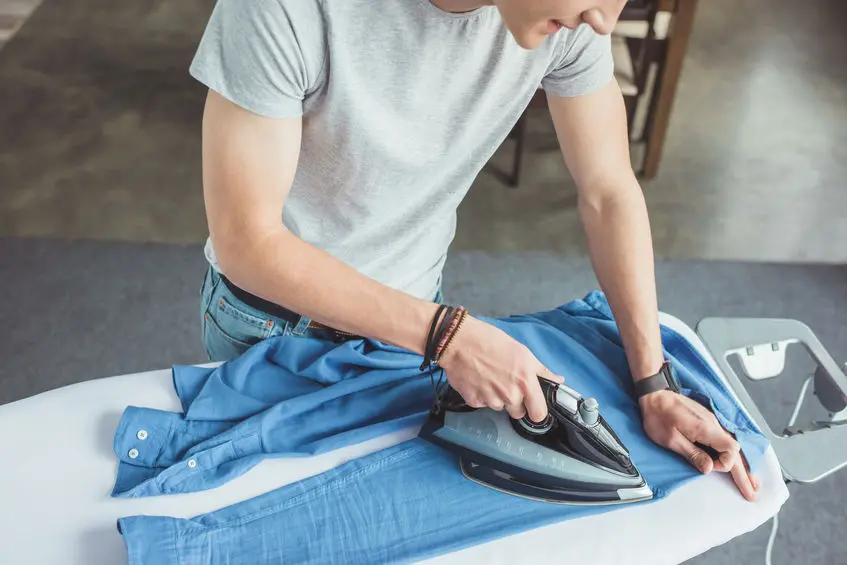
Begin Ironing
Use both hands to place the item flat on the ironing board while trying to flatten out bumps and wrinkles as you lay it down.
Move the iron over the fabric in smooth even strokes, taking care not to stay in one spot too long and risk overheating the fabric.
You can use the steam burst feature on the iron to add moisture to the garment which will speed up the process and help protect it from burning.
Simply flatten the fabric as you glide across it with the iron. This may take a few strokes.
Pay close attention to follow the natural seams and pleats, and make sure to avoid “ironing in” any new creases.
If you’re ironing a button shirt, start with the collar and cuffs to establish some “structure” before moving on to the other panels.
Start out with simpler items like t-shirts and pants, then work your way up, getting more comfortable as you go. Suits are slightly more complicated and definitely require some practice.
Don’t overshoot your skill level and accidentally damage the garment.
One you’ve ironed out all the wrinkles, you’re done!
Hang the Clothing
After all the effort you’ve put into ironing your clothing, it would be a waste to fold it and create new creases. It’s best to hang the item right away and let it retain that crisp look until it’s ready to wear.
Ready to Get Started?
Ironing your clothes doesn’t just leave you looking polished, the steam ironing process also sanitizes the fabric so you’ll be bacteria and odor free!
Once you’ve ironed a shirt to perfection and worn it to an important meeting or date, you’ll get to experience the pride and self-confidence it gives you. Welcome to the league of honorable gentlemen.


There are some steps to iron military creases in shirts. Step 1: know where the creases are supposed to be. Step 2: prepare your steam iron. Step 3: prepare your ironing station and shirt. Step 4: iron the shirt to remove wrinkles. Step 5: iron the yoke and collar. Step 6: iron the back of the shirt. Step 7: continue ironing the back of the shirt. Step 8: iron the front of the shirt. Step 9: iron the buttons & buttonholes. Step 10: iron the sleeves. Step 11: finally, make last touches.
Hi
Thank you for this helpful article.
As a devoted lover of ironing this has confirmed the things that I have been doing right and not so right, and lots of new information on this subject , I am now feeling keen to tackle my next ironing session.
A few notes please, your statement:
‘German-made irons far outshine any Chinese-made competitors’ is actually a fact, someone could challenge you on this?
You suggested to use a pressing cloth, I never though of being able to buy from a shop?
I have been using an old damp shirt instead which has been far form ideal
I am not sure about the photo of a man ironing a used shirt, something I would prefer not do, (there are exceptions) once an item is used I either put it in the wash or put outside in the wind to air it, before ironing this again.
Regards
Roman