READ FIRST: This is an in-depth guide to clothing care (over 5,000 words). It includes a list of tool and supplies, as well as an infographic to help you decode fabric care symbols.
You can download this entire guide in PDF format for free to print or keep on your computer (for offline access). Simply fill out this form:
[convertkit form=4968511]
Use this Table of Contents to jump to a specific section. If you get lost, you can return here to navigate:
Forward (from the Editors)
One of the most common requests I get is to write a post about clothing maintenance.
After all, if you’re trying to build a killer wardrobe, you don’t want to cause premature wear and tear on your shoes or accidentally ruin your favorite shirt.
I always recommend buying the highest quality clothing and accessories that you can afford, but buying quality stuff is just the first step.
You have to care for it properly. If you do, you’ll extend its lifespan and get more for your hard earned money.
This guide will help you take care of your clothes. Enjoy it, and if you have any questions or recommendations, please leave a comment below the post.
Note: I want to thank TMM reader Dan Sheets for drafting this guide. His knowledge and generosity made this in-depth piece possible.
Tools & Supplies
For your convenience, here’s a list of all the tools and supplies recommended throughout the guide:
Introduction
Disposed of your baggy acid wash jeans? Check.
Threw out the faded graphic tees? Check.
Bought some new clothes that compliment your body type? Check.
I know that overhauling your wardrobe isn’t cheap, even for frugal shoppers. So how do you protect your precious investment?
You need to figure out ways to preserve you wardrobe, and I wrote this guide to help you do just that.
Before we really dig into this, here’s my disclaimer:
I don’t have any cosmic secrets of the universe about taking care of your clothes. In fact, many of these tips and suggestions fall into the, “duh, doesn’t everyone knows that” category.
My purpose is to ensure men have a reasonably comprehensive source to establish the foundation of closet care.
I say reasonably comprehensive because there are plenty of things you can do to take care of your clothes that are just simply outside the scope of this article.
For example, we won’t be talking about the negative effects of gamma radiation on dyed wool in low humidity environments…
You get my point.
Also, I should mention that these tips and suggestions aren’t exclusive to modest men, but are applicable to anyone who wants to get the most out of their clothes.
Clothing Care 101
There are a number of general tips that apply to almost everything in your closet. Here’s the “Golden Rule” of clothing maintenance:
Read the fabric care label, and follow the instructions.
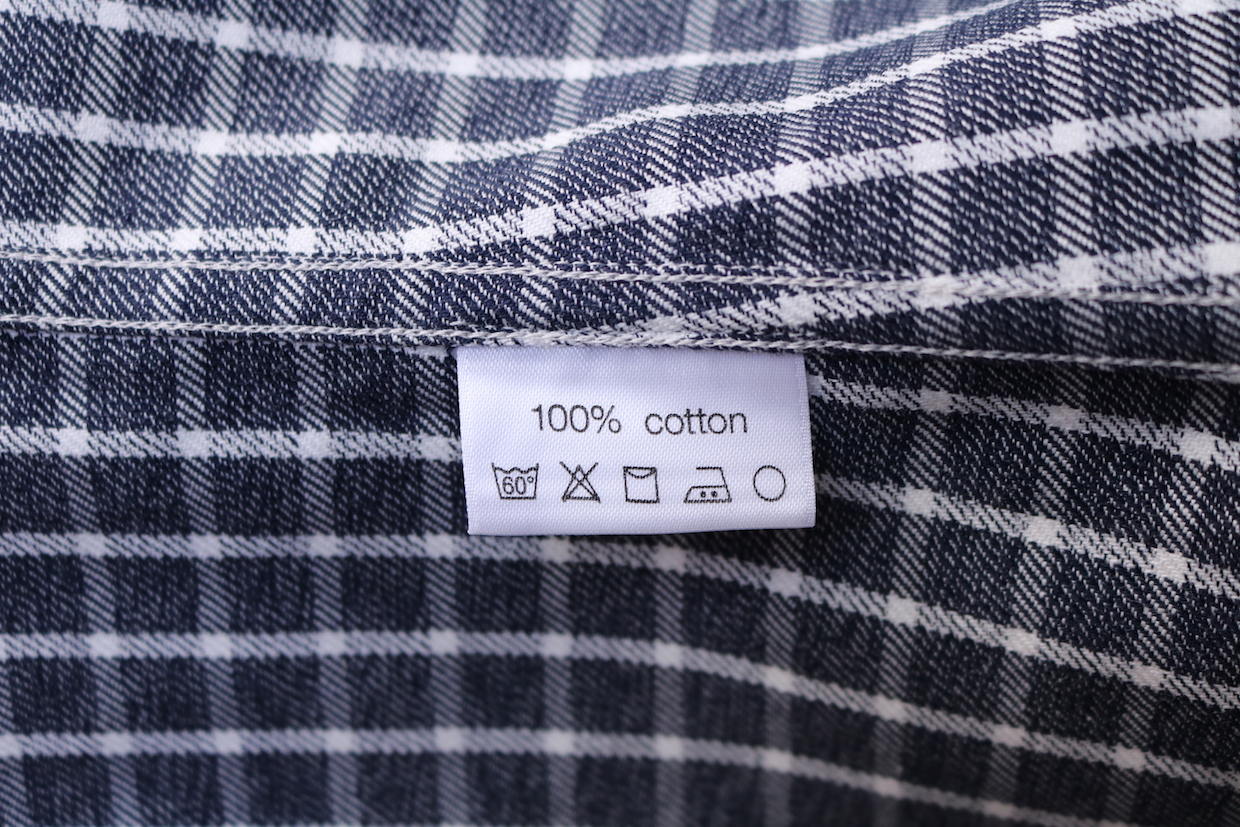
In a world of pure fabrics, blends and synthetics, the issue of how to launder each garment can be a daunting task. Thankfully, just about every article of clothing has a cheat sheet built right into the garment.
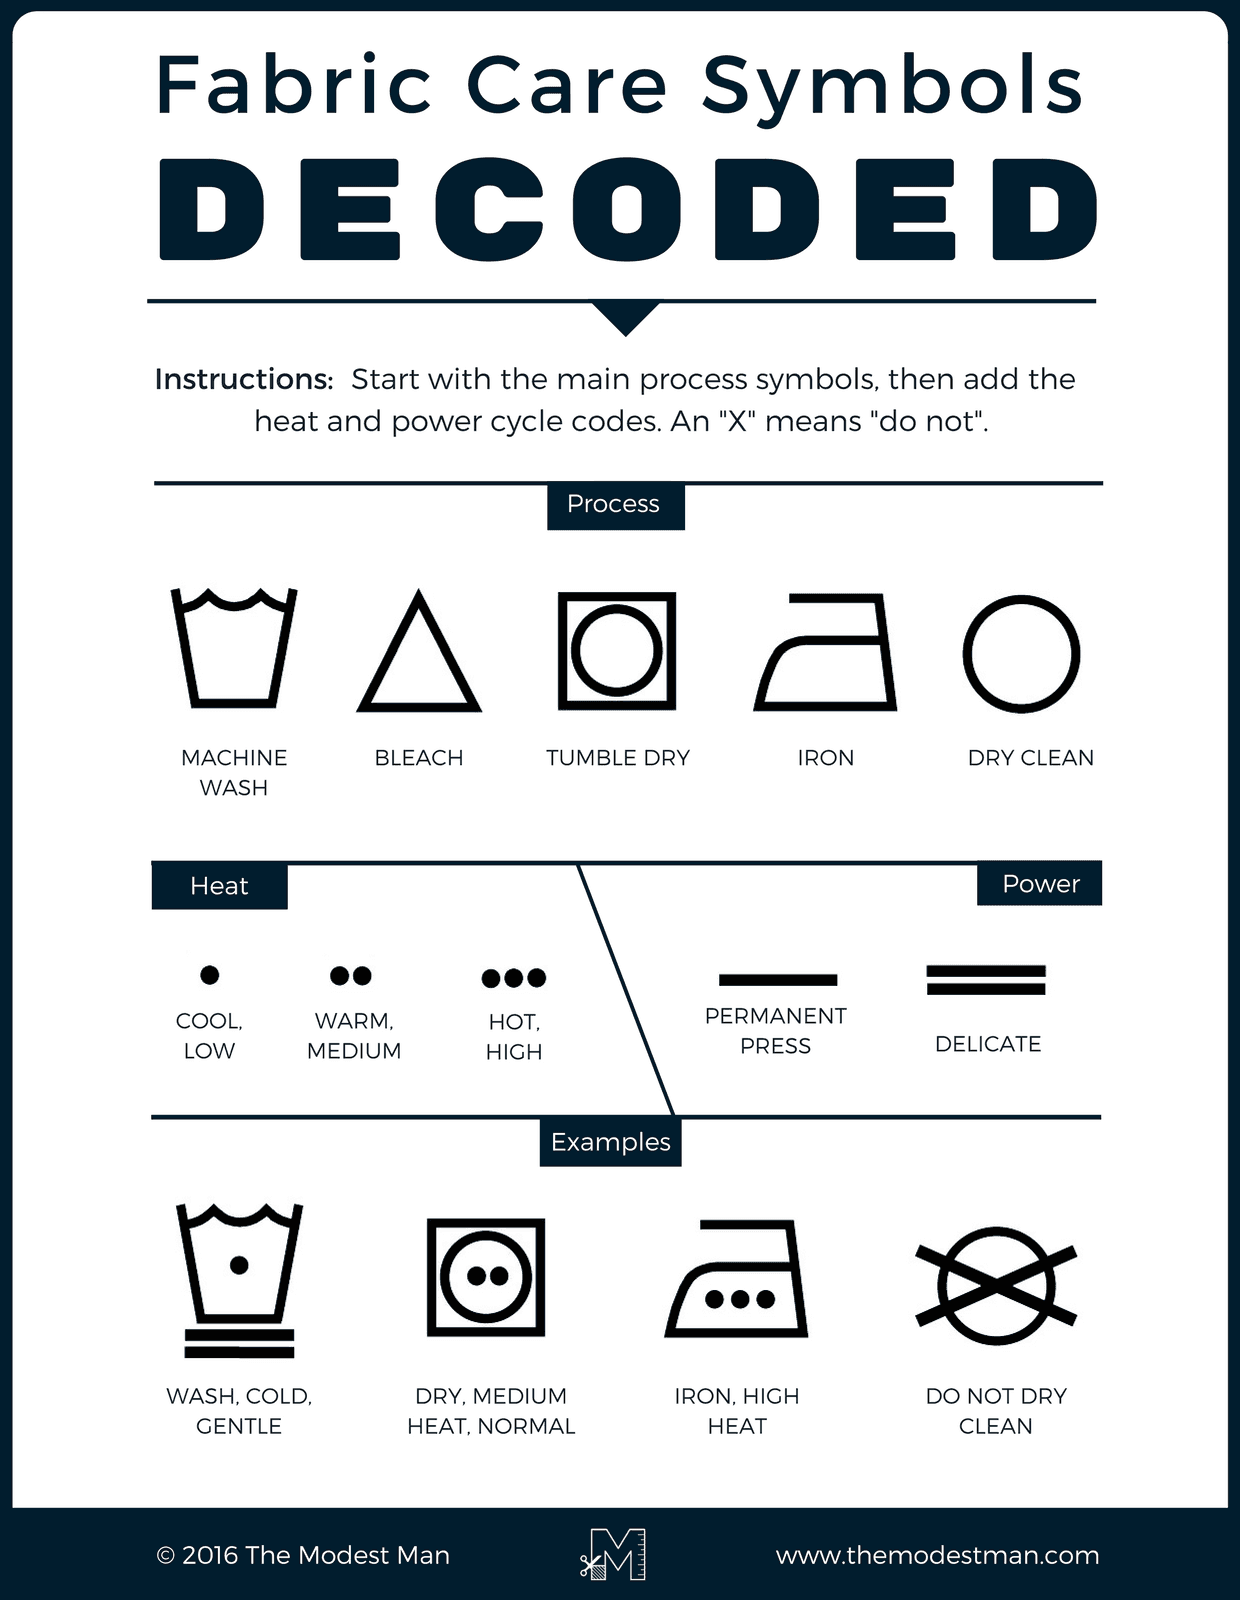
How to Interpret Fabric Care Symbols
Fabric care symbols sort of look like hieroglyphics, but they’re actually very straightforward once you understand the system.
Each symbol is a combination of elements. This graphic explains how the system works:
The location of the care instructions varies, but it’s usually on the tag. If it’s not on the collar tag, check along the inside seams.
I’ve lost hundreds of dollars on clothes through negligent laundering. I’ve turned vibrant medium-sized sweaters into dull, faded XS compression shirts.
If you only take one thing away from this article, it should be this: follow the manufacturer’s instructions in caring for your clothes.
The Skinny on Dry Cleaning
I used to think dry cleaning was the end-all be-all of laundering clothes – and it kind of is – but there are times when dry cleaning is not the appropriate way to clean your clothes.
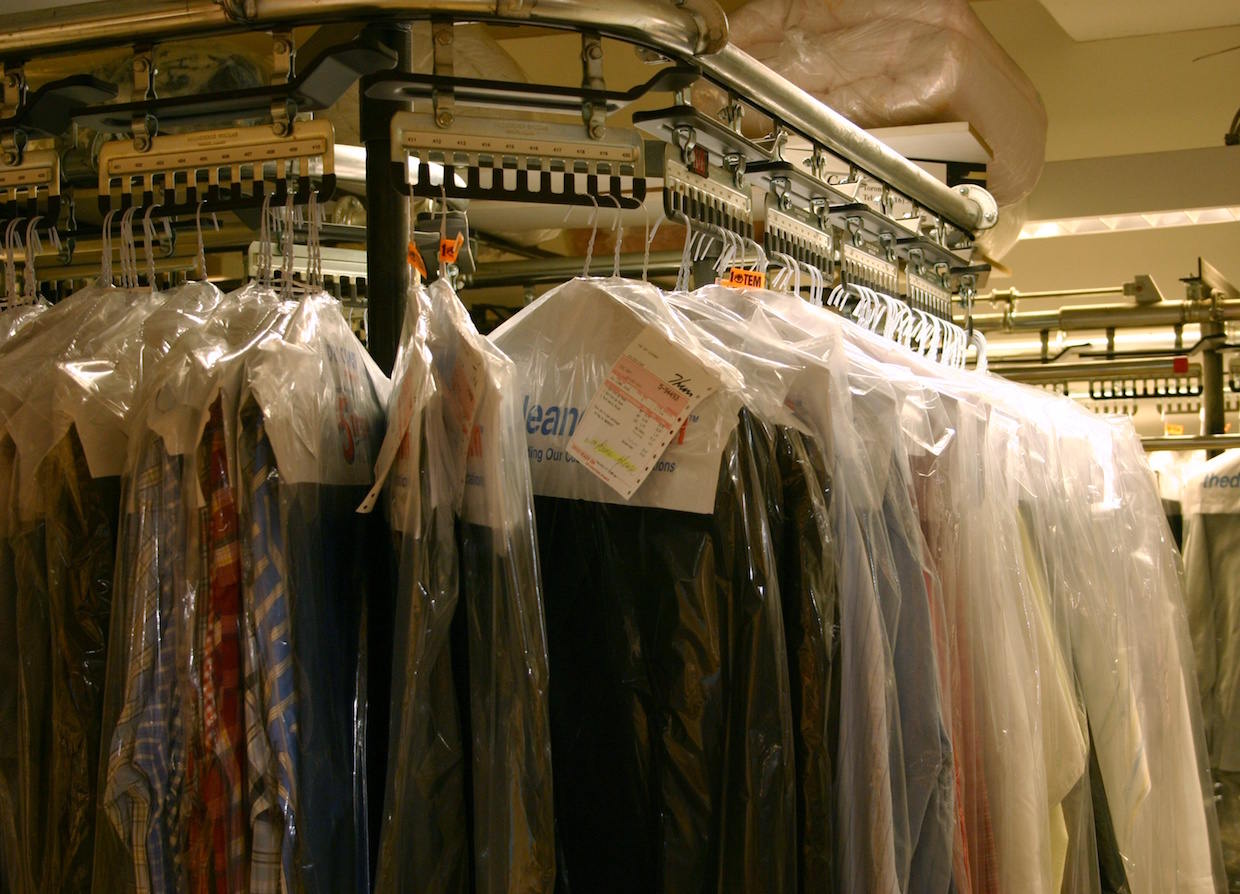 Dry cleaning is also the most expensive method for cleaning your clothes and often comes with the greatest amount of down-time for your favorite article of clothing.
The fear of spending hundreds of dollars a month on dry cleaning was one of the reasons I prolonged my switch to dressing nice.
I figured it was easier and cheaper to stick with the same old clothes that I could toss into the washing machine on any setting than it was to worry about taking my shirts and ties into the dry cleaner.
Had I taken the time and looked at the cleaning instructions on the clothes, I would have noticed that most clothes should be washed at home for a fraction of the cost.
As long as you have access to a washing machine and dryer, you’ll be able to handle most laundry situations that come across your way.
Perchloroethylene vs. Green Earth
Here’s something most men don’t know about dry cleaning: there are two different types of dry cleaners.
 The two primary solvents used in dry cleaning are perchloroethylene (a.k.a., “perc”) and Green Earth, which is a liquid silicone-based cleaner.
I’ve found that most dry cleaners who use Green Earth will advertise this fact. This comes into play because perc will generally remove more stains than Green Earth, but Green Earth is not as harsh on your clothes as perc.
So for your toughest stains, I recommend using a dry cleaner that uses perc, but for more routine dry cleaning, I recommend using a dry cleaner that uses Green Earth.
Do It Right the First Time
The best time to take care of your clothes is immediately after you have finished cleaning them. Whether you use a dryer or hang dry your clothes, hang them up as soon as they are done in the washing machine.
Taking care of your clothes right after cleaning ensures they will be have the greatest amount of time to “rest” in the proper way.
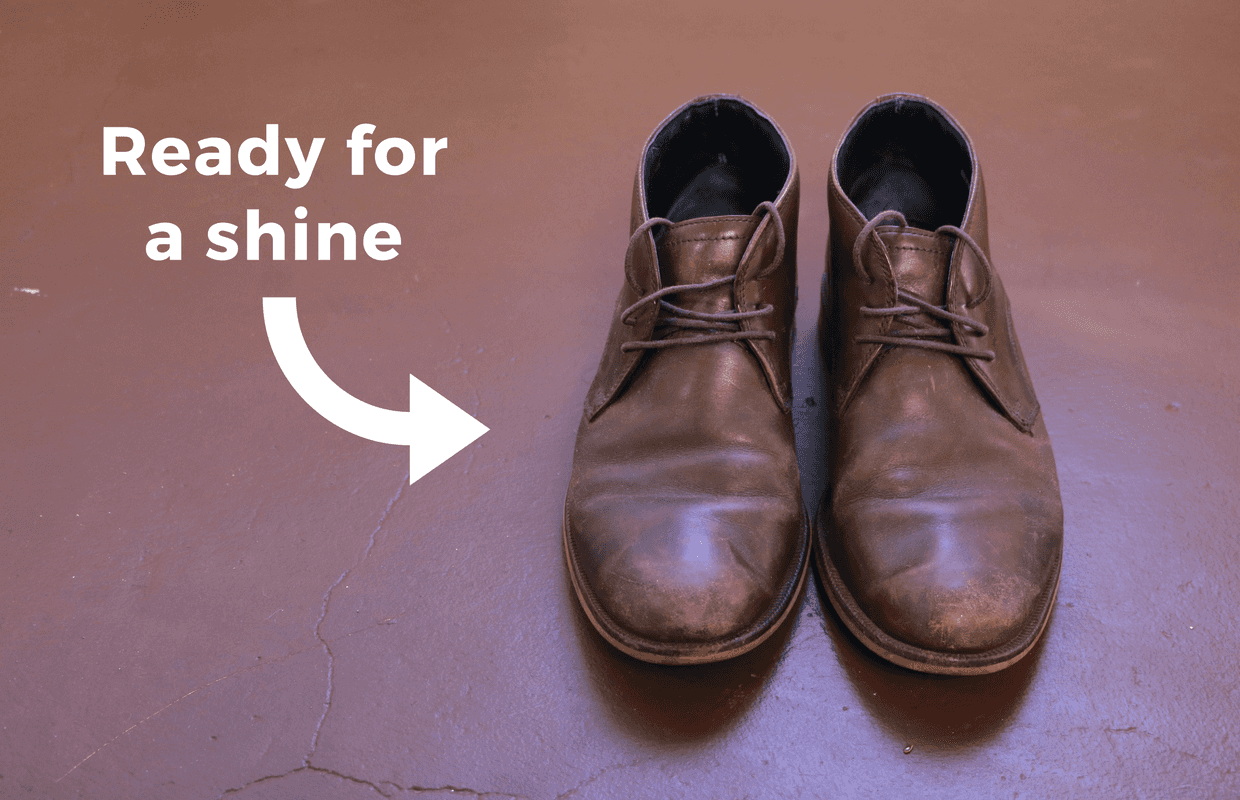
Taking Care of Your Shoes
It starts with putting your shoes on. Shoes can make or break an outfit. They are also often the first thing people will notice about an outfit.
Combine this with the fact that a great pair of shoes can be the most expensive article of clothing on your body, it is important to make sure you keep that pair of brogues or oxfords looking sharp for years. Luckily, there are some things you can do to maintain your shoes.
I was 19 years old and buying my first suit. Along with my suit, I needed a nice pair of shoes to go with it. I was surprised when I told the attendant that I wanted to try on a pair of shoes and he insisted on helping me.
I was pretty confident I knew how to put on a pair of shoes. To my dismay, I was wrong. He gently slid my foot into the shoe by using a shoe horn. I didn’t even know shoe horns were still around!
I grew up jamming my foot into my shoes, wriggling my heel side to side until it finally pushed its way into the shoe. This is a clumsy method that can damage the lip of the heel (the counter) of your shoe over time.
Invest in a shoe horn. It’s the easiest way to extend the lifespan of your shoes on the magnitude of years.
How to Shine Your Shoes
Some of the skills I learned while serving in the military have helped me dress better and take better care of my clothes.
One such skill is shining my shoes. While I no longer spend hours shining my shoes until I can see my own reflection in them, I still make sure to keep the exterior of the shoes nice and uniform with a fresh coat of polish.
I recommend buying a shoe shine kit. This comes with a can of polish (usually black), a fine cloth, and a horsehair brush. You will likely need buy another can of brown polish for your brown shoes.
You don’t have to buy a fancy wooden shoe shine kit (although they’re pretty cool). You can just buy some supplies and store them in a plastic box.
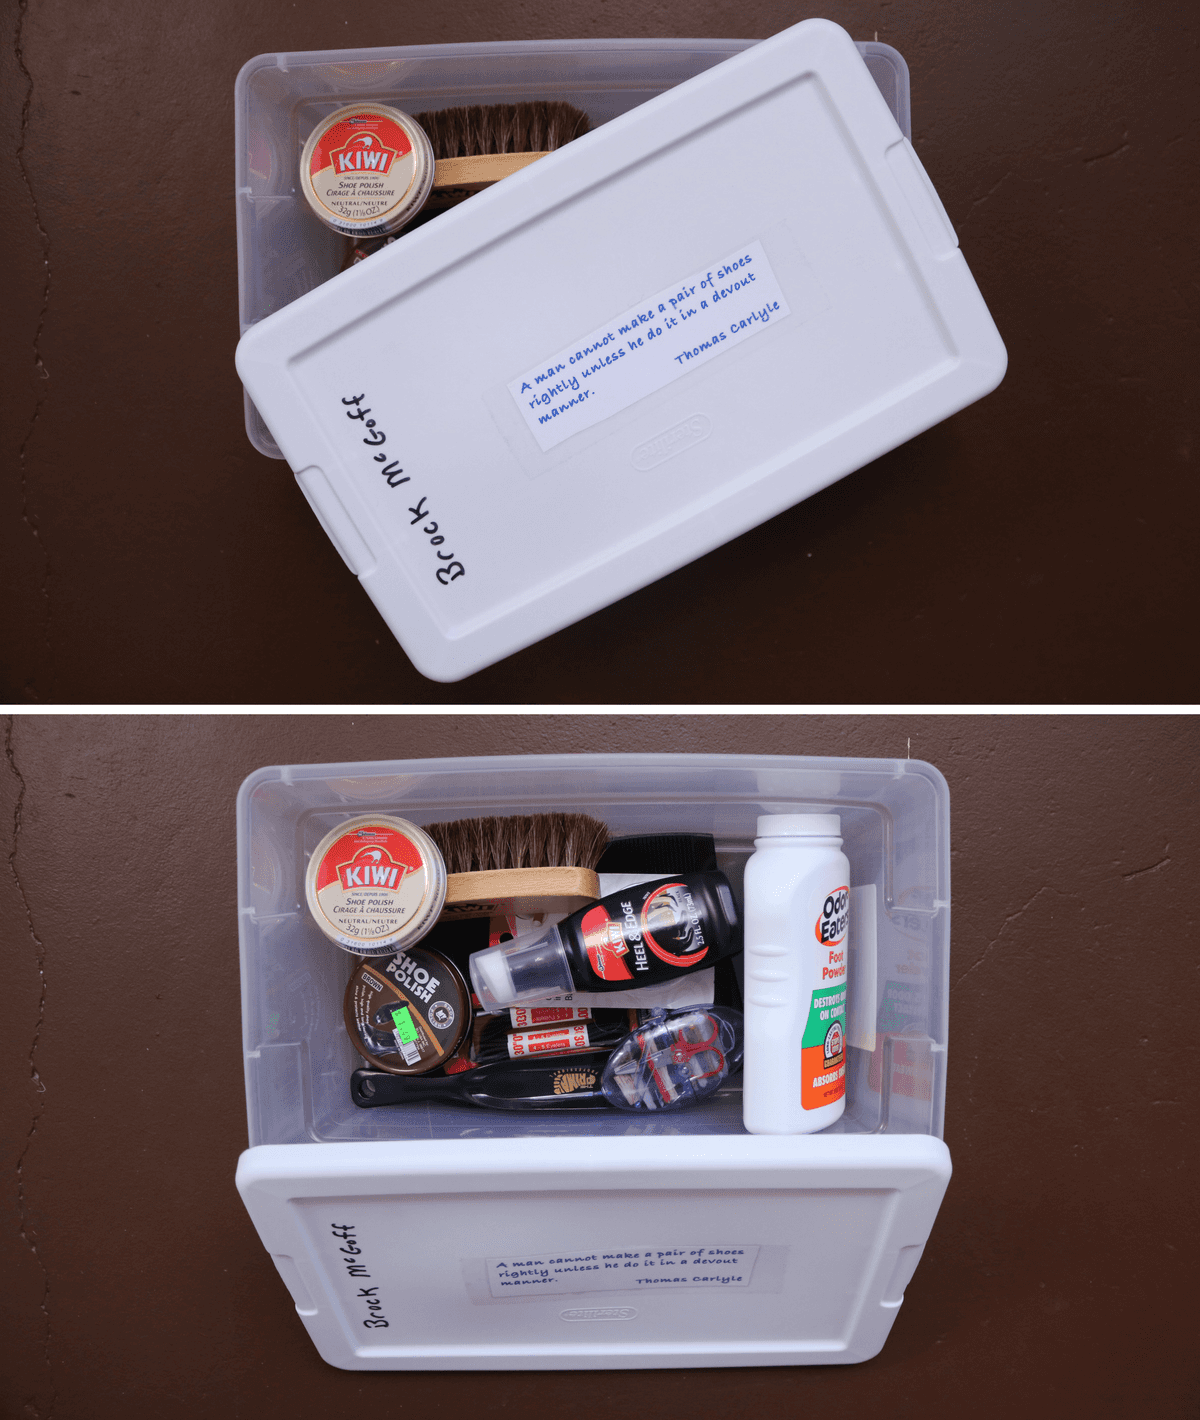
Use the cloth to apply a light coat of polish all around the shoes. Take the horsehair brush and gently stroke all around the shoe. This works the polish onto the shoe, producing a nice sheen.
They won’t become super shiny unless you apply a lot of polish (and elbow grease). But in most cases, you don’t want super glossy shoes.
Once you have a coat of polish on your shoes, the polish is susceptible to scuffing. Believe it or not, pantyhose are a great way to quickly buff out any scuffs.
They’re also compact enough to keep in your briefcase or coat pocket. Just don’t let your friends see them, as it might be tough to explain.
Using Shoe Trees
Let’s face it: our feet stink. And if our feet stink, our shoes probably stink too.
When you get home from a long day at the office, all you want to do is rip off your shoes and throw them in the closet. Do your shoes a favor by taking one extra step before you put your play clothes on.
Buy a few pairs of cedar shoe trees. Don’t skimp on plastic shoe trees. Shoe trees will preserve the shape of the shoe, preventing and slowing down the process of creasing in the leather, especially around the toe box.

The cedar will also absorb any moisture that has built up in the shoe, thus reducing the likelihood of the leather cracking. It will also leave a fresh cedar scent that pairs well with high quality leather.
Using shoe trees from the start won’t just make your shoes last longer, but will help them look better too.
You can pay as little or as much as you’d like for shoe trees. Some higher end brands will even make model-specific trees, which are great if you can afford them.
But you don’t have to spend a ton of cash on shoe trees. Just make sure they’re made from fresh cedar.
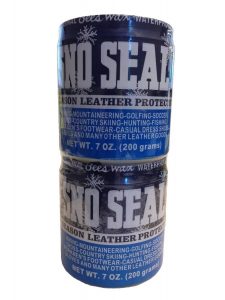
Protecting Your Leather Shoes from Rain & Snow
If you wear leather dress shoes and boots, and you live in an area that gets rain and snow for part of the year, you’re going to want to protect your shoes from water and moisture.
You have three options:
- Wear weatherproof boots (with the option to change shoes when you reach your destination).
- Buy some galoshes.
- Waterproof your leather shoes, as needed.
I like the third option, as it’s more convenient and doesn’t require you to carry an extra pair of shoes or plan ahead.
Waterproofing your leather shoes is easy. You can do it yourself or go to a shoe repair shop. If you do it yourself, just buy some Sno-Seal (or any other non-silicone based weather proofing spray/ointment), and follow the instructions on the bottle.
And remember, if your leather shoes do get wet, it’s not the end of the world. Just make sure to use shoe trees and let them dry out completely before you wear them again.
At the end of the rainy/snowy season, you’ll need to condition and polish your shoes.
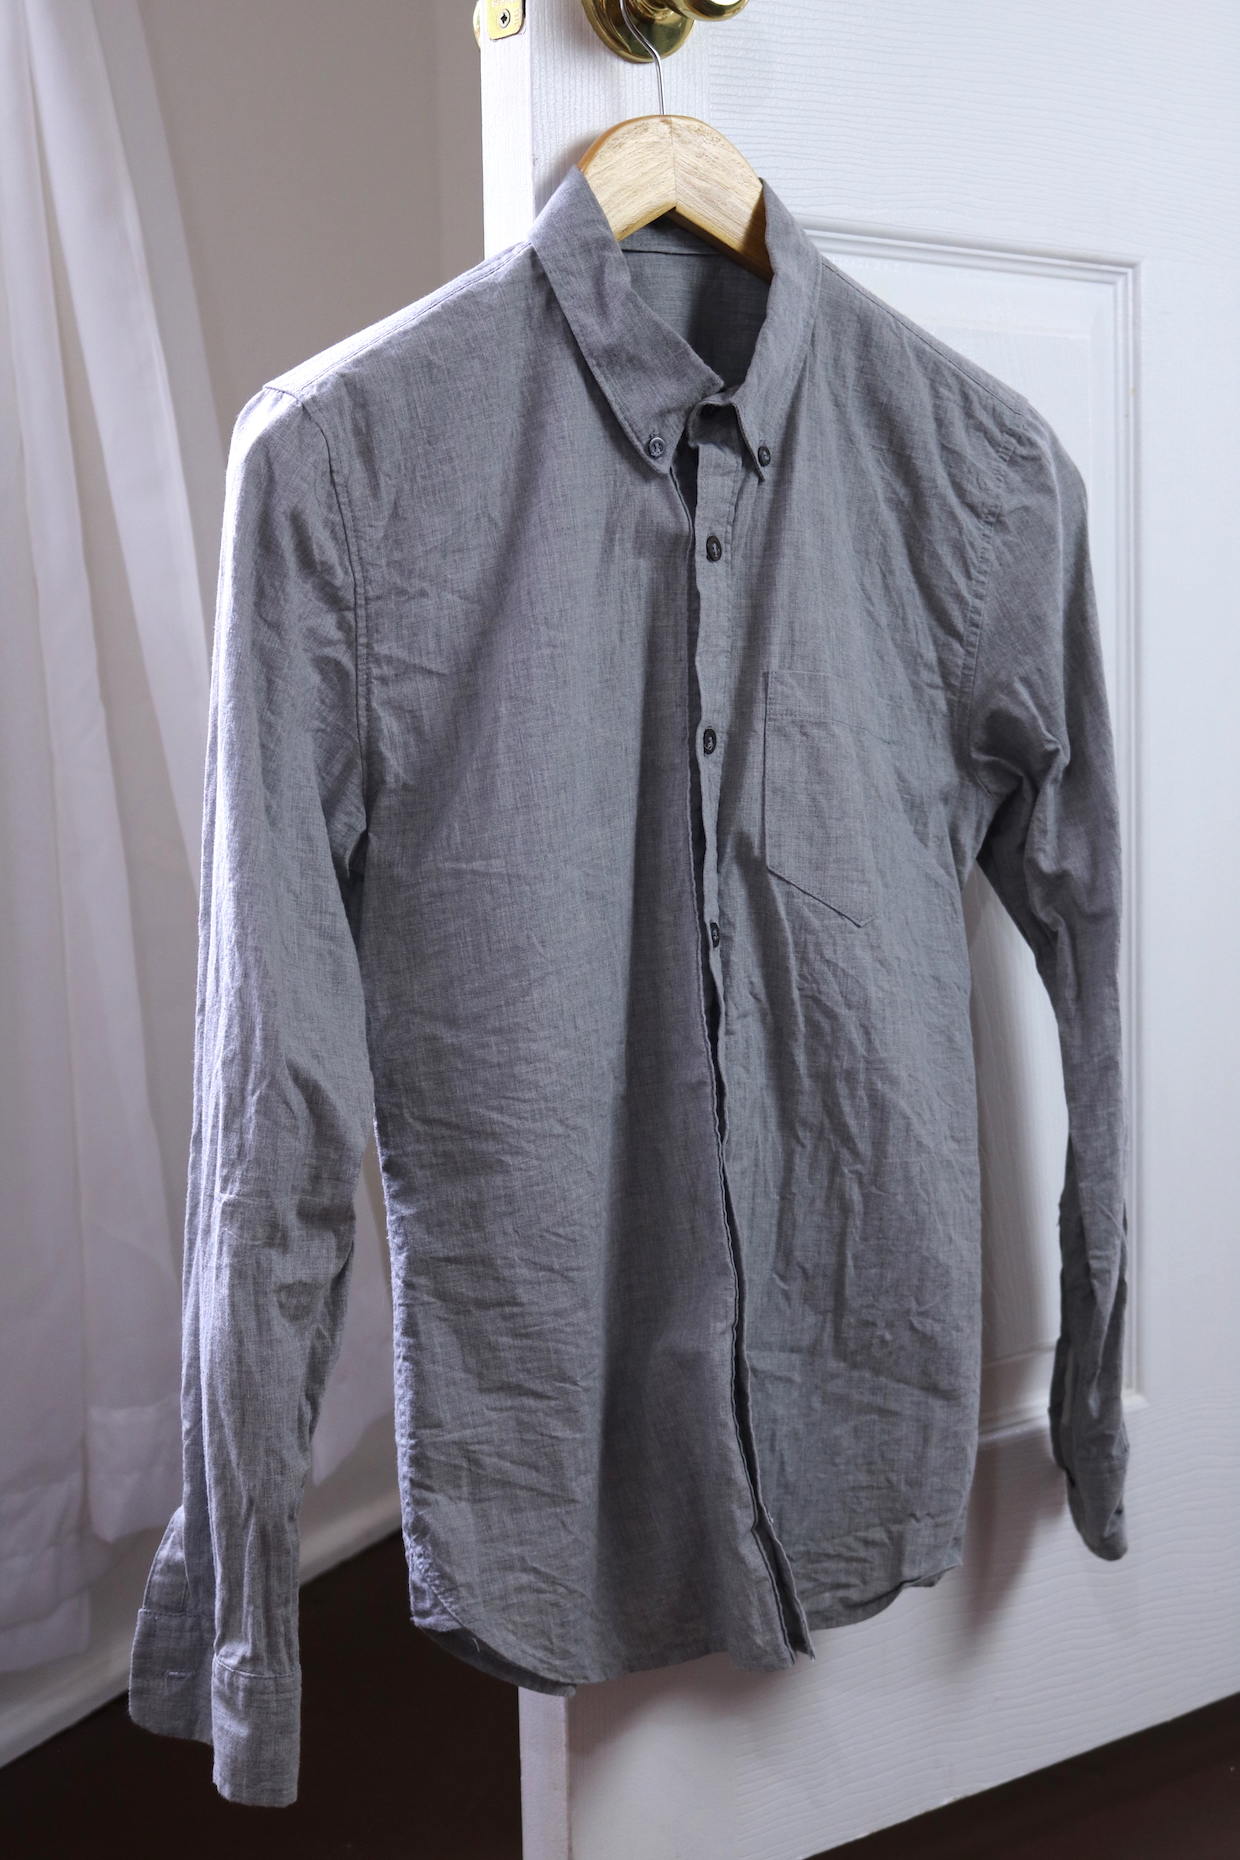
Taking Care of Your Dress Shirts
Dress shirts may not be the most expensive items in your closet, but they get a lot of wear and are highly visible, especially in business casual settings.
People may notice your shoes first, but their eyes will linger longer on your shirts, especially when you’re going sans jacket and/or tie.
How to Prevent and Remove Wrinkles
A crisp, wrinkle-free shirt dress shirt will pull your outfit together without drawing extra attention to itself.
A wrinkly shirt, on the other hand, is the best way to ruin your getup and lose credibility. It will quickly become the center of attention, much like the habitually drunk uncle at Thanksgiving.
There are a few ways to stay wrinkle free. Which method you employ may depend on a number of factors, like manufacturer’s instructions, fabric considerations, preference and convenience.
Simply throwing your clothes in a hot dryer for 15 minutes may work out most wrinkles, but this usually isn’t the best way to take care of your clothes. Instead, invest in an iron and ironing board.
In college I had a collapsible tabletop ironing board that was half the length of a normal ironing board and only stood about three inches off of the ground. It was great for dorm life and could be an option in other space-constrained environments.
Most irons have settings based on the fabric you want to press. In the case of uncertain blends, I err on the side of lower heat and go up from there. I also recommend filling up the iron with water so you can use steam and spray to help work out the stubborn wrinkles.
If you need a stiff press, you can use some starch while ironing. This was a common practice when ironing my military uniforms. How much starch and what kind of starch comes down to preference, but most men don’t need any starch at all.
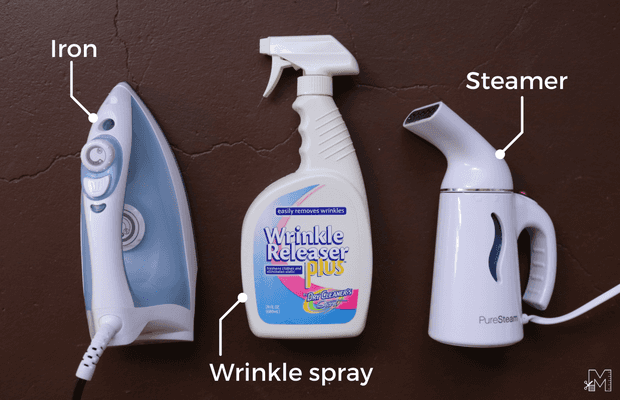
Steaming clothes is an increasingly popular option. It’s a gentle way to get rid of wrinkles, and it doesn’t create creases.
Steamers let heat, a little bit of water and gravity to do most of the work. The only downside is having to own an entirely separate piece of equipment.
Another option is to get your clothes pressed at the dry cleaner. Just be sure to let them know how you like your clothes. My uniforms were always heavy starch (as crisp as possible), but that’s on the extreme end of the spectrum.
Another great option is the iron-in-a-bottle method (i.e., wrinkle releasing spray). You can spray this product on the clothes and gently smooth the wrinkles out with your hands.
Wrinkle releaser also works as a fabric refresher since it usually has a fresh scent built in. I wouldn’t use this product on something as nice as a dress shirt unless I had to, but it’s a good way to freshen up a few tee shirts in a matter of seconds.
Hanging Up Your Shirts
 Just because you sprung for the “no ironing required wrinkle-free” dress shirts doesn’t mean you can leave them wadded up in a ball in the corner of your closet until you need to wear them.
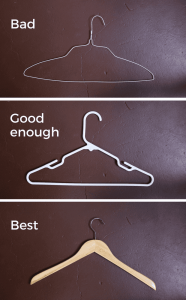
Hanging up your shirts properly preserves the collars and extends the life of the shirts. I recommend using wood hangers whenever hanging up your shirts; however, thicker plastic hangers can do the trick as well.
When you hang your button-up and polo shirts, always button the top button to prevent the collar from sagging.
Speaking of which, if your shirts have removable collar stays, be sure to remove them prior to washing, then put them back immediately after ironing.
If the collar stays are sewn in, don’t worry about it.
Preserving Your Pants
Many of the same suggestions that work on your dress shirts will also work on your dress pants. For the sake of brevity, I’ll just review the pants-specific tips.
As long as you don’t violate the fabric care instructions, ironing and dry cleaning are your best bets for getting rid of trouser wrinkles.
 You can also hang your pants in the bathroom while taking a hot shower, thus allowing the steam to help smooth out some of the wrinkles.
Preventing wrinkles in the first place will save you a lot of time in the end. It should go without saying, but hang up your pants immediately after ironing or laundering.
There are numerous methods for hanging dress pants, so it sort of comes down to personal preference.
If you’re like me, you have a hodgepodge of different types of hangers in your closet. Unless you are willing to standardize your assortment of hangers, you may need to resort to using a few methods of hanging your pants.
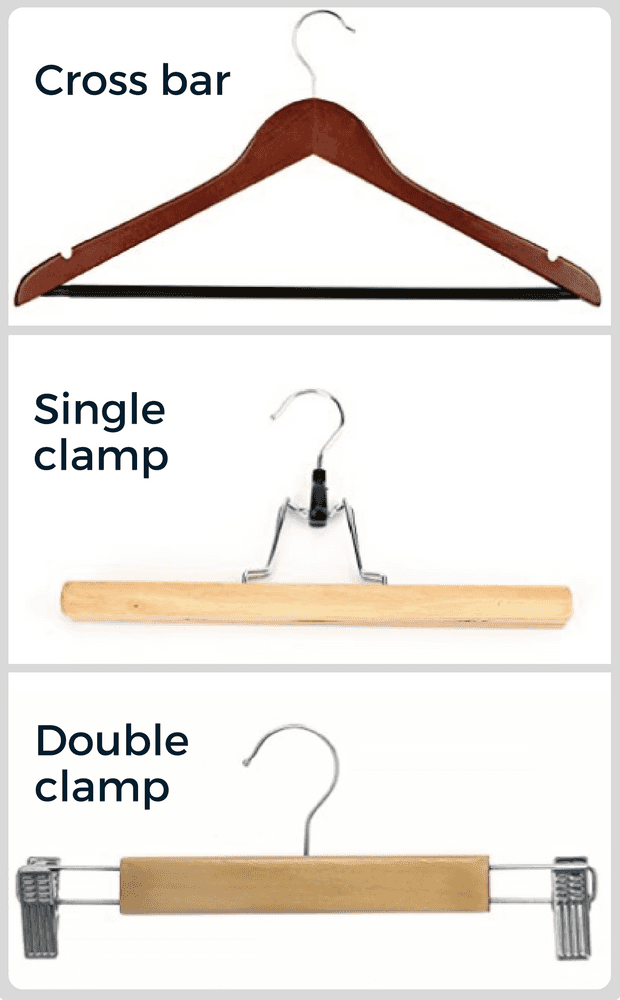
Never hang pants on wire hangers unless the hanger has a reinforced cross bar. If you’re stuck with regular hangers, line up your pants along the crease on each leg and drape them over the crossbar of the hanger.
Try to keep the creases even throughout the pant. And remember, unless the cross bar has some sort of anti-slip coating, your pants will likely slide off (eventually).
A better method is to use single clamp hangers (also called skirt hangers) and hang your pants by their waistband or the cuffs. Double clamp hangers are best used for hanging pants by the waistband.
Of course, these clamp hangers only work if you have a full closet that allows the full length of the pants to hang.
If you’re up to the task, you can try your hand at the Savile Row method:
It works with regular hangers and shorter closets. Plus it stops your pants from sliding off the hanger.
The only downside to this method is that it takes a little more time to execute.
Getting Rid of Lint
Lint, pet hair, dust and dandruff will get on your clothes, but they don’t have to ruin your style. Just buy a good lint brush to remove these particulars from your pants.
I don’t recommend buying a lint roller. I do not think they do as good of a job and you have to keep buying news ones when the tape runs out.
A good lint brush will cost less than $10 and last forever.
These brushes require cleaning, but it’s very simple. Just use your finger to stroke the brush with the grain of the bristles, then pull the collected debris off the end.
How to Take Care of Your Jeans
There’s enough information, hype and myths about caring for denim to fill a book. I simply can’t cover it all. So let me keep the conversation about your beloved denim jeans general.
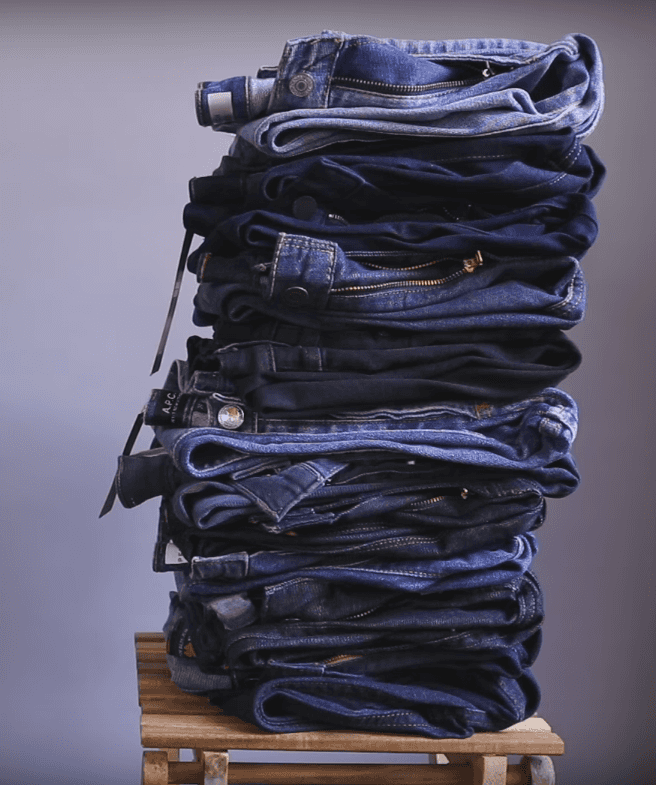 Most denim heads agree that you should wash your jeans as seldom as possible. Many will tell you to never wash them.
I’m not that extreme. When they begin to stink, I wash them. When they get an unsightly stain, I wash them. But it’s not uncommon to go 4-6 months in between washes.
When you do wash them, wash them inside out in cold water with a small amount of a mild detergent, then hang dry.
To quickly address some of the myths, I have never put my pants in the freezer or dunked them in salt water. I’ve never tried the vinegar soak, although there may be some merit to that one.
Hanging up your jeans, rather than folding them, will help air them out, thus reducing odor and giving you more time in between washes.
Maintaining Your Suits & Jackets
Whether you own five suits or one navy blazer, taking the upmost care of your jackets is crucial to preserving your wardrobe investment.
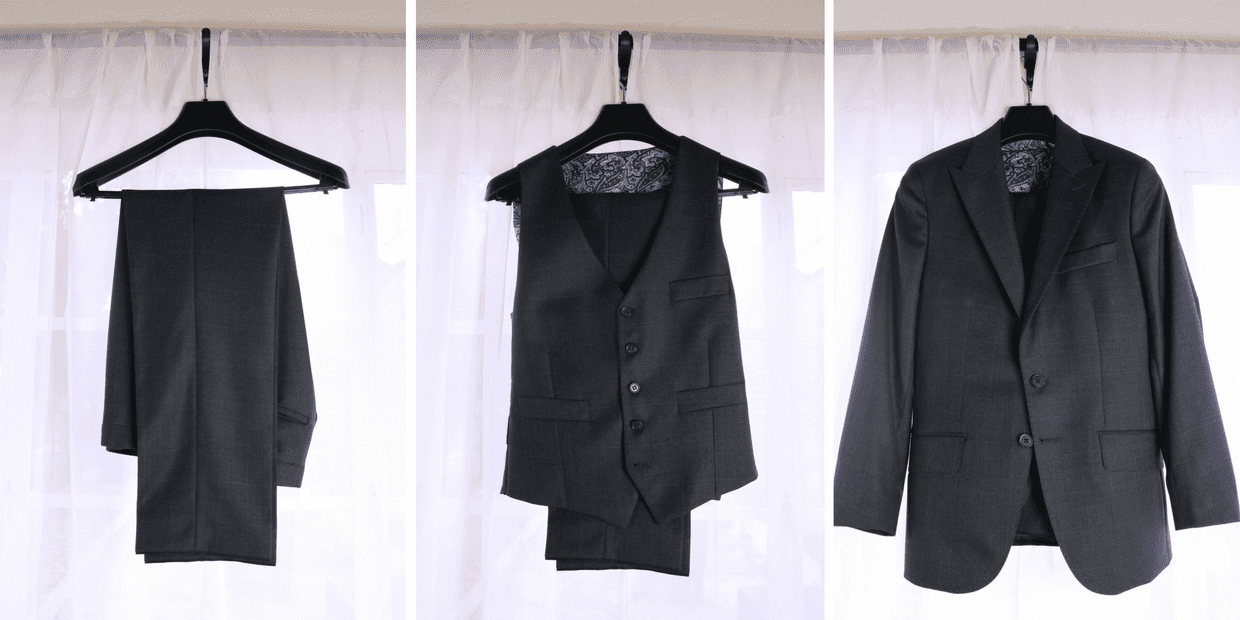
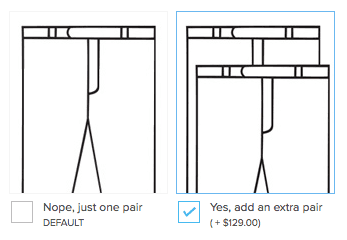
If you can spring for it, always buy a two-pant suit. Your pants will wear out much faster than your jacket. Rotating your pants will ensure you can spread the wear over two pairs and extend the life of your suit.
If you often wear dress pants with no jacket, I highly recommend not using your suit pants for these outfits (as tempting as it is).
Wearing your suit pants more often than you wear your jacket will create uneven wear and tear on the pants, possibly creating a discontinuity between your top and bottom.
Remember that awesome lint brush you use on your pants? Use that over your entire suit, especially on the shoulders (where dust and dandruff tends to accumulate).
Don’t forget to give your suit a quick once-over with your lint brush prior to heading off to work or the night on the town, especially if it’s a dark color.
For cleaning, I always dry clean my suits. Period.
Taking Care of Accessories
Your accessories are a great way to let your personality shine through an otherwise simple getup, so it’s important to take care of them properly.
Socks, Ties and Pocket Squares
Perhaps more than my ties, I love my socks. I thoroughly enjoy kicking one leg over the other and letting my socks show.
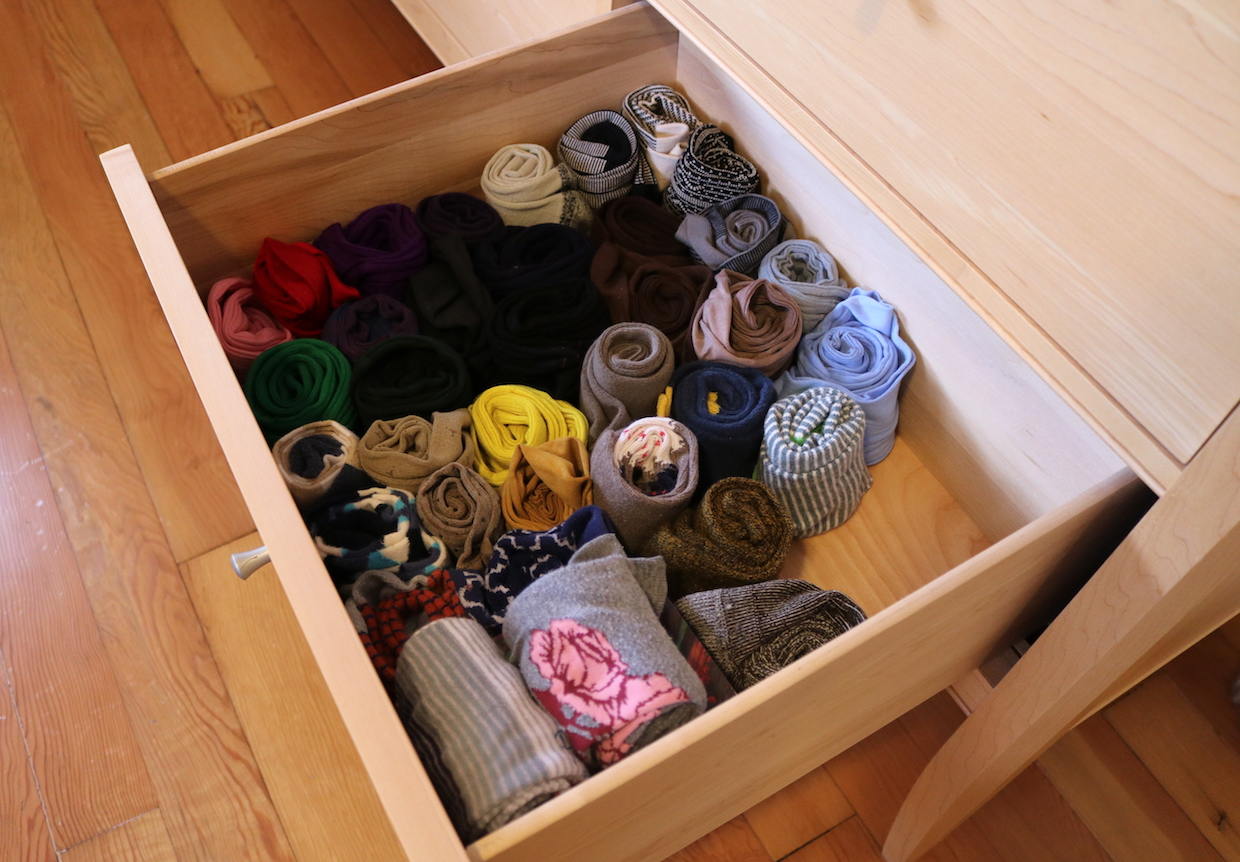
With how much attention your shoes can draw, you want to make sure you are not showing off ragged, faded and hole-filled socks.
Thankfully, properly caring for socks is pretty easy. Like every other garment, just follow the manufacturer’s instructions.
One thing to note: when you are folding them up, be careful not to put too much stress on the elastic. It will wear down as time goes on, and you don’t want to speed this up unnecessarily.
One way to avoid this is to roll your socks instead of folding them over each other. Rolling your socks has the added benefits of saving precious drawer space and keeping things organized.
How to Take Care of Neckties
Your neckties, especially the silk ones, require sensitive treatment. Luckily, it’s pretty simple.
First off, be intentional about removing your ties. Whether you are rocking a four-in-hand or a full Windsor, try to untie it in the reverse order of how you tied it. Simply pulling the knot apart can stretch out your tie over time.
 To store your ties, invest in a tie rack hangar. It won’t take up room in your closet and is a nice way to keep your ties organized. You can get the kind that hangs from the rod or mounts on the door or wall.
Many good tie rack hangers also have a few hooks for belts, which is a nice little bonus.
As for cleaning your ties, you only need to do this if they get some sort of stain. First try spot cleaning with cold water. If that doesn’t work, take it to the dry cleaner.
One final note on tie care – and this is my personal opinion – I am diametrically opposed to using tie pins. You just spent good money on a nice necktie, and now you want to poke a hole right in the middle of it?
That seems strange to me. It kills me to see a once-nice tie ruined in such a manner. For that reason, I recommend staying away from tie pins.
How to Store Pocket Squares
I am a huge fan of pocket squares. They add contrast and depth to a jacket without increasing the overall formality of an outfit.
Since these are generally made of silk, cleaning them will be similar to cleaning your ties. But really, they should rarely get dirty. After all, you’re not actually using them to blow your nose.
…right?
To store pocket squares, take one of your old wire hangars and clip a few old-fashioned clothespins along the bottom.
This allows you to clip up a few pocket squares without being overly abrasive on the silk. It also keeps them organized in your closet.
Caring for Leather Goods
Taking extra care of your leather wallets, watchbands, briefcases and belts is, well, a bit extra. But leather accessories can be pricey, so why not make them last?
Nice leather products will last you years without much maintenance. But in the end, leather is an animal byproduct and is subject to deterioration just like anything organic material.
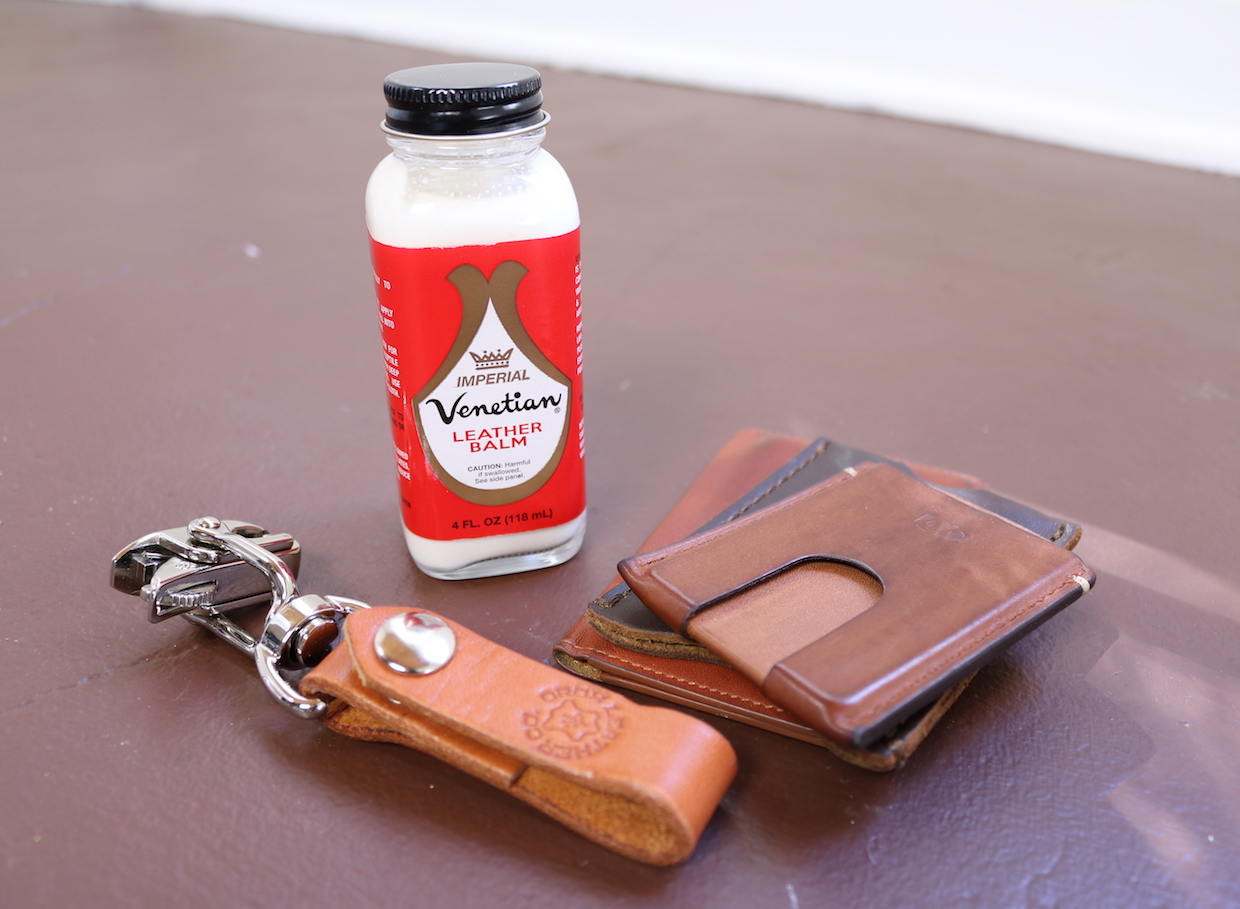
Want to keep that slim wallet or go-to belt in peak condition? You can spot clean using cold water. Tough stains will often respond to a little rubbing alcohol.
That said, preventative care is best for longevity. I recommend getting some leather conditioner to use with a micro-fiber cloth on your leather products.
But remember: a little wear and tear on your leather products gives them a “lived in” feel that can only be achieved with time and regular use. So don’t be afraid of some natural imperfections and a few battle scars.
To store leather belts, I recommend buying a belt rack hanger. It’s like a tie rack for belts, and it makes it easy to store eight or more belts in an organized fashion.
Metal Accessories and Jewelry
Most of us will never have to polish brass buttons (like I did in my military days), but things like cuff links, rings and watches may need some attention.
Metal dive watches, for example, can get particularly grimy after years of wear.
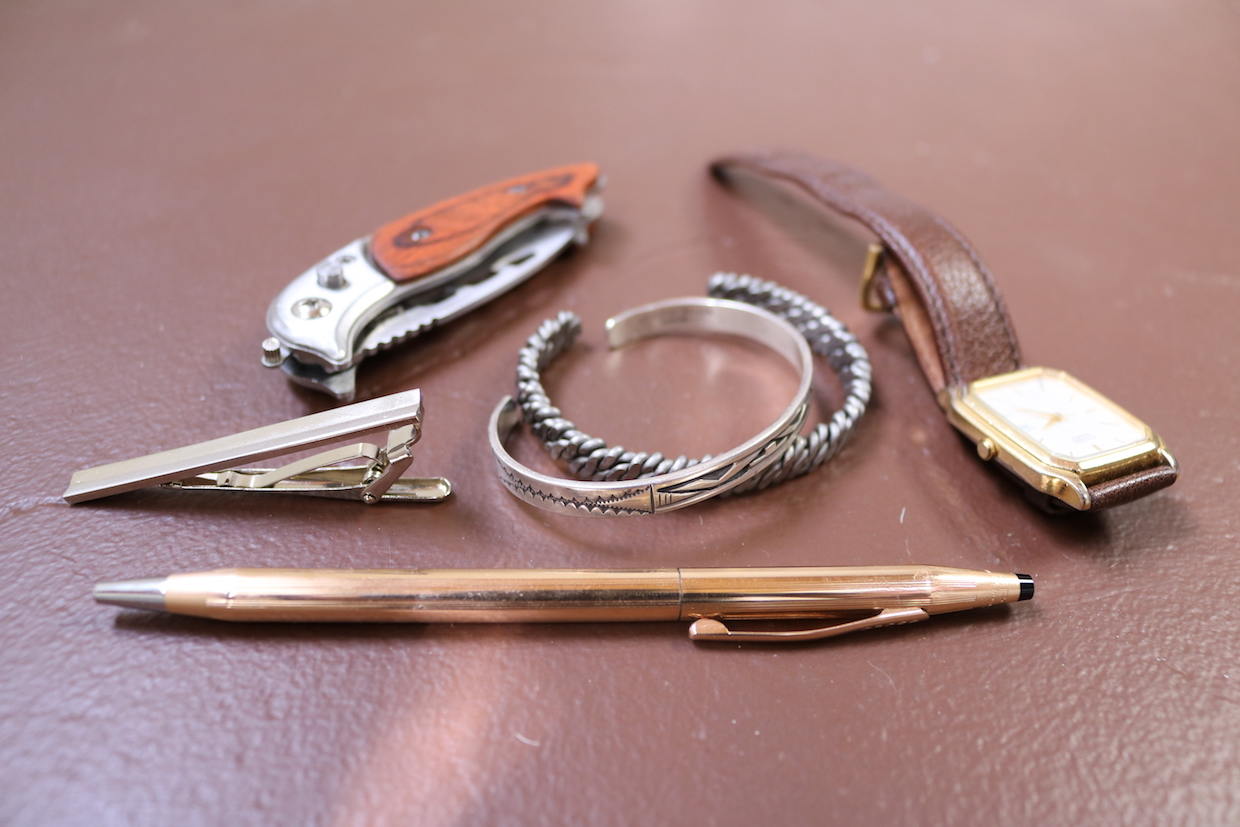
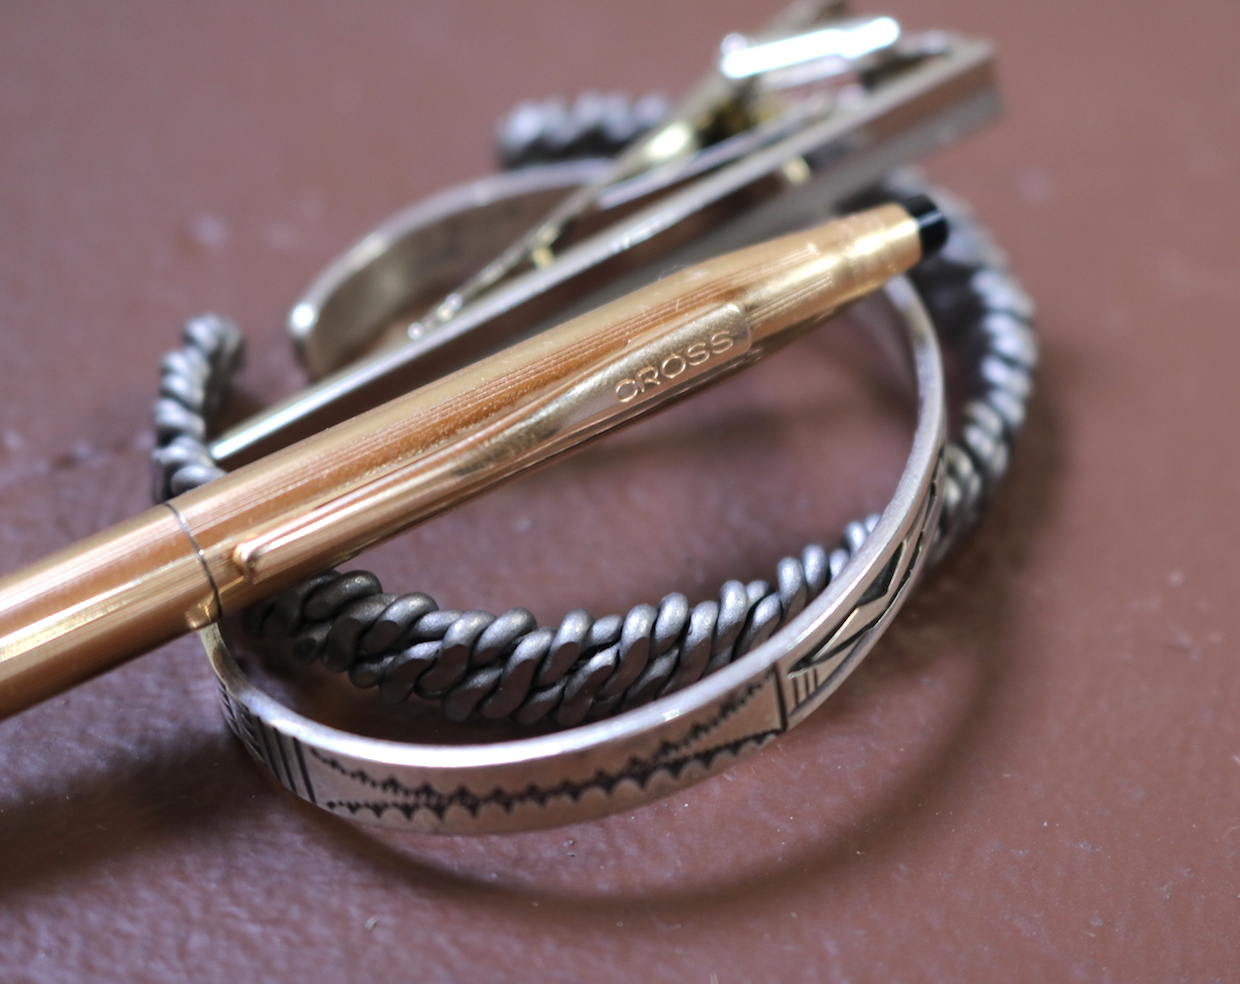
Dust, dirt, sweat, and who knows what else can accumulate in between the links of your watch and may require occasional cleaning.
Use jewelry cleaner and polishing cloth to keep your metal accessories and jewelry in mint condition for as long as possible.
It doesn’t require much effort, so a little goes a long way.
Hazards In the Men’s Room
You probably didn’t this guide would follow you into the bathroom, but alas, here we are.
There are little things you can do to help take care of your clothes while taking care of your business. So let’s fall jump right in!
 We’ll go in numerical order here. When you’re going number one in a urinal, you want to avoid the ever pesky backsplash. It’s unsanitary, and urine spots on your pants and shoes are rather unsightly (not to mention smelly).
To avoid the dreaded backsplash, aim for the curved corner of the urinal, right where the back meets the side.
Let’s move on to number two. Before you drop your trousers, it’s a good idea to check the ground immediately surrounding the toilet for urine, water and who knows what else.
If the ground is dirty, make sure your pants and belt sit on top of your shoes, rather than touching the floor.
Also, most stalls will have a place to hang up a coat or jacket. Take advantage of these hooks before settling in.
Lastly, if you’re wearing a dress shirt, it never hurts to roll up your sleeves prior to filing your paperwork. While the chances of unintentional contact between your clothes and other gross stuff is slim, why risk it?
Going to the bathroom should not have a lasting effect on the quality of your clothes. Be mindful of the aforementioned tips to help keep your clothes as clean as possible.
For the Traveling Man
If you prepare properly, traveling doesn’t have to take a toll on you clothes. The first step is to get yourself a decent garment bag.
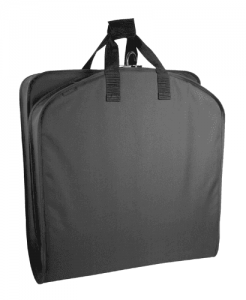
There are a number of different bags available, and it may come down to preference, but many will be able to handle a good amount of jackets, shirts, and pants.
I prefer the kind that fold in half. I feel my clothes are protected, but I do not have to carry around a travel dresser.
Whenever I travel I always pack a small bottle of wrinkle releaser. You never know when your flight will be delayed, hit bad travel from the airport, or just be in a general rush.
The last thing you want is you have to change into a wadded up dress shirt from your suitcase in the airport bathroom on the way to an important meeting that you are running late for. Some wrinkle releaser could help pay dividends when trying to freshen up an outfit on the fly. Be careful it does not break in your suitcase or garment bag.
To keep shoes scuff free while traveling in a suitcase, you can wrap them in a fabric bag. Those cotton bags you get from a brand new laptop purchase actually work pretty well in this capacity. You want to avoid excess friction from your belt buckle or any other hard things you have packed in the suitcase along with your shoes.
Wrapping It Up
Remember, you paid good money to look your best. And now that you have done that, it does not take too much more effort in order to keep your clothes looking their best too.
In many cases, taking care of your clothes only requires small changes in behavior. The money you save by properly taking care of your clothes could be used to expand your sleek wardrobe or anything else for that matter.
Lastly, remember that it isn’t always about making your clothes last longer either. Some articles just have an almost predetermined shelf life.
Taking good care of your clothes is just as much about making them look “as if new” for as long as possible, even if their overall shelf life isn’t affected.
With that: stay sharp, stay classy. See you out there!


Hi Brock, thank you for this interesting article. I am just curious for i am contemplating to purchase an oxford in walnut, I would like to ask how would you wear your walnut PA oxford casually? Do you have a video about this?
oh my goodness – what an amazing article!
Great article Brock! You clearly spent a significant amount of time preparing and writing. Thank you for the advice.
I use Saphir Renovateur on my leather desert boots and I can say it is a great product. Expensive, but one jar can last you a long time so I say it is worth it. It can darken leather but less than other products. I wait until my shoes are no longer presentable, then I hit them with Saphir and it extends the life another year.
As for other leather products, I don’t condition them much. This is especially true for my leather jackets, even my naked cowhide jackets. They don’t need it. Bags and wallets, never since I like the worn in look.