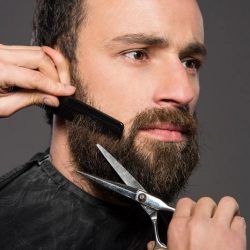
Ever wanted to save yourself a trip to the barber by using clippers to cut your own hair at home? We’ll show you how.

Even a slightly disheveled pile of hair can ruin an otherwise immaculate impression. I’ve seen a lot of men who look dapper…until you notice something’s a bit off with their hairstyle.
It could be an overgrown neckline that has lost its trimmed neatness.
A fade haircut where the sides have gotten way too thick to achieve the layered effect properly.
Or just your standard easy cut that’s turned into a jungle of messy locks before you even realized.
The truth is, haircuts definitely have a strict “expiration date.” For a long time, I was a regular offender by not sticking to it and failing to revitalize my undercut.
Sometimes I was just lazy. On other occasions the financial side of things was to blame. It can be expensive if you want to keep your hair in check frequently!
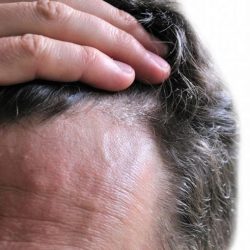
Unfortunately, soon after I started caring more about my hairstyle routine, I experienced rapid hair loss. Over a period of only 4 months, a severe diffuse thinning robbed me of the wavy hair I had had over the past 23 years.
After a few weeks of torture and hating myself, I decided I’d had enough. I bought a pair of clippers and shaved it all off to a #2.
I could’ve gone to a barber, yes, but I wanted to do it by myself. It felt like a rite of passage to mark a rather shocking stage in my life.
Following that, I became increasingly interested in DIY haircuts and haircutting tools. I’ve cut my friends’ hair, consulted aspiring barbers in their choice of tools and experimented with clippers by disassembling them and customizing them.
As I like to say – what started as a coping mechanism has turned into a passion.
You can easily become your own hairstylist. No, I’m not only talking about simple buzzcuts. I’ve seen a lot of people shaping very neat fades or undercuts with a little bit of practice.
Going the DIY haircut way is very satisfying. You’re in full control of your looks, you learn a cool new skill and you save quite a bit of money in the process. There’s literally nothing not to like… except maybe the 5-10 minutes of post-haircut cleanup.
Let’s take a look at a few basics of trying out a home haircut.
The Proper Tools
Your cuts will look like crap if you don’t do a little bit of due diligence. It won’t even matter if you have a natural talent for DIY haircutting.
I’ve seen a lot of people complaining about clippers “chewing” on their hair without cutting properly, breaking down in no time, blades rusting, etc.
Guess what? 90% of the time they were shooting for cheap clippers off the shelves in Walmart for $15.
This is quite similar to me getting a pair of $10 headphones and wondering why the sound sucks and why they broke after a month or two.
Don’t make the same mistake. Quality clippers don’t need to be very expensive, but you do tend to get what you pay for. Here are a few tips:
Hair Clipper Brands
The big three are Wahl, Andis and Oster, with a thumbs up for Remington too. I know some people like Conair, but I haven’t had good experiences with their clippers.
Price Range
$35 to $60 is a good price tag for clippers that are suited for home users.
Everything below that might lack performance, everything above that is a premium that you don’t necessarily need. A lot of barbers actually use mid-range clippers like Oster Fast Feeds or Wahl Magic Clips.
Going above $90 means you’re getting professional tools that you’ll see in higher end barbershops.
Accessories & Extras
Some models come packed with lots of additional things – from scissors, to capes and luxury storage boxes. You may or may not need these.
What you definitely need are clipper guards, as many of them as possible. They define how versatile you are in your DIY hairstyling.
Size & Weight
A typical clipper weighs around 1 lbs and is 6″ or so in size. Models above that usually have metal in their construction.
They will heat up and tire your hands more.
Lightweight clippers are usually cordless, but be careful – you might be trading performance for their convenience.
Adjustable vs. Detachable Blade Clippers
Your typical home clippers are the adjustable blade type. Their symbolic feature is a side lever that looks like this:
This little guy gives you valuable control over the length of your cuts. Pulling the lever in a “closed” position will cut your hair shorter. Leaving it “open” will allow for longer cutting lengths.
Basically, you get a simple, convenient way to further control how much hair you cut, aside from clipper combs. You can layer your hair mid-cut with a quick flick of the lever.
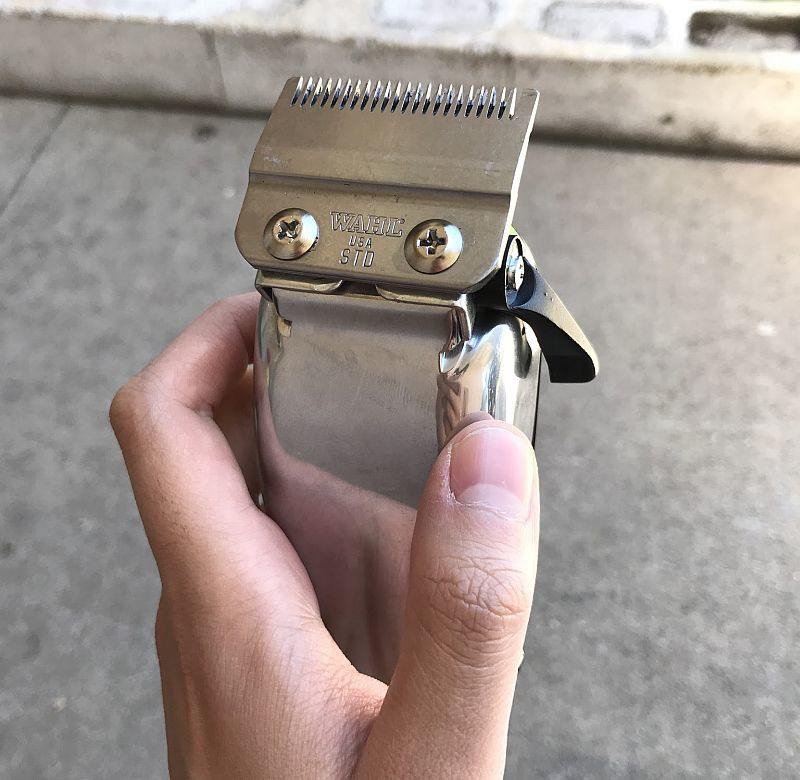
Detachable blade clippers are the Cadillacs of haircutting tools. Their cuts are crisper and honestly, you’ll feel like a hairstylist with a decade of experience behind your back.
This type works in a completely different way. To control the cutting length, you have to swap one blade with a different sized one. This can feel a bit overwhelming for beginners, not to mention the whole ordeal costs more.
While there are comb sets for detachable clippers too, the real pride and satisfaction of using one comes exactly by sticking to naked blades.
In most of the cases, I recommend you pick an adjustable blade clipper. They are quite straightforward to work with, cheaper and usually come with more accessories.
How To Cut Your Own Hair
What I love about cutting hair with clippers is how much more of a streamlined, convenient process it is compared to working with scissors.
If you’re not doing something overly complicated with your hair, it can take as few as three minutes for a quick buzzcut, or 10-15 minutes for something more demanding.
The only hard-set rule when you’re cutting your own hair is to go against the grain. Your hair’s direction might differ depending on the specific part of your head.
Here’s how I usually buzz my head and do easy cuts on my friends:
Step 1: Start With the Top by Going Front To Back
If you’re going to do a shorter buzz, pay special attention to the crown. I feel the skin there is a little bit more tender than other parts of our heads, so be more gentle.
Step 2: Move to the Sides
Note that the area around the ear can be a bit tricky. A lot of the clipper kits, especially the Wahl ones, include specific attachments called “ear tapers.”
Make sure you use them instead of the standard combs. If you’re working with a naked blade, make especially slow motions so as not to poke your ear. There won’t be blood, but it still hurts.
Step 3: Trim the Back
I go bottom-to-top in an against the grain motion once more. Usually this is where you’ll need a small hand mirror to see how your cutting efforts are turning out.
Yes, you can get by just “feeling” the length of your hair. However, there’s a high chance you’ll miss some parts.
To avoid looking ridiculous, just use the hand mirror so you don’t end up with uneven hair patches.
Step 4: Give the Neckline and Sideburns Some Love
This is crucial. You want them to look sharp, otherwise they’ll ruin your cut.
For the neckline, you might consider a neckline template – local shops and Amazon should have them. Or you can just make your own! I’ve even heard about people using belts to get their neckline right.
For me, placing my fingers and taking a good look at the hand mirror while going slowly with the trimmer are more than enough.
A very simple, yet effective tip regardless of your preferred hair length is to leave the sides a bit shorter than the top.
Most of the time, hair on the sides appears to be bulkier which might make your hairstyle lack symmetry. Taking a bit more off the sides preserves the balance and makes your hair look neater.
Usually there’s a 1 or 2 clipper sizes difference between the two sections.
So for example, if you go with a #6 guard on your top, make the sides a #5 or #4. I’m partial to the more discrete 1 size difference – when I started buzzing my head, it was a #2 all over.
Before moving to my current close-to-bald shave, I found out that a #2 on the sides and a longer #3 on top looks way more presentable. The slight difference evened out the denser hair on the sides and the sparse remains on top.
For me, a #4 would be too much of a contrast, as you can see from the difference in combs:

Speaking of sizes and numbers…
Standard Cutting Lengths
As I mentioned before, most of the kits should come with quite a few guards included. Their lengths are standardized between brands, with very small deviations present.
Usually, you’ll get attachments numbered from #1 to #8. Here’s what length they cut to (inches shown are equal to the amount of hair left on your head):
- #1 – 1/8″ or 3 mm
- #2 – 1/4″ or 6 mm
- #3 – 3/8″ or 10 mm
- #4 – 1/2″ or 13 mm
- #5 – 5/8″ or 16 mm
- #6 – 3/4″ or 19 mm
- #7 – 7/8″ or 22 mm
- #8 – 1″ or 25 mm
Generally size increments are around 1/8″ or 3 mm.
There’s a few additional sizes that might are more situational and might not be included with some clippers:
- #0 (or #1/2 with Wahl clippers) – 1/16″ or 1.5 mm
- # 1 1/2 (Wahl clippers) – 3/16″ or 4.5 mm
- #10 (Wahl clippers) – 1 1/4″ or 32 mm
- #12 (Wahl clippers) – 1 1/2″ or 38 mm
Either way, here’s how to make your home haircut last longer.
Making Your Haircut Last Longer
Some people love going to the barbershop. For others, it can be a bit of a struggle.
As I mentioned, before my hair loss I’d sometimes get lazy with keeping my haircut fresh. Other times, the postponing was due to purely financial reasons.
But there’s a third factor: from time to time, I just didn’t want to bother with the social side of hitting the barber shop. I suck at small talk and if you’re not in a good mood, the whole grooming session can get really awkward.
The good thing with home haircuts is that you can refresh your hairstyle whenever you wish. 10PM? No problem, just grab the clippers and get to work. Not in the mood? Nobody forces you to go through small talk or any social interactions anyways!
Home haircuts can be a relaxed way of doing some proper touch-ups between your full haircuts.
Clean Up Your Sideburns and Neckline
These two areas are the biggest offenders when it comes to haircuts that seem like they’ve gone past their “expiry date.”
Even when your hair is actually still on point!
It’s because these sections are delicate lines that require more frequent touching up. Just a few overgrown hairs and you’re looking like a careless caveman.
Okay, that was quite the hyperbole, but these can get messy in no time, really.
However, clippers won’t do a great job here. What you really need is a proper hair trimmer.
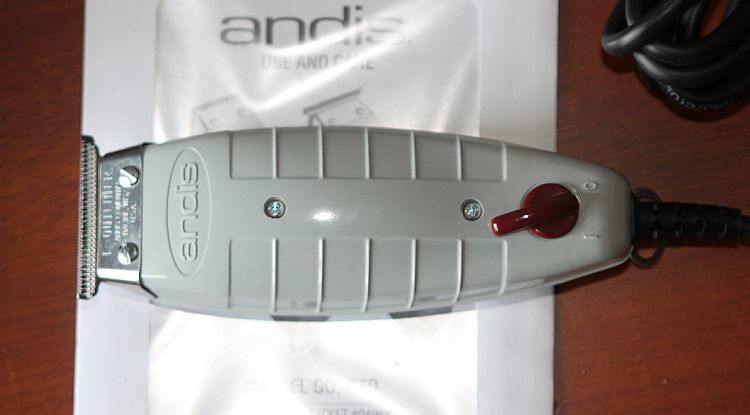
If you already have a quality beard trimmer, you can actually use it (naked blade) to touch up both areas. In my case, I prefer a professional hair trimmer like this Andis T Outliner:
Which prompts me to make an important distinction: hair clippers and hair trimmers are two completely different tools. I’ve seen a lot of people use them interchangeably, but that’s straight up wrong.
Here’s how a typical T-Blade hair trimmer looks:
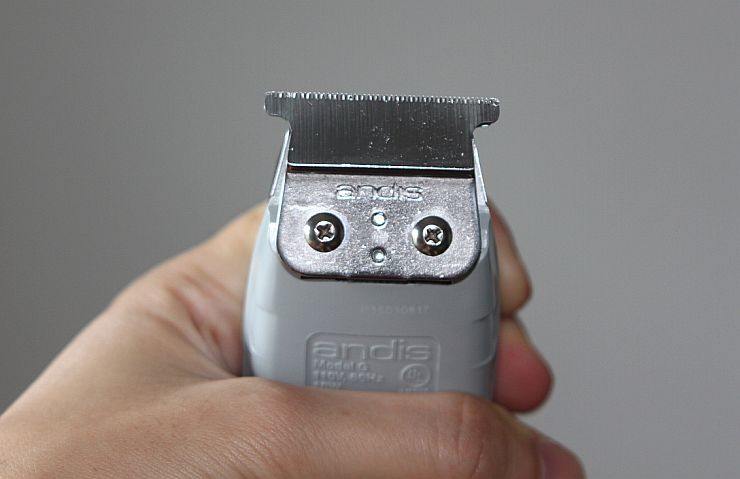
Notice the blade teeth? Very small and situated close to each other. Most trimmers also have a limited number of guards, if any at all.
They’re made for maintaining stubble or shorter beards, touching up sideburns, shaping necklines or doing edge-ups.
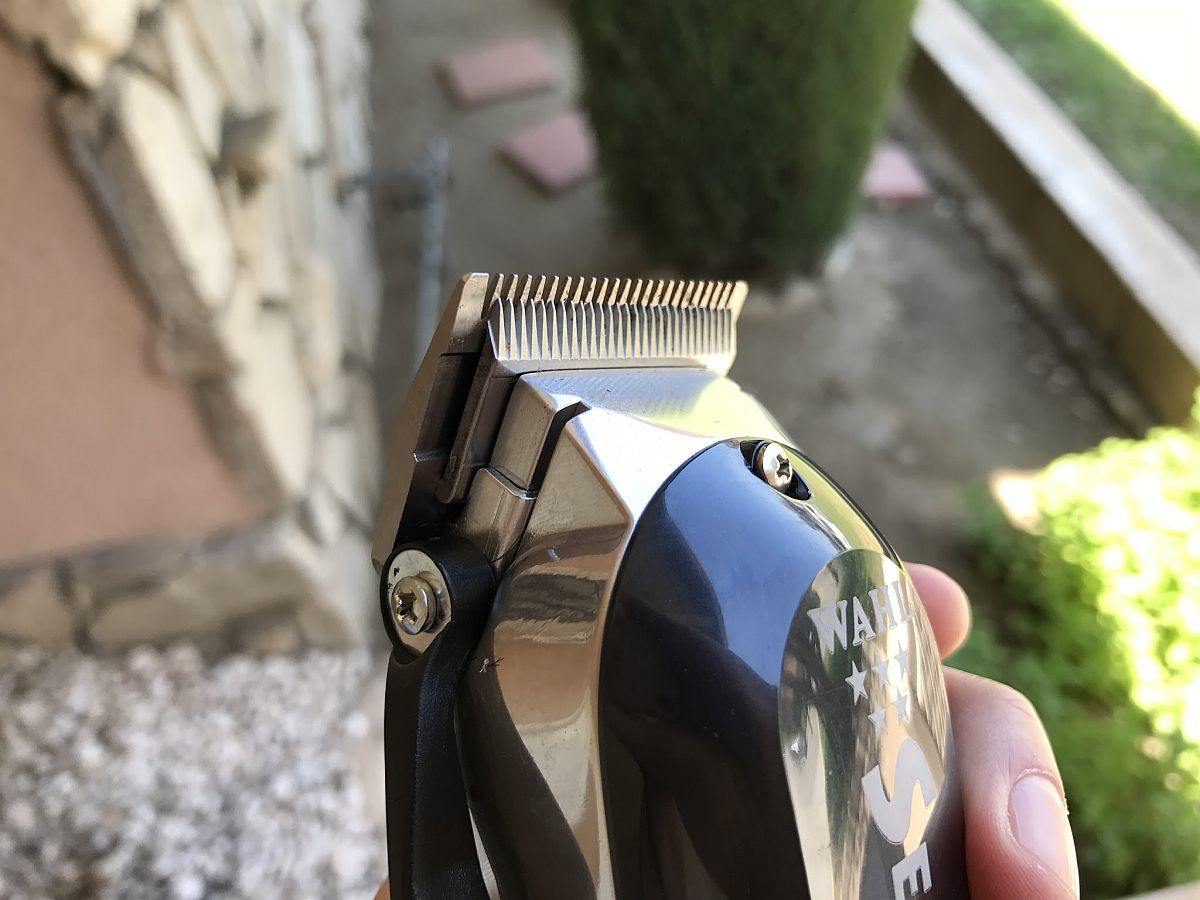
Hair clippers were meant to work on your hair or serve as grooming tools for longer beards. Check what the blade on the Wahl Senior looks like:
As you can guess, the wider teeth and bigger blade easily miss the mark when it comes to detailed work. That’s why they’re not optimal if you want to do keep your sideburns or neckline properly trimmed.
The neckline is especially sneaky, as we usually don’t pay attention to what happens in the lower part of the back of our head.
It really depends on how hairy you are, and what’s your hair growth rate, but do frequent checks with the side mirror.
As for the sideburns, if I shave my beard, I leave them higher. A standard practice when they grow out is to just trim them to the halfway point of your ears.
My neckline has decided to grow out like a gorilla’s, for some reason, so I have to clean it up every 2-3 days. If you’re luckier guy than me, once per week should be fine.
If you have an extremely thick neck, I advise you to go for a tapered/layered neckline, just like the fade haircuts you’re seeing. Conversely, if it’s thin, go for a more squared shape as it’ll add a bit of volume to your neck.
Ensure New Hairs Are Healthy
The sideburns and neckline are the little details, but let’s not forget about the bulk of your hair.
A possible enemy of any dapper looking haircut can be the growth of unhealthy hair. Breakages and split hairs; dreary looking locks – if you’re too harsh on your hair, these can significantly shorten the life of your haircut.
The best solution is to be careful with drying your hair, as it’s most vulnerable when it’s wet.
When I had longer hair, I always preferred to stick to towels and pat gently, with slow motions to minimize the risks of hair breakages.
Using a good conditioner is also quite important as it fosters the growth of smooth, healthy hair. I don’t recommend you use it every day, especially if you have fine hair.
However, conditioners are not a one-size-fits-all product. What works for some other men might be a total disaster for you.
Fine hair will need a thickening conditioner for optimal healthiness and looks; this could backfire for thicker hair types.
What I want to say here is that in any case, you should stick to a suitable conditioner if you want to preserve your hairstyle’s brilliance for a longer time.
Hair Clipper Maintenance
Hair clippers save you money and give you access to a pretty cool skill. In return, they want something very basic: maintenance.
Don’t worry, it’s not an overly complicated task! It boils down to three things:
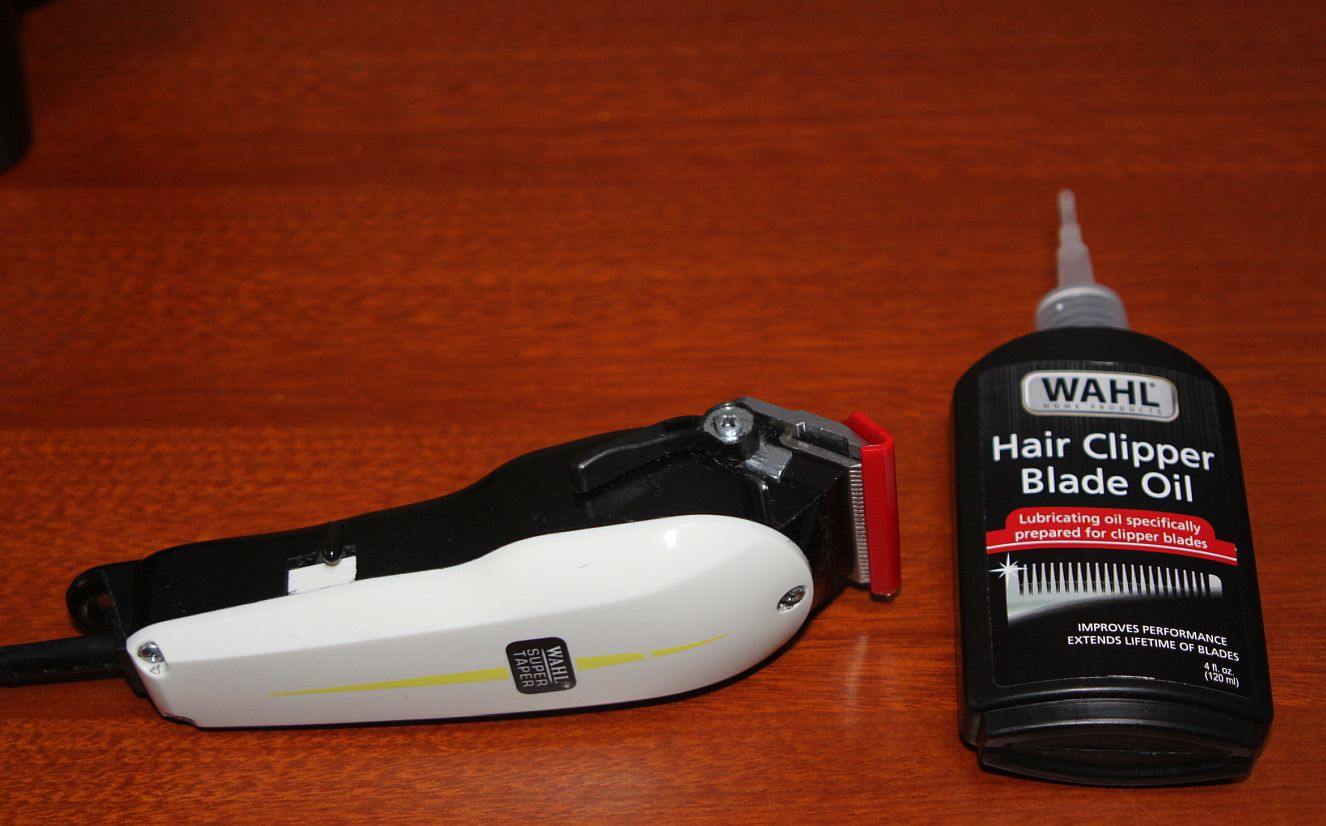
#1: Oiling
The frequency depends on how much hair you cut, but generally make sure you oil your clippers after every cut. For quicker, shorter buzzcuts every other cut is acceptable too.
#2: Cleaning Leftover Hair
Make sure you remove all remains after every single cut. Hair and debris will deteriorate your clipper blade’s sharpness and will reduce the quality of your cuts.
#3: Disinfecting
Not necessarily after every cut, but make sure you clean the blades from time to time. As I cut pretty close and there’s contact with my skin, I disinfect my blades at least twice per month.
The good thing is most clippers come with a small tube of clipper oil and a tiny brush included in the set. As for disinfectants, both Wahl and Andis have sprays or liquids that take care of that.
Pro Tip: If you lose your cleaning brush (something I’ve been guilty of quite a few times!), a small toothbrush should do the job just fine too!
FAQs About Cutting Your Own Hair
Here are the answers to some questions you may have about cutting your own hair.
What Do You Need To Know Before Cutting Your Own Hair?
You definitely need to know what kind of clippers you should get, as well as the order of cutting. Start with the top, then the sides, then the back and finally, clean up your neckline and sideburns.
Is It Safe To Cut Your Own Hair at Home?
Yes, it is safe as long as you use the right tools, and use them carefully.
Should You Cut Your Own Hair Wet or Dry?
The shape and length of your hair change when it’s wet so it’s usually best to cut it while it’s dry. But if you’re going for a style that has precise lines and edges, it can be easier to cut it when it’s wet.
Is It Bad To Cut Your Own Hair With Normal Scissors?
Yes, normal scissors are not very sharp when compared to hair-cutting scissors. They make cutting hair difficult, and they can damage the ends of your hair.
Final Thoughts & Recommendations
I have the feeling that way too many people think of DIY haircuts and clippers as something that’s way more complicated than it really is.
Sure, if you’re rocking a very intricate hairstyle, it’s probably not worth it to try to emulate your barber’s technique.
But honestly, probably more than half of the men I’ve seen so far stick to relatively simple haircuts that can be easily done at home. No doubt, it might take a “trial” cut or two to get things right, but it saves time, it saves money, and gives you a new DIY skill to brag about.
If you’re looking for some product suggestions, here’s what’s worked for me and the people around me:
- Whole haircutting kit: Wahl Elite Pro
This is actually what other pro reviewers like The Sweethome recommend too.

A total no-brainer given its price and all the accessories you receive, I’ve dubbed this model “The King of Home Haircuts”.
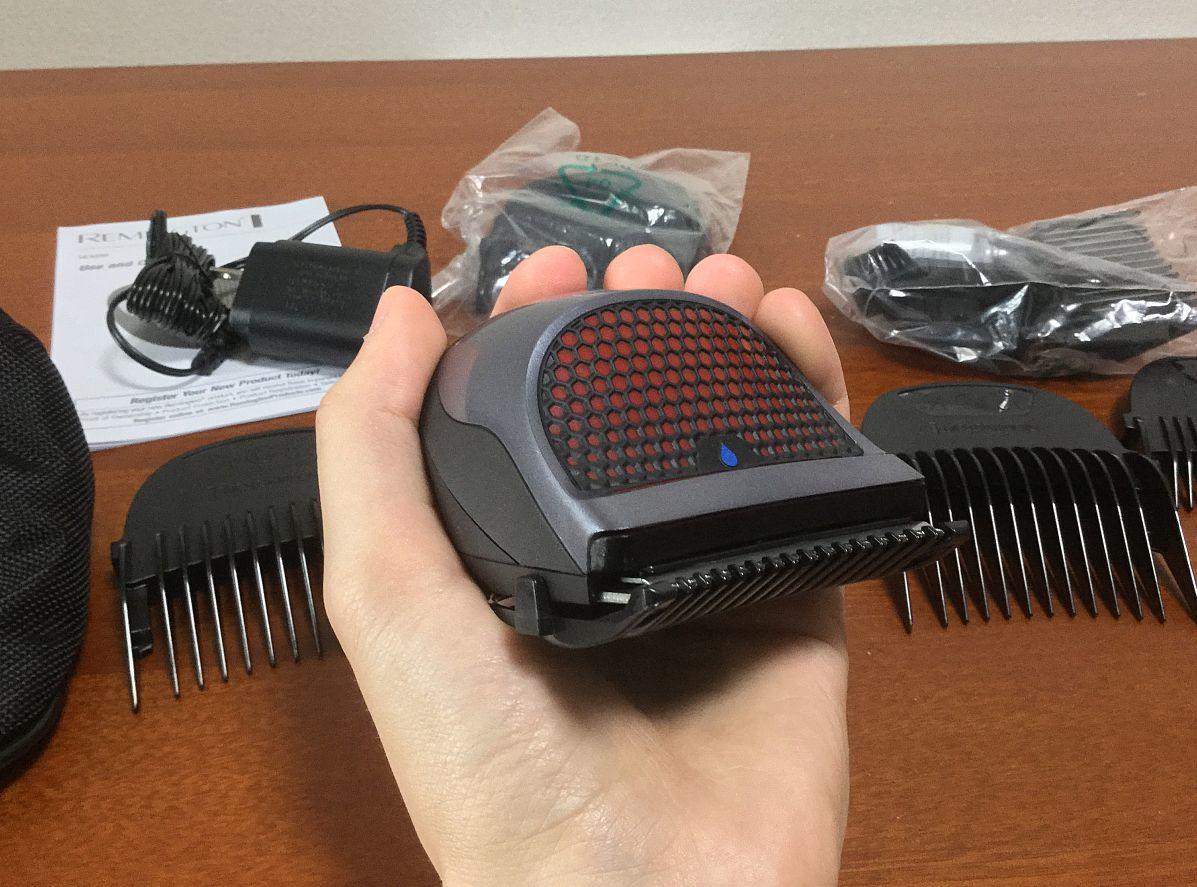
- Cordless, lightweight clipper: Remington HC4250
I want to commend two things here – it’s wide, curved blade that follows the head shape better than traditional blades, and the extra small, palm-sized body.
Keep in mind that it’s perfect for buzzcuts, but not optimal for layered hairstyles.
- More professional tools: Oster Fast Feed / Wahl Magic Clip
- Barber-grade detachable blade clipper: Oster Classic 76
If you’re just experimenting with the idea of cutting your own hair, I’d recommend starting with something inexpensive. You can always upgrade later on!
Questions? Comments? Leave them below!
I think it would be easier to cut another’s hair than one’s own. I know people who cut there kid’s and parents hair quite well after the beginning.
This is great information Brock. I may need to begin cutting my son’s hair at home (instead of the barber shop) for the first time and this has been the best overview I’ve seen while reviewing tutorials. Thanks!!!
Hi Brock.
I have cut my own hair since I was first hired at an airline in October 1990. With an airline pilot schedule, the last thing I want to do is make another appointment in my life to do what? Haircut! No.
I do it myself. Your tips are spot on. I have already incorporated them over the years, but it was a nice validation to view them on your site.
Ciao’
Ken
I’ve been cutting my husband and 2 sons hair (with clippers) for almost 30 years. Great information and tips here-still learning Thanks
Hey Brock. Hair cuts should be left to the Professionals, for all the gents i know that tried to cut their own hair was not successful i always say don’t be cheap when it comes to hair cuts pay a professional there are no shorts cuts when it comes to hair cuts
Or just be a big boy and go to a barber and have it done right. I’ve never, ever seen a good DIY haircut with the exception of the buzz.
How would you know if you had seen one?
I’ve seen plenty of bad ones Brock and each owner has been all too happy to share with me that they did it themselves. Two things my dad taught me – keep your mouth closed when your either angry or under water, and leave the haircuts to the professionals.
Sounds like that first lesson may not have sunk in fully…
Good thing that hair grows out…
Learn from your mistakes – do better the next time…