Looking for ways to make your boots more comfortable or stylish? Try lacing them in a new way for results!
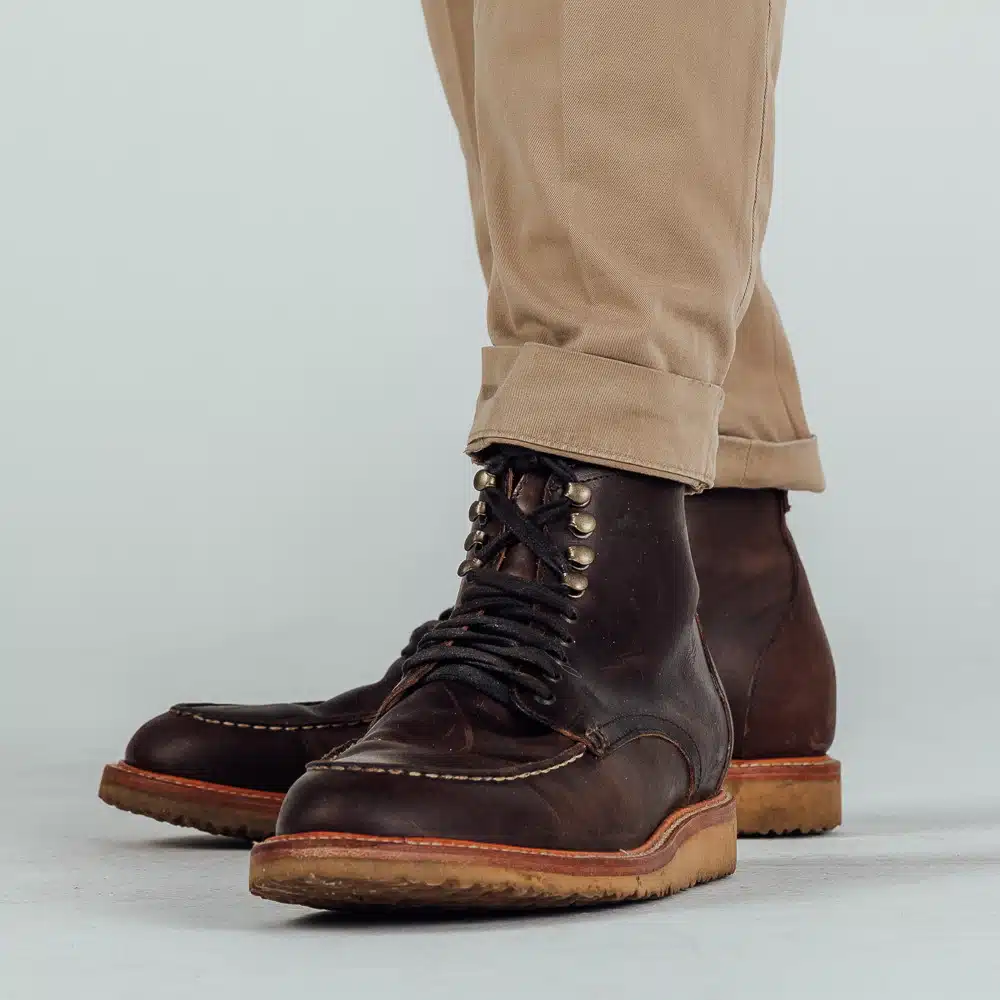
Let’s admit it — as little kids, tying our shoes wasn’t a cakewalk. Now, many of us confront the same problem with tying or lacing our boots.
If you have ever been flustered or intimidated by the surplus of string or endless eyelets, you’ve come to the right place.
Today, we’ll explore the best ways to learn how to tie and lace boots for all occasions.
What Type of Boots Should I Wear?
Before taking the rabbit down the boot lacing rabbit hole, so to say, I’d recommend considering what purpose the boots will serve and deciding on the proper boots for the task.
While your chukka boots might be your go-to footwear for date night, your moc toe Red Wings might be what you wear to change the oil on your car, and your hiking boots are probably for, well, hiking.
Each of these various circumstances may prompt a different boot-tying method.
Before outlining each method, I’ll include recommendations on which style of boot the lacing method prefers. If you are uncertain about what boots to wear, check out our article featuring the 10 best types of boots.
Best Lace Types for Boots
Often, when you buy a pair of boots, you’ll get an extra pair of laces, typically bundled together in the furthest, darkest corner of your shoebox.
Manufacturers provide laces with the style and use of boot in mind; however, there are many types of laces available to us boot greenhorns and enthusiasts alike.
The shapes of laces vary, but most commonly, we see either round or flat laces.
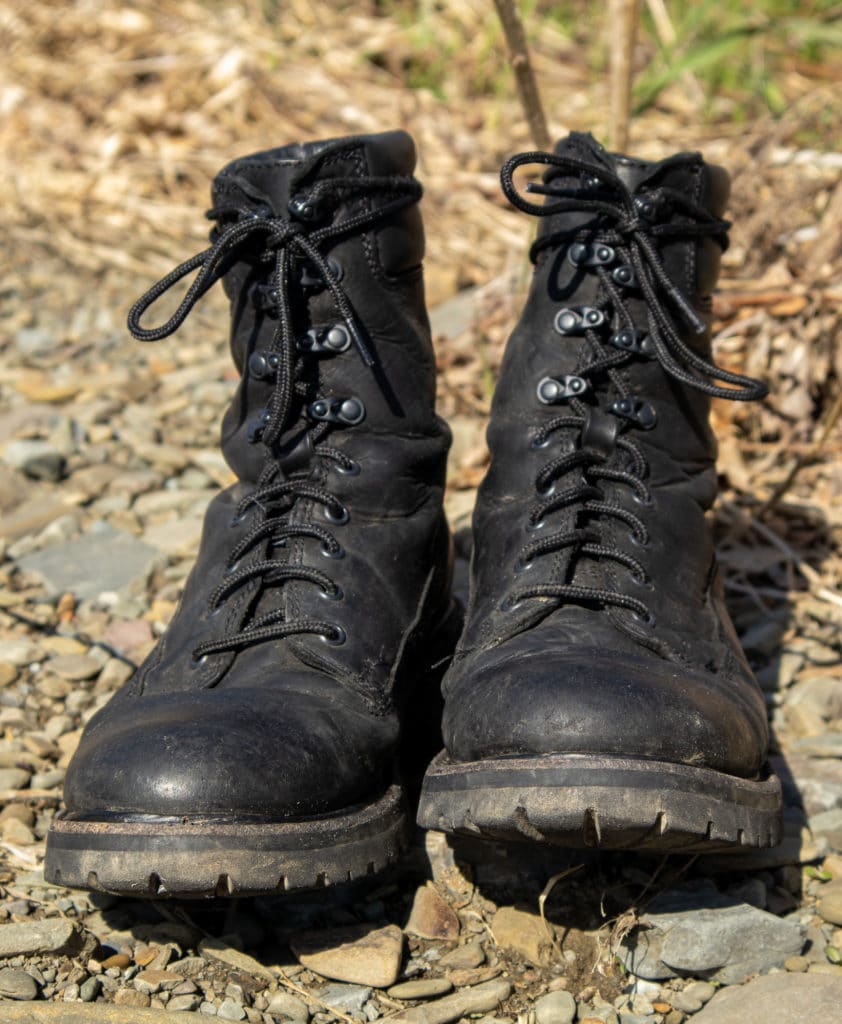
Round laces are commonly found on hiking boots and combat boots due to their durability and strength. Round laces are usually made from paracord, Taslan, another braided synthetic material, or waxed cotton.
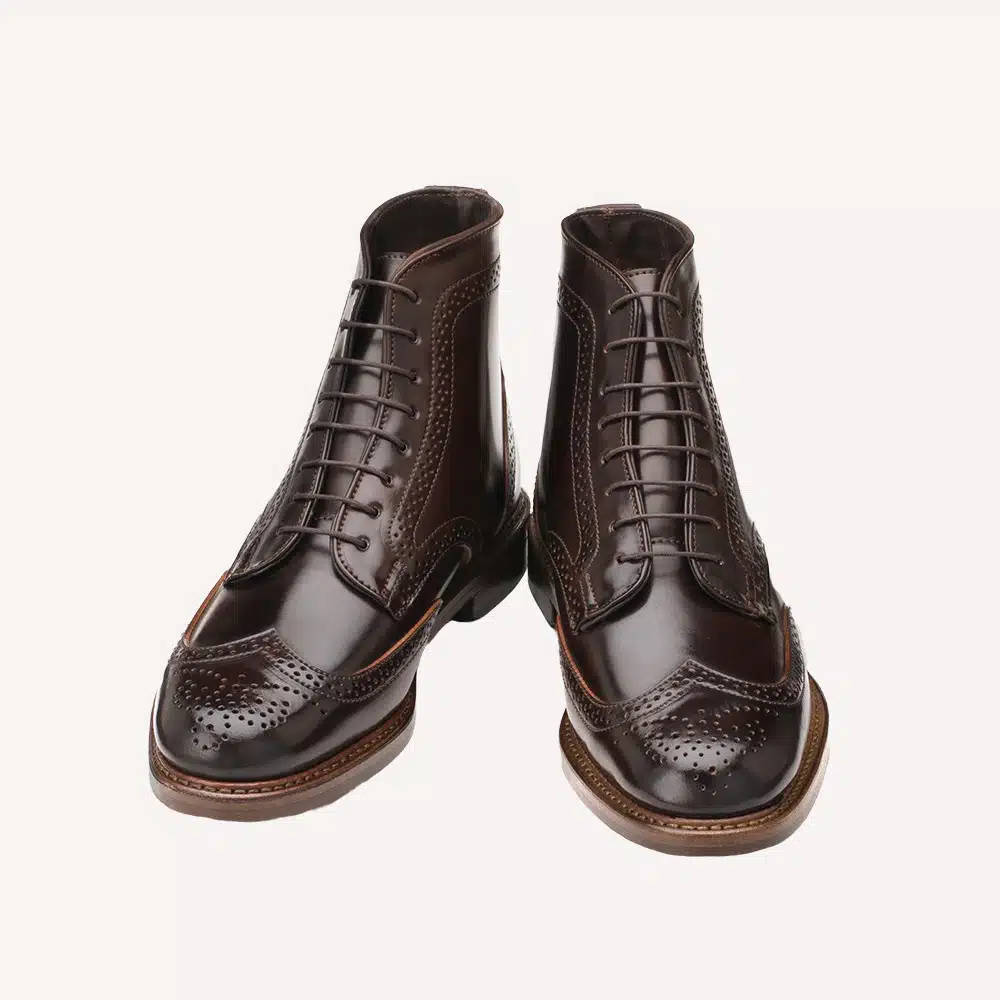
Round cord and round cotton laces are used with dress boots since they look best in professional settings and because they’re generally more delicate than synthetic varieties.
Flat laces have the advantage of staying tied for longer. Flat laces often appear on all kinds of everyday wear boots.
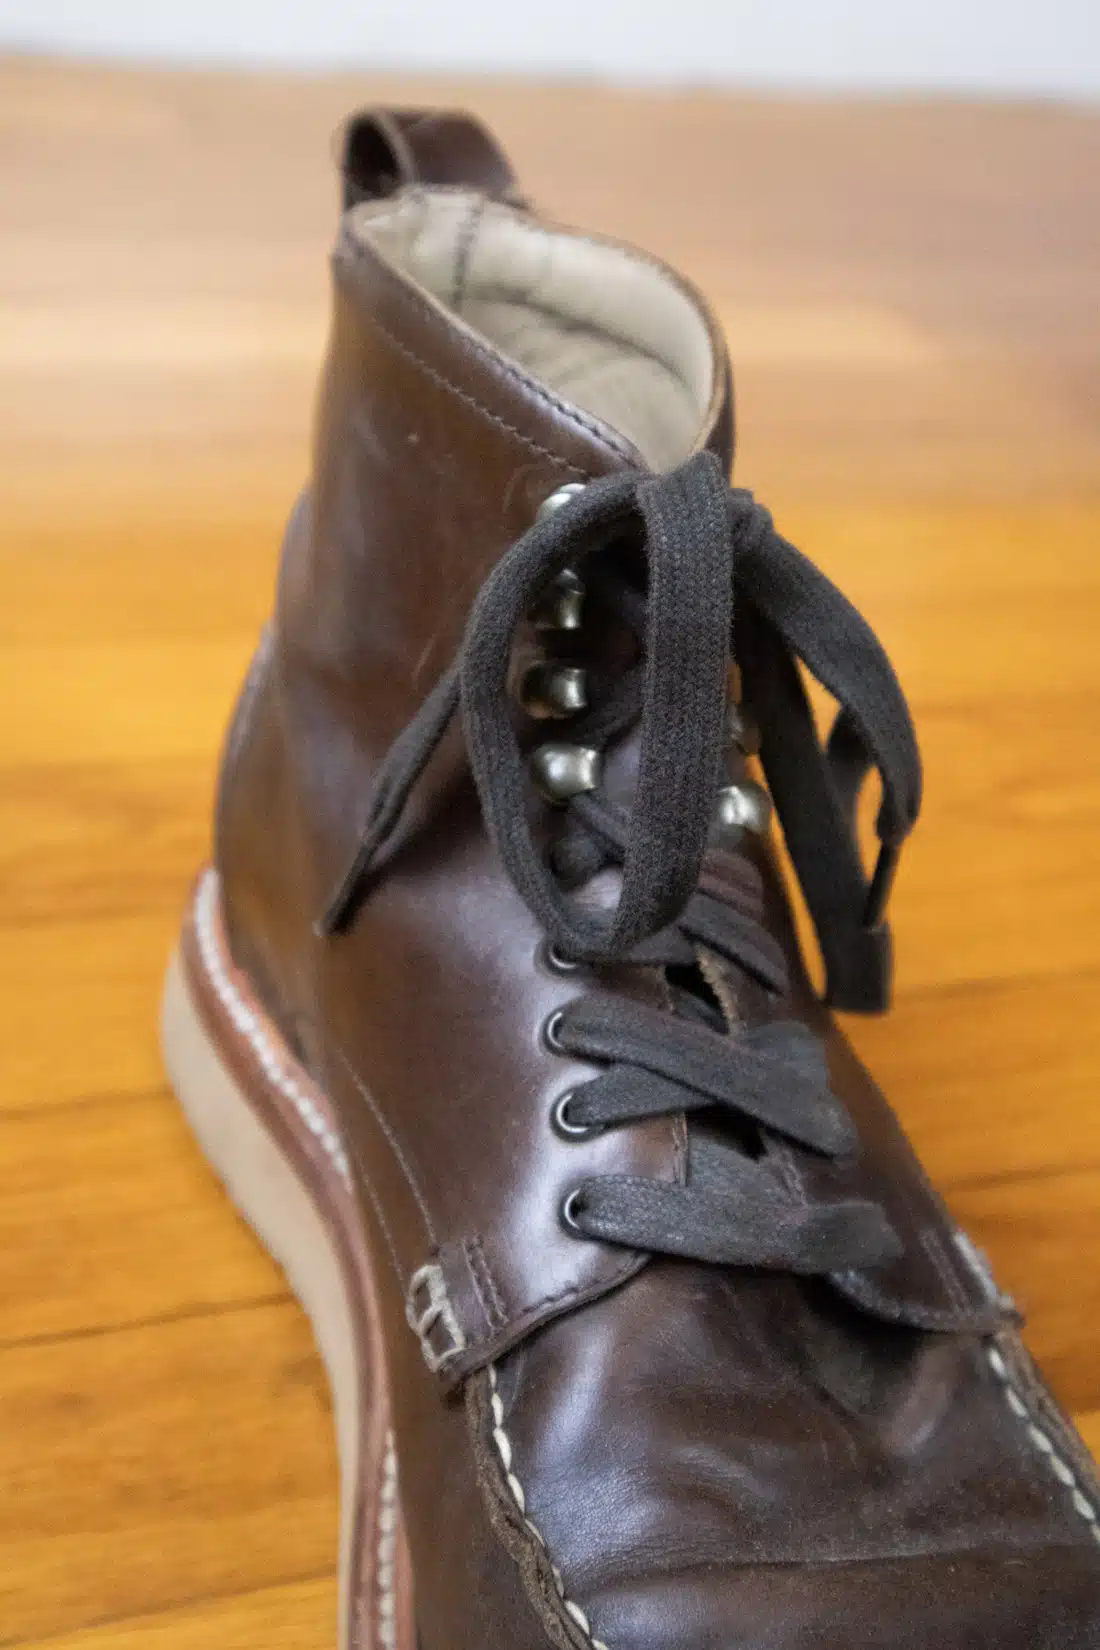
Lacing and tying flat laces is also easier due to the material being less rigid.
Lace “Accessories”: Kilties and Speed Hooks
Kilties and speedhooks are two important, although often overlooked, elements when it comes to lacing.
Kilties are a “false tongue” that is laced onto your boot to protect the tongue from debris, liquid, or punctures.
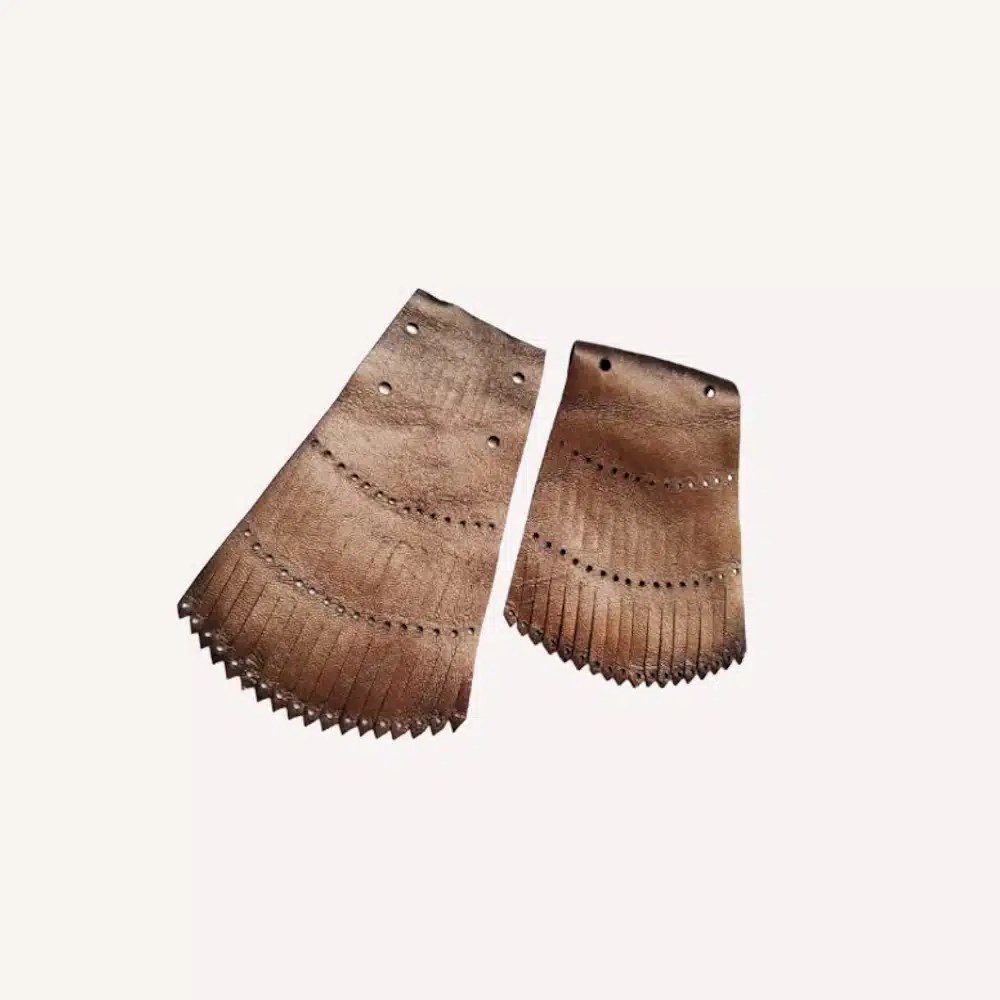
When I worked for a landscaper, the foreman and all his long-time workers had boots with kilties to help keep out dirt and grime.
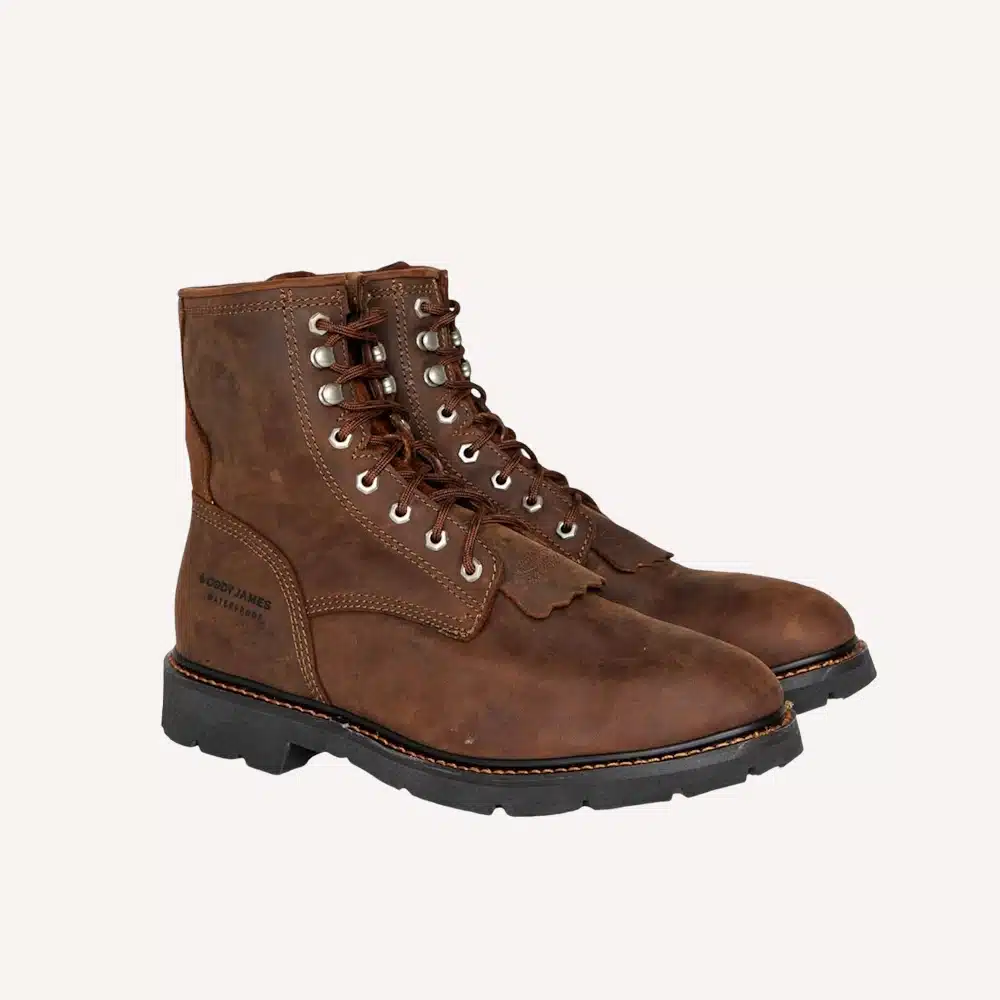
Speed hooks are a feature many boots boast and typically replace the top rows of eyelets. Like the name suggests, these attachments make it quicker to lace your boots (you can even use speedhooks with one hand!).
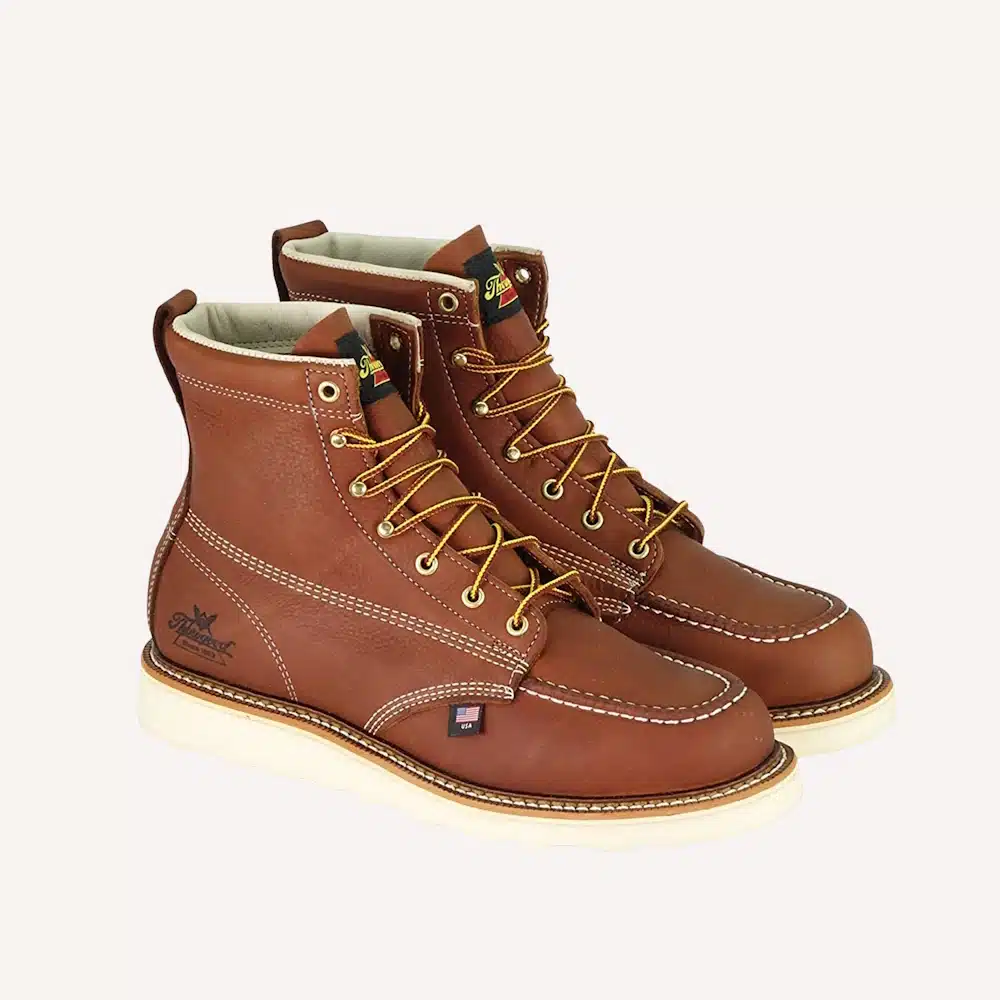
A master boot lacer may choose to utilize these improvements to make lacing a breeze.
If you do not have speed hooks on your boots but you would like to, these little guys are available for purchase and can be installed in virtually any boot by a skilled cobbler.
Standard Lacing
Now, let’s move on to five step-by-step guides to lacing boots.
Simply put, the standard or crisscross method dominates the boot lacing race. Slow and steady, standard boot lacing presents a functional and comfortable feel to any pair of boots.
Standard lacing works with all kinds of different boot accessories, such as kilties and speed hooks.
Step #1:
Beginning with the bottom pair of eyelets, pull both ends of your lace inside so that the two ends are coming from the bottom of the eyelet.
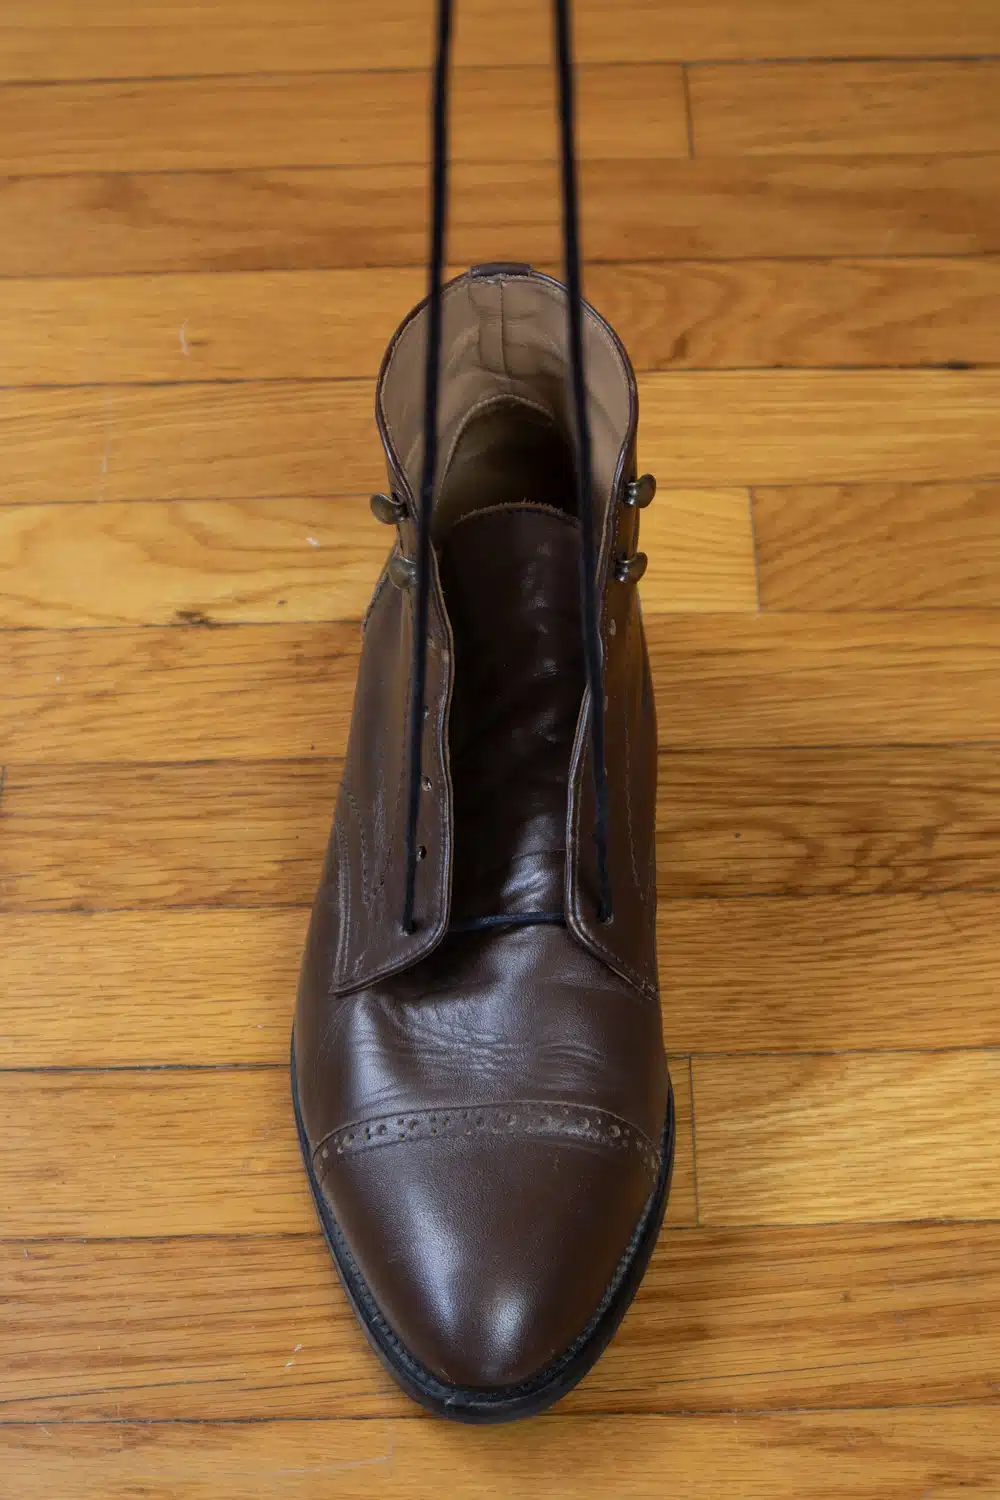
This forms the base and is the only instance where the laces do not appear crisscrossed.
Step #2:
Ensuring that you have equal lace on either side, proceed by identifying the eyelet above the last, and start the crisscross pattern by taking the lace to the opposite eyelet.
Just like with the base, the lace should be coming out of the bottom of the eyelet before passing over to the other side.
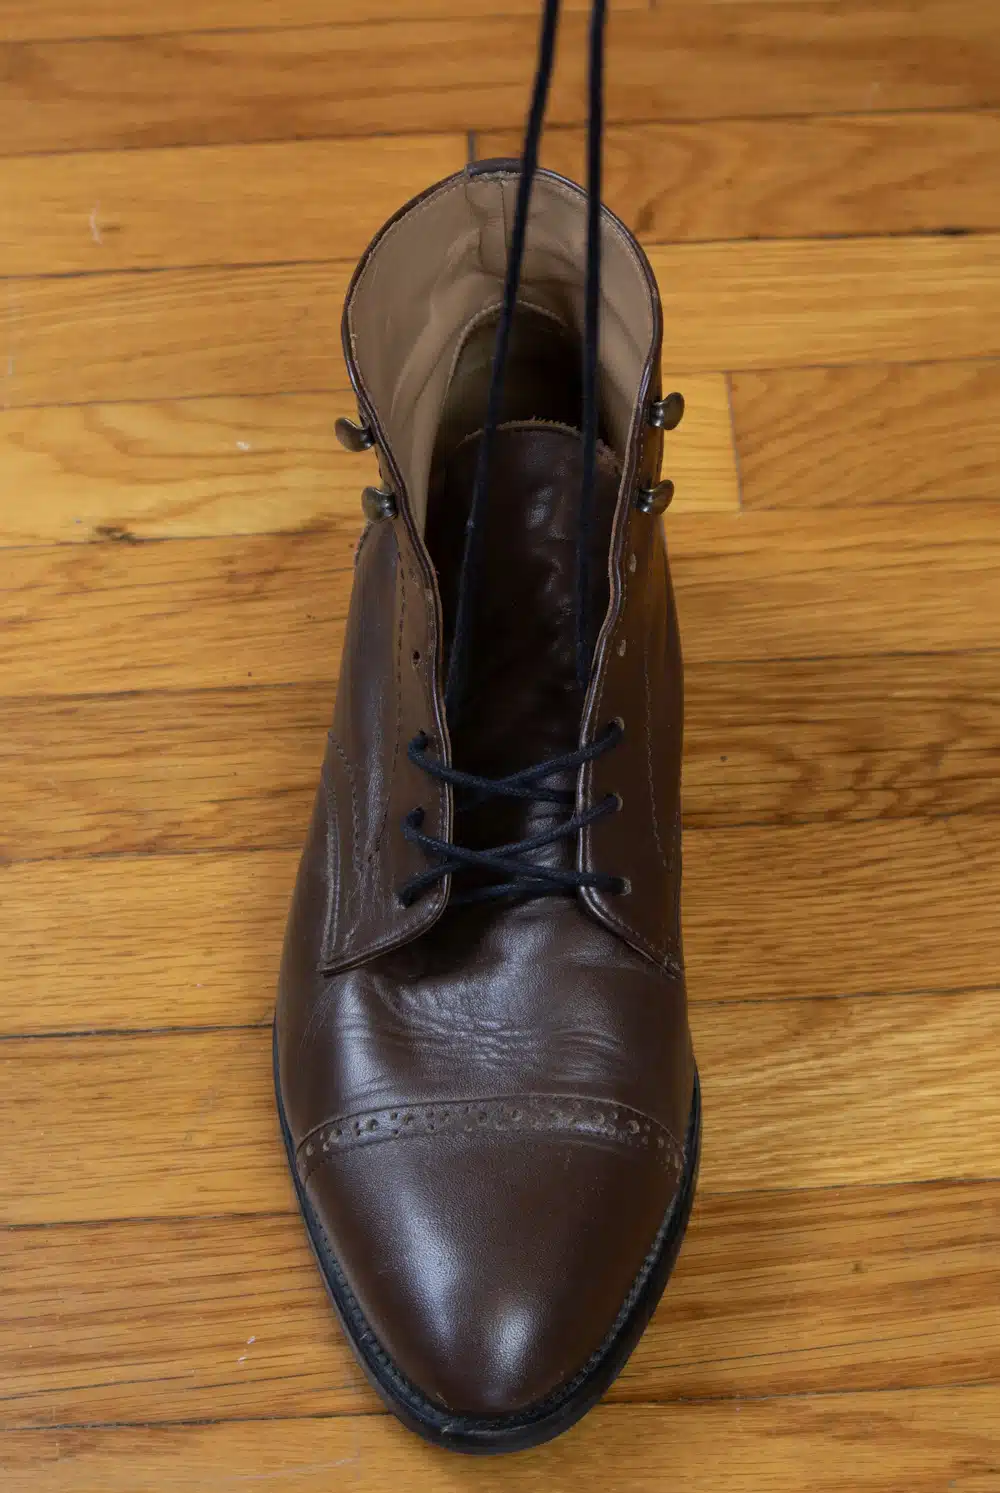
The crisscross of the laces needs to be consistent.
For 10 eye-hole boots, I like to start with a cross on top and then underneath. This allows for easy tying.
You will notice that one lace lays on top of the other. Make sure that you follow that same pattern as you continue to lace your boot.
Step #3:
Repeat step 2 until all eyelets have been filled.
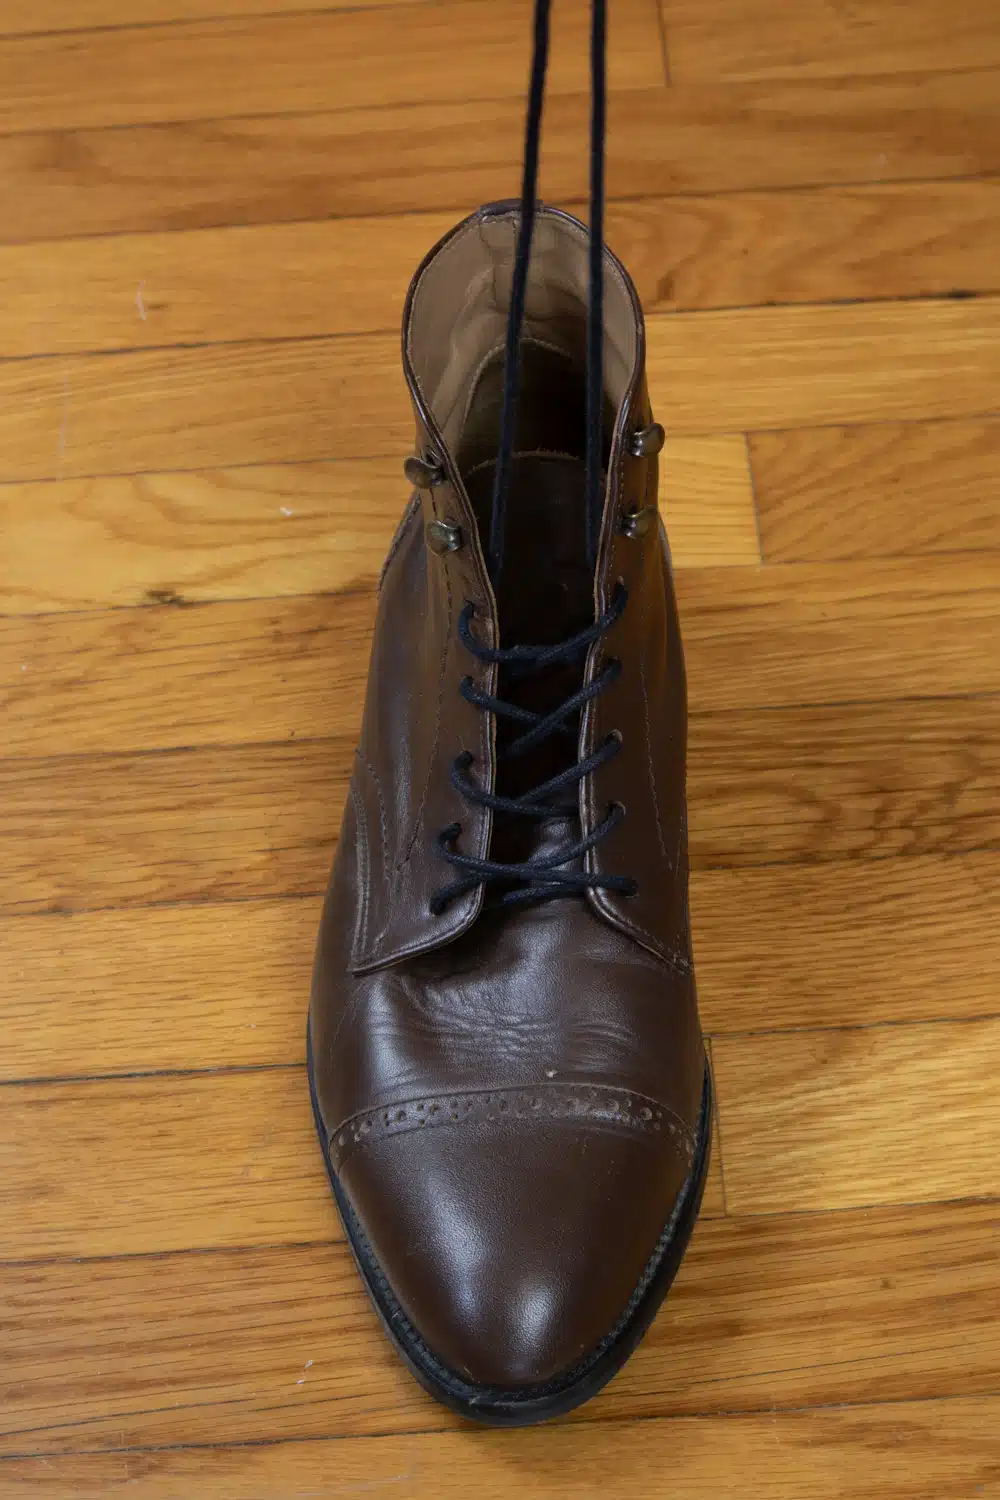
You’re almost done!
Step #4:
If your boot has speed hooks, instead of going from the bottom of the eyelet, you will just wrap around the hook.
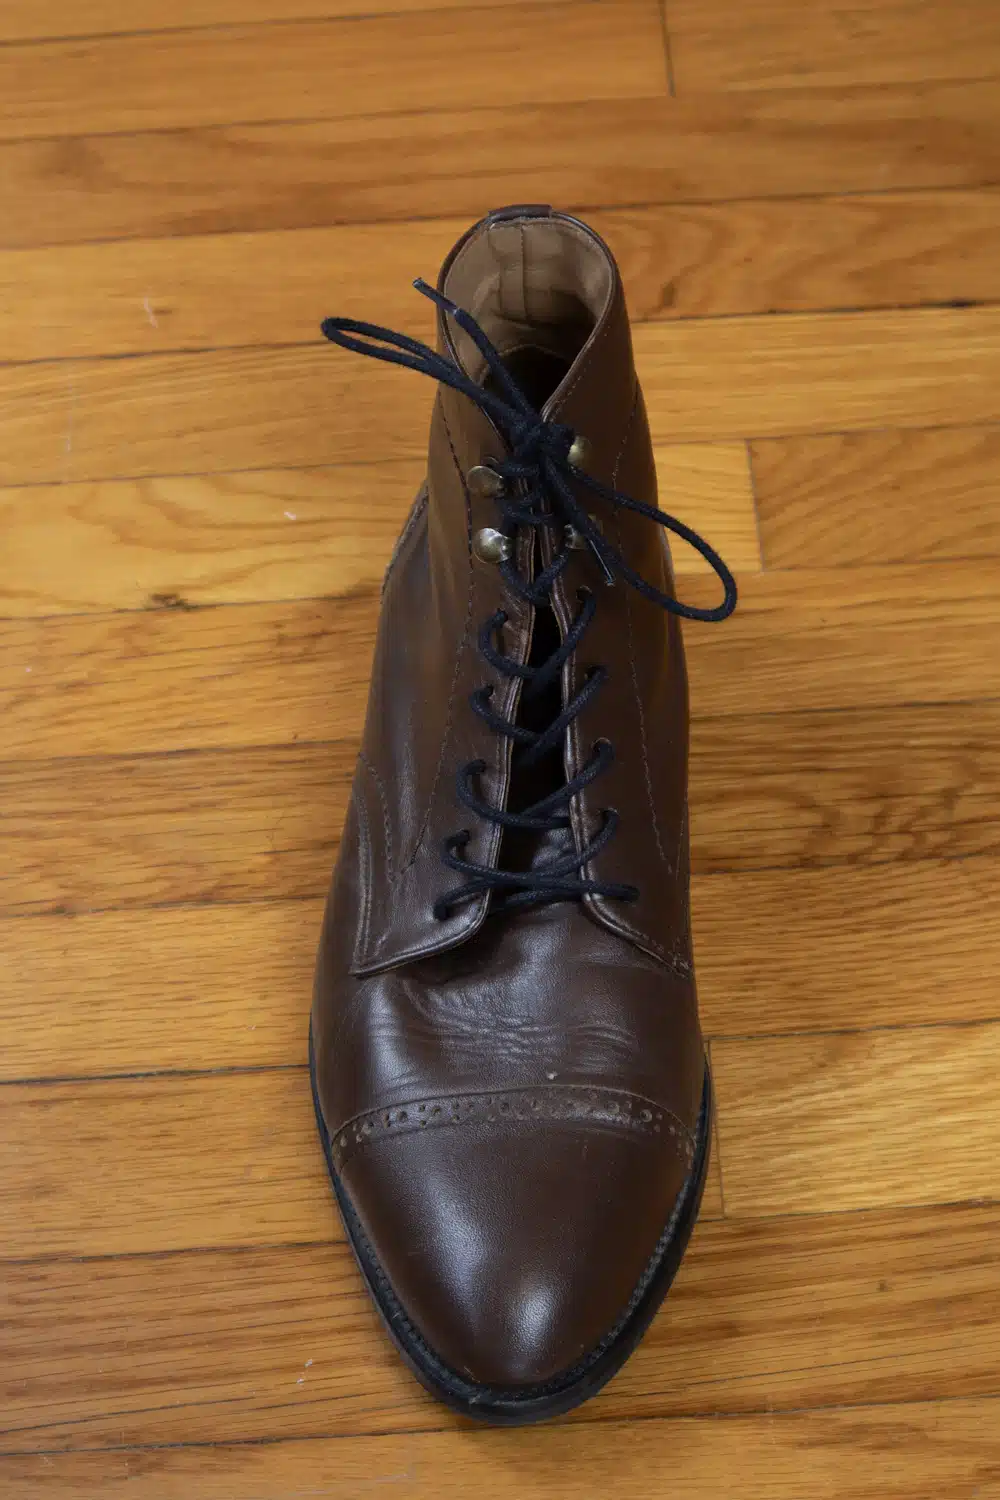
You will still maintain the pattern of which lace is on top.
How To Install a Kiltie
If you elect to use a kiltie, in step 2, identify the bottom two eyelets in the kiltie and lace through those before pulling the laces through the boots’ eyelets.
Then, after step 3, pull the laces through the other two eyelets of the kiltie before adjusting the kiltie to your liking.
Over-Under Lacing
Over-Under lacing is great for tightening and loosening your ties at will, given that this pattern creates less friction when pulling on the laces.
Over-Under differs from Standard by, like the name suggests, alternating the direction with which you will push the lace through the eyelet.
Step #1:
For an even amount of eyelet pairs, push the lace ends through the bottom pair of eyelets so that both ends are entering from outside the eyelets.
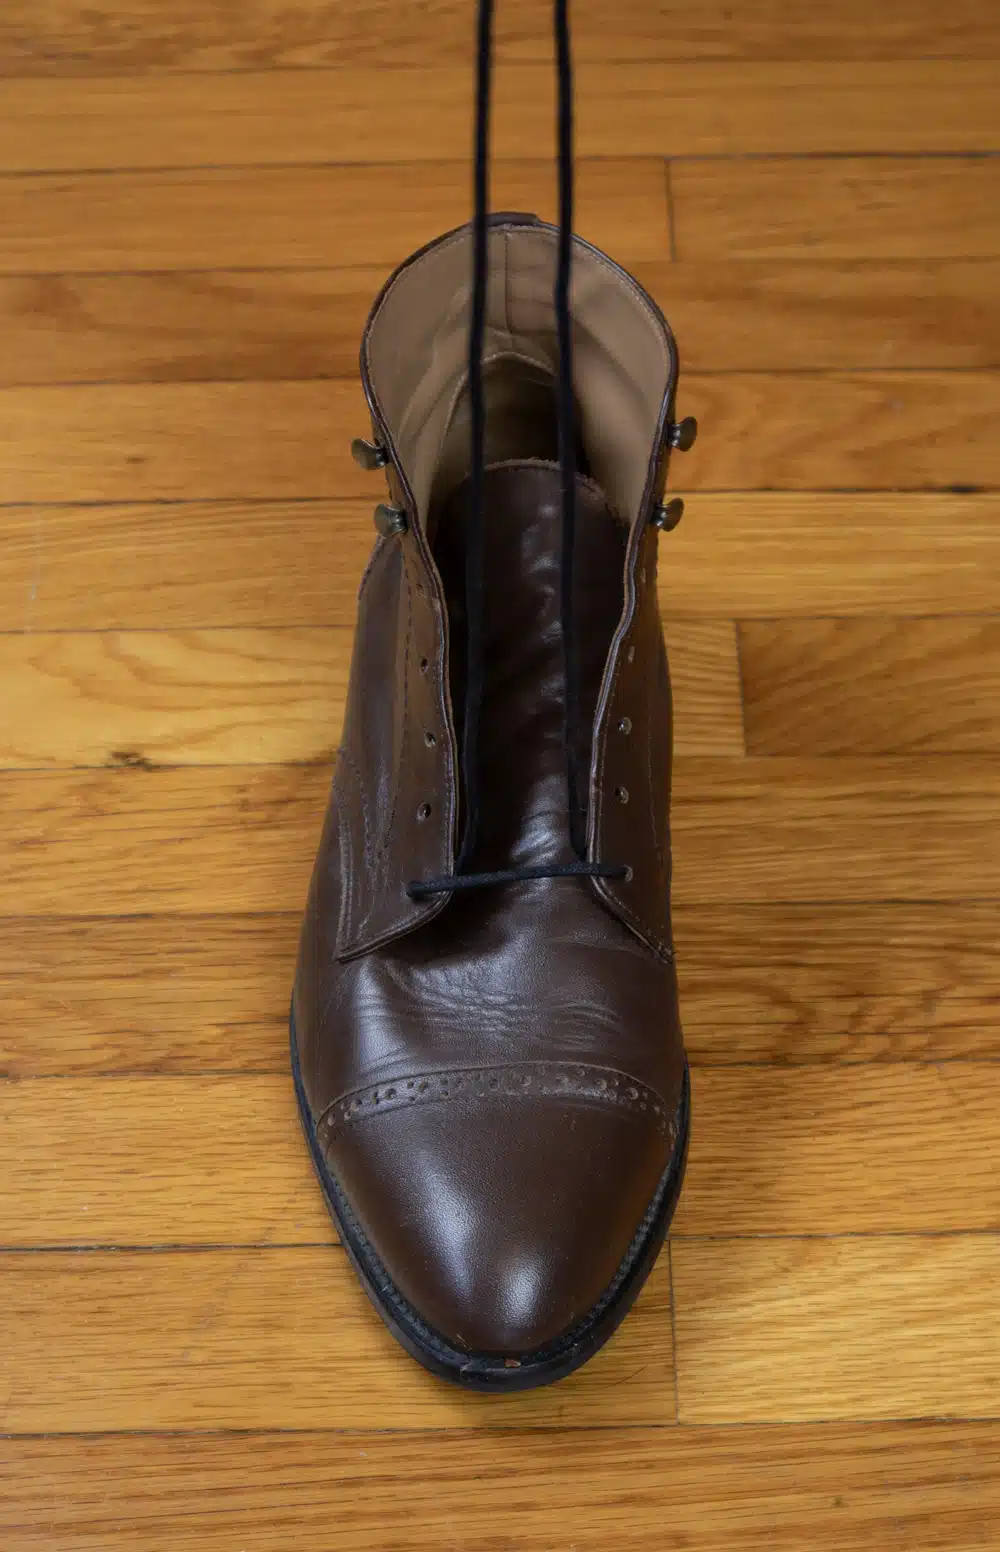
For odd pairs, begin from inside.
Step #2:
Similar to the crisscross pattern, now we will alternate left and right eyelets, only now we also alternate the direction in which we thread the lace.
Since we began this pattern with the laces outside the eyelet, on the second pair, we lace from inside. However, similar to Standard lacing, the lacing needs to be consistent.
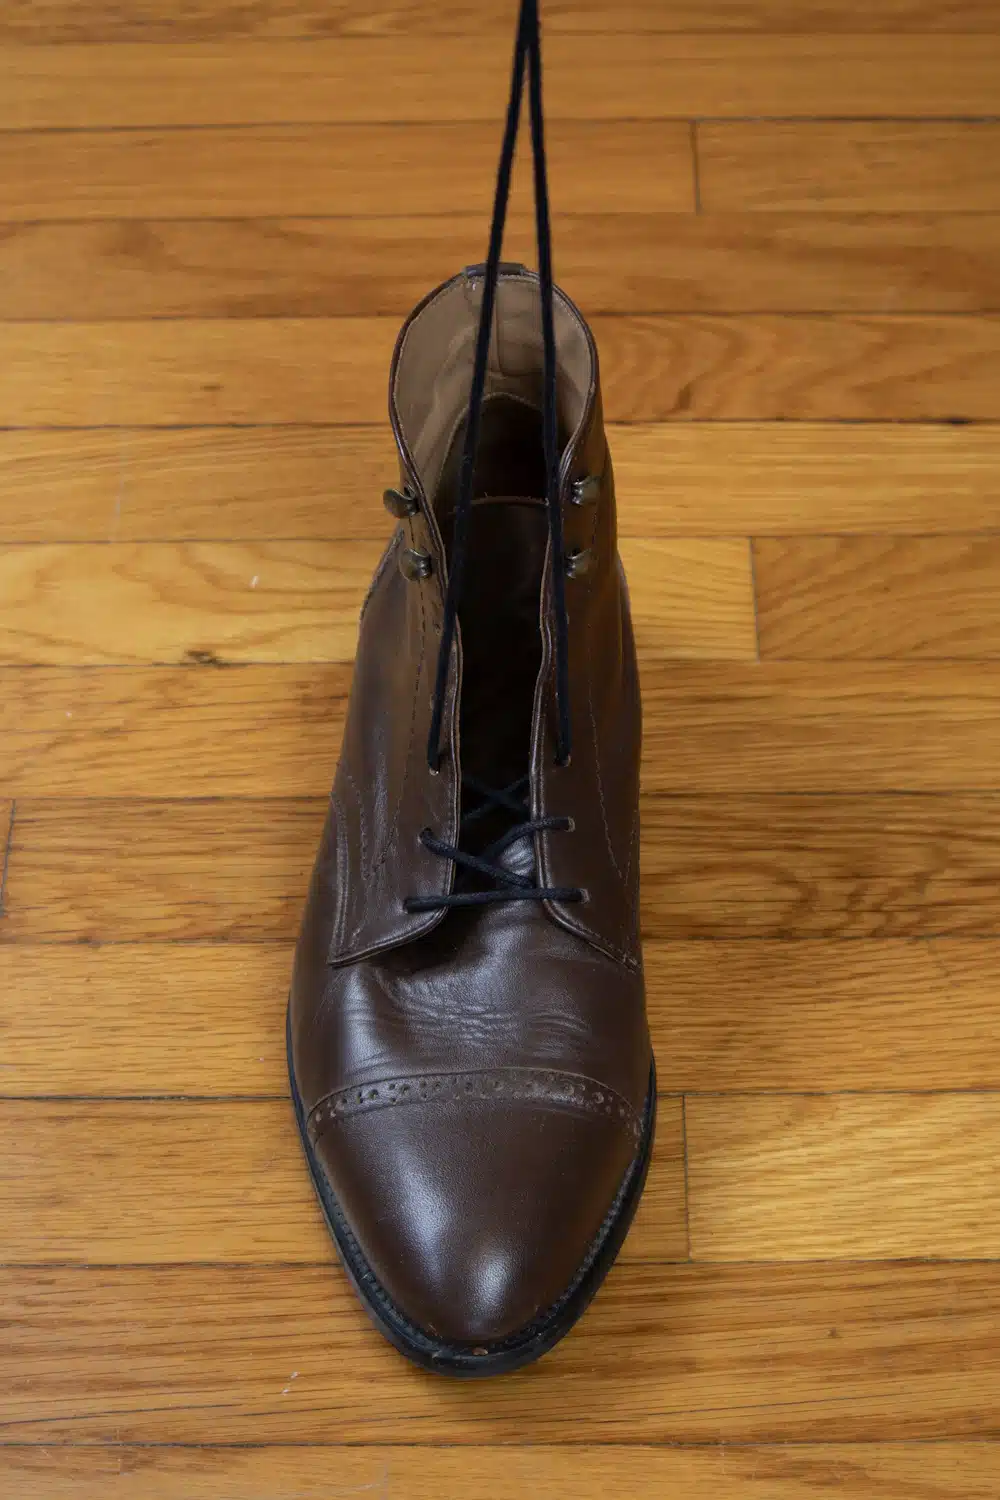
From left to right, the same pattern should be followed.
Step #3:
Repeat step 2 until all eyelets have been filled.
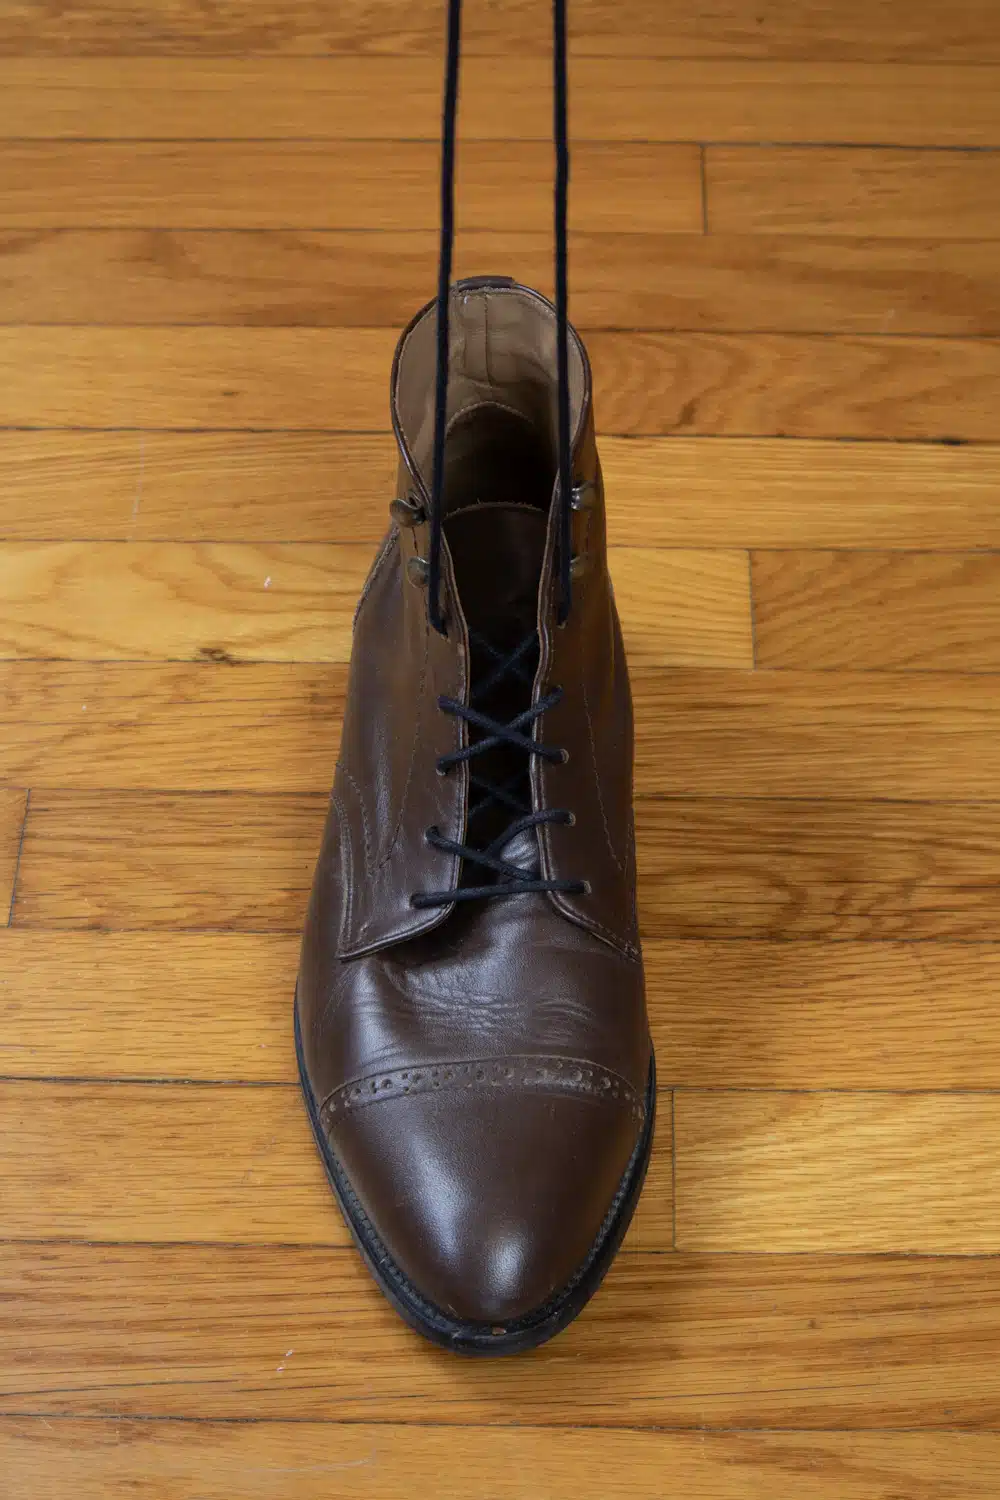
If your boot has speed hooks, instead of going from the top or bottom of the eyelet, you will just wrap around the hook.
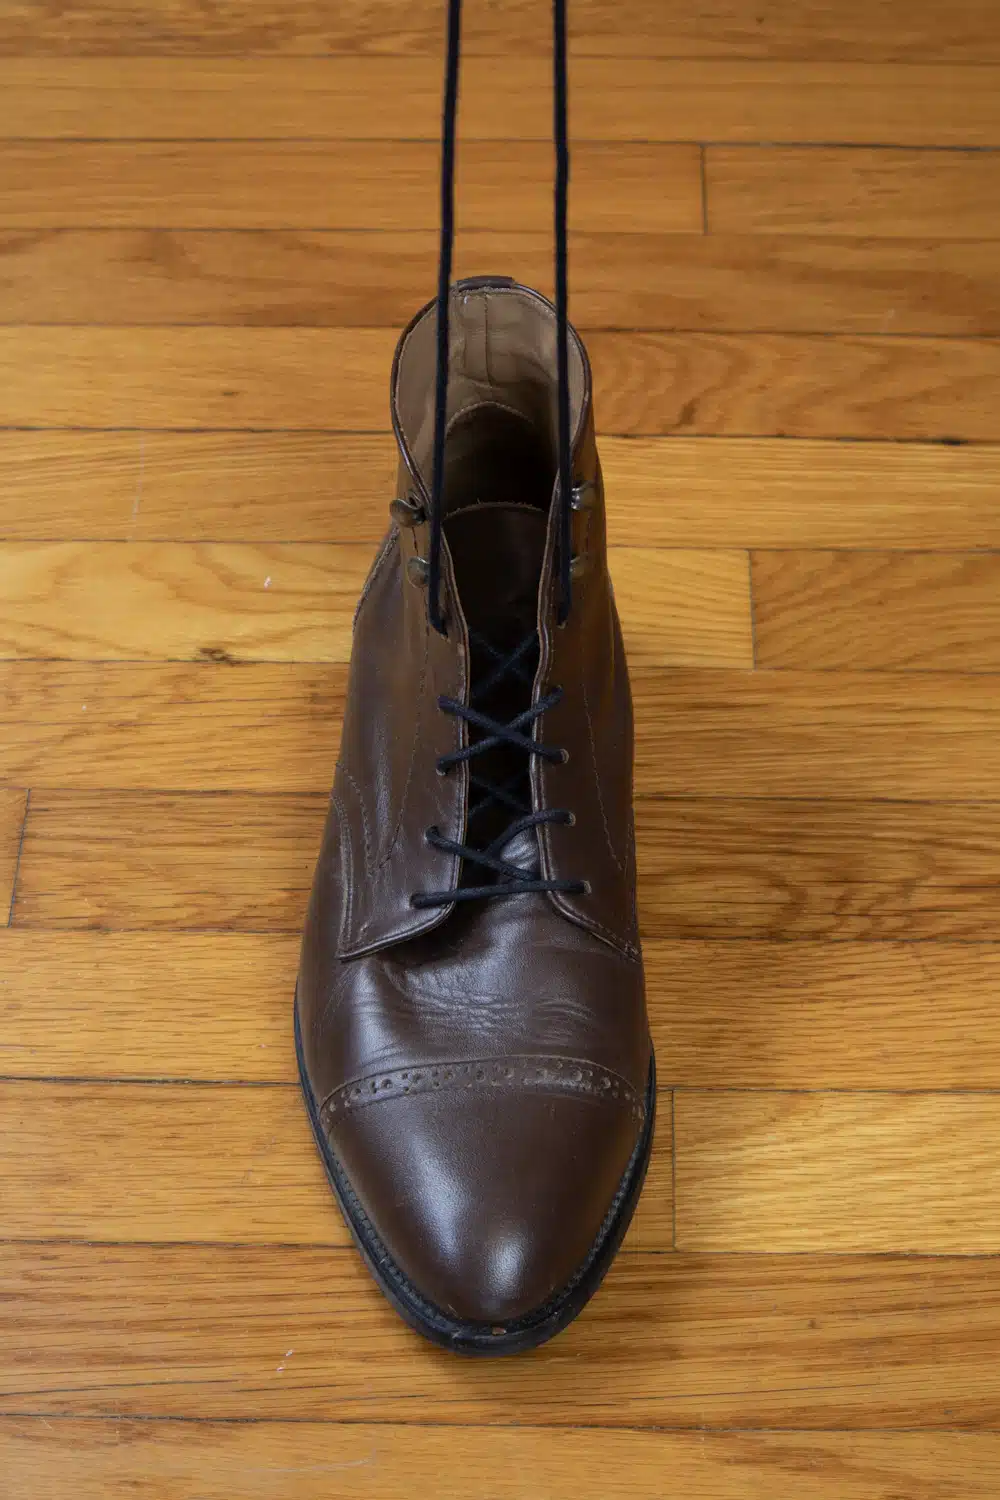
The use of a kiltie will require the same steps as in Standard lacing.
Here’s what your boots should look like at the end.
Bar Lacing
Bar lacing is a stylish, flexible pattern for use in boots with less intense applications. Bar lacing looks great on casual work boots worn everyday, as well as dress boots for those special occasions.
It is important to note that bar lacing works best on boots with an even amount of eyelet pairs.
You can use this pattern on boots with odd pairs, but it will require you to do a simple cross on the last set of eyelets that will be mostly hidden by the knot you tie.
Step #1:
From the bottom, start by pushing the lace ends from outside to inside so they are now coming from the bottom.
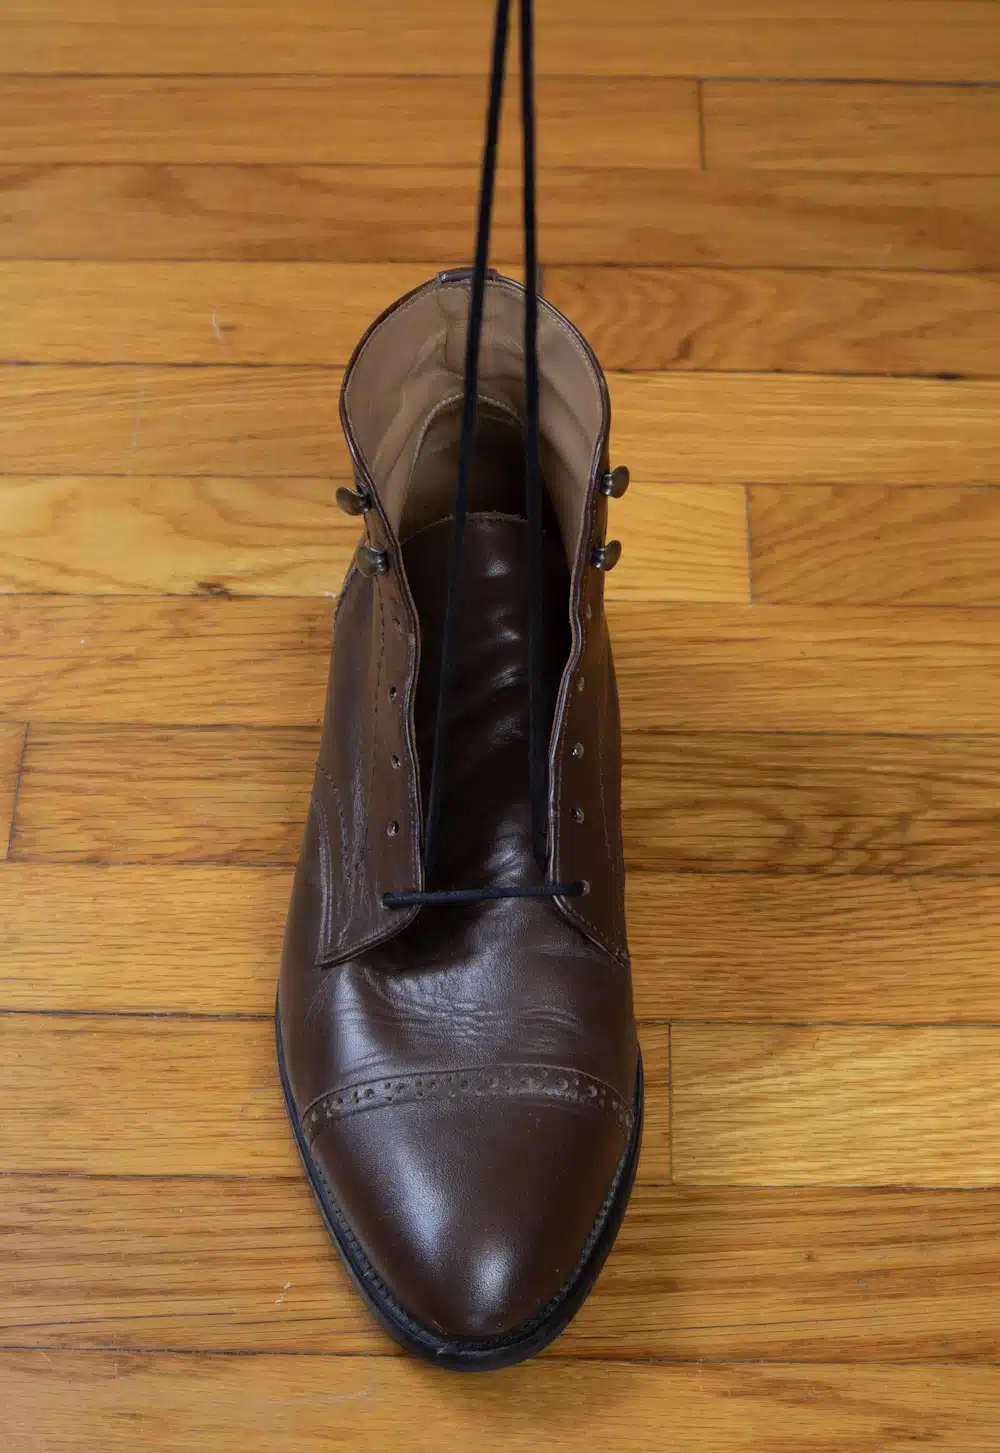
Got it so far?
Step #2:
With one lace, push the end out from the bottom of the eyelet immediately above it, then lace through the top of its parallel partner.
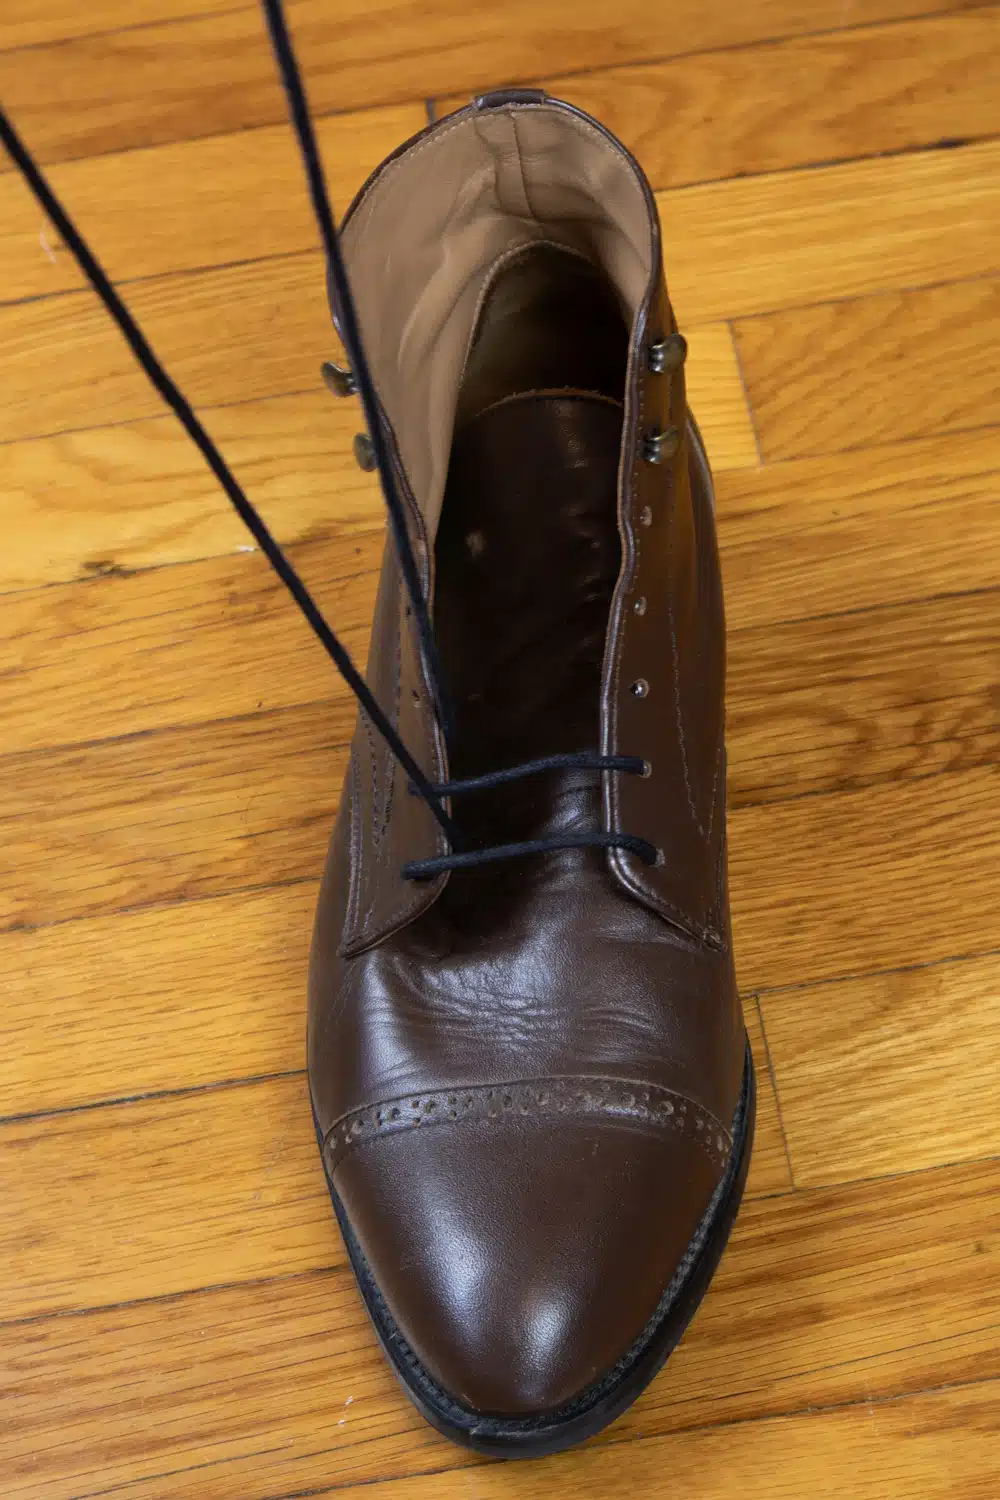
It’s getting a little more tricky. Still following?
Step #3:
With the other lace, skipping the already used outlet directly above, use the next available eyelet in the same column from the inside out.
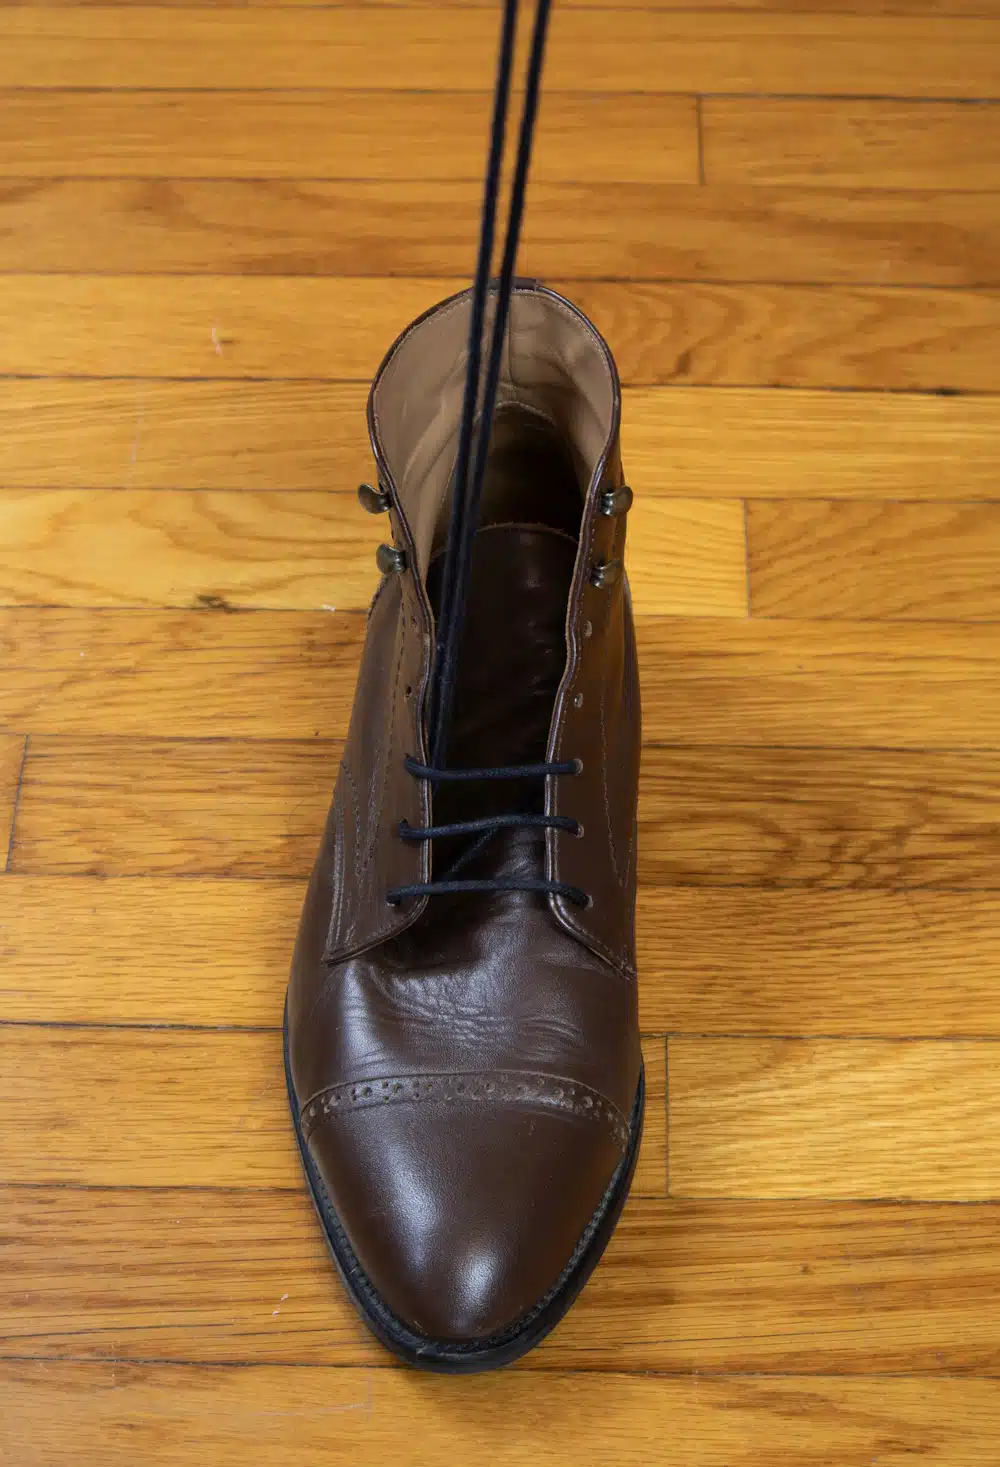
Then, lace directly across from the outside of the outlet in.
Step #4:
Repeat step 3 until you have completed lacing the boot.
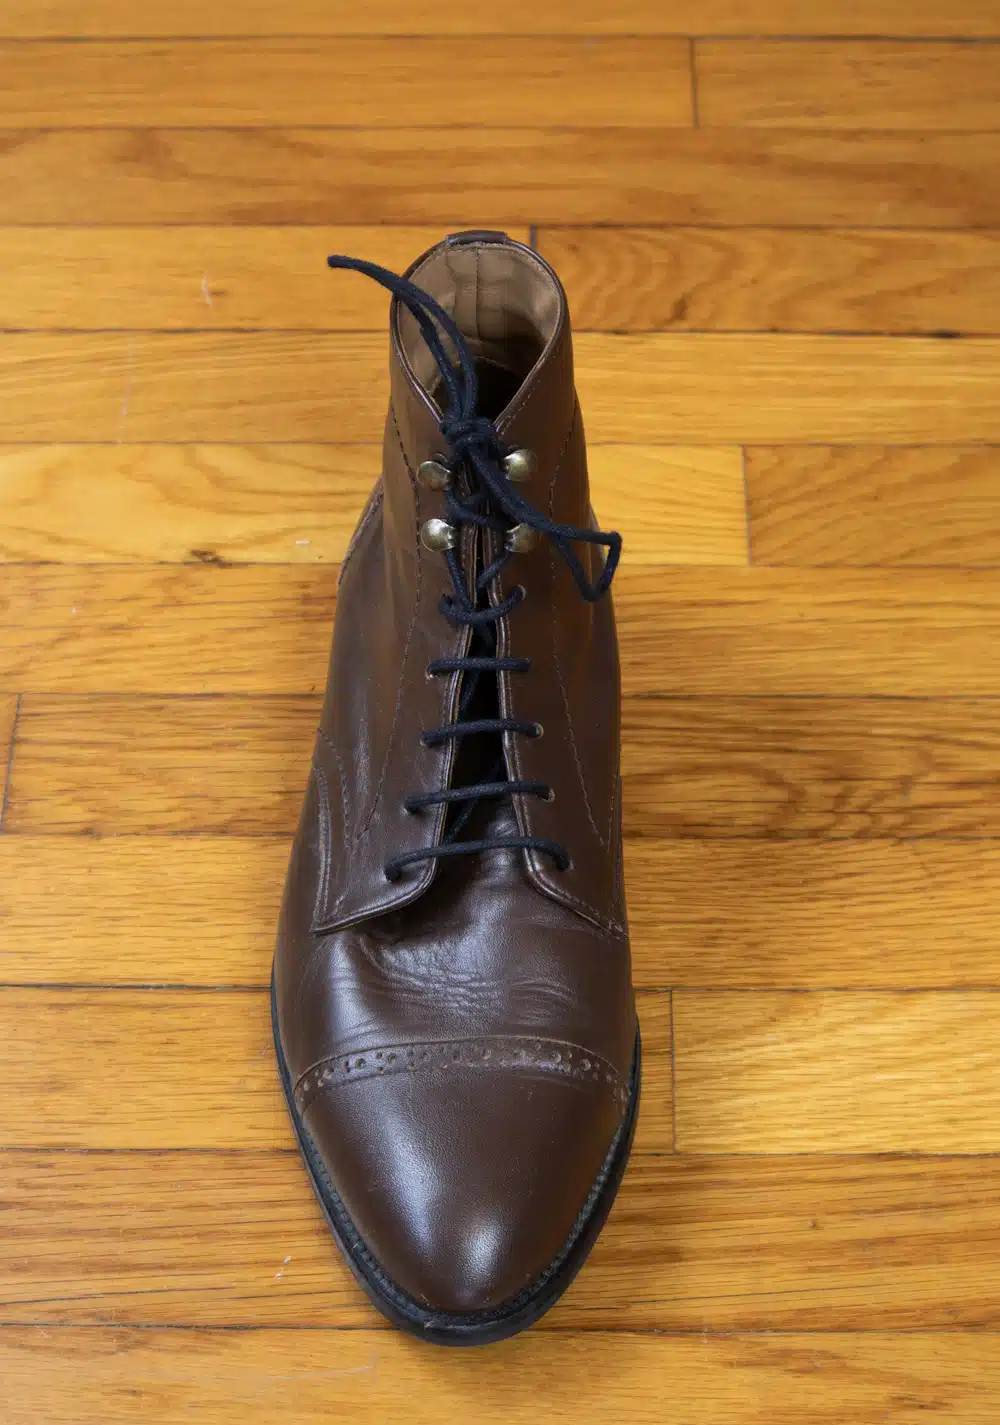
Now, you should be looking at a sleek, straight laced boot yourself. For an even sleeker look, you could tuck in the bunny ears up top.
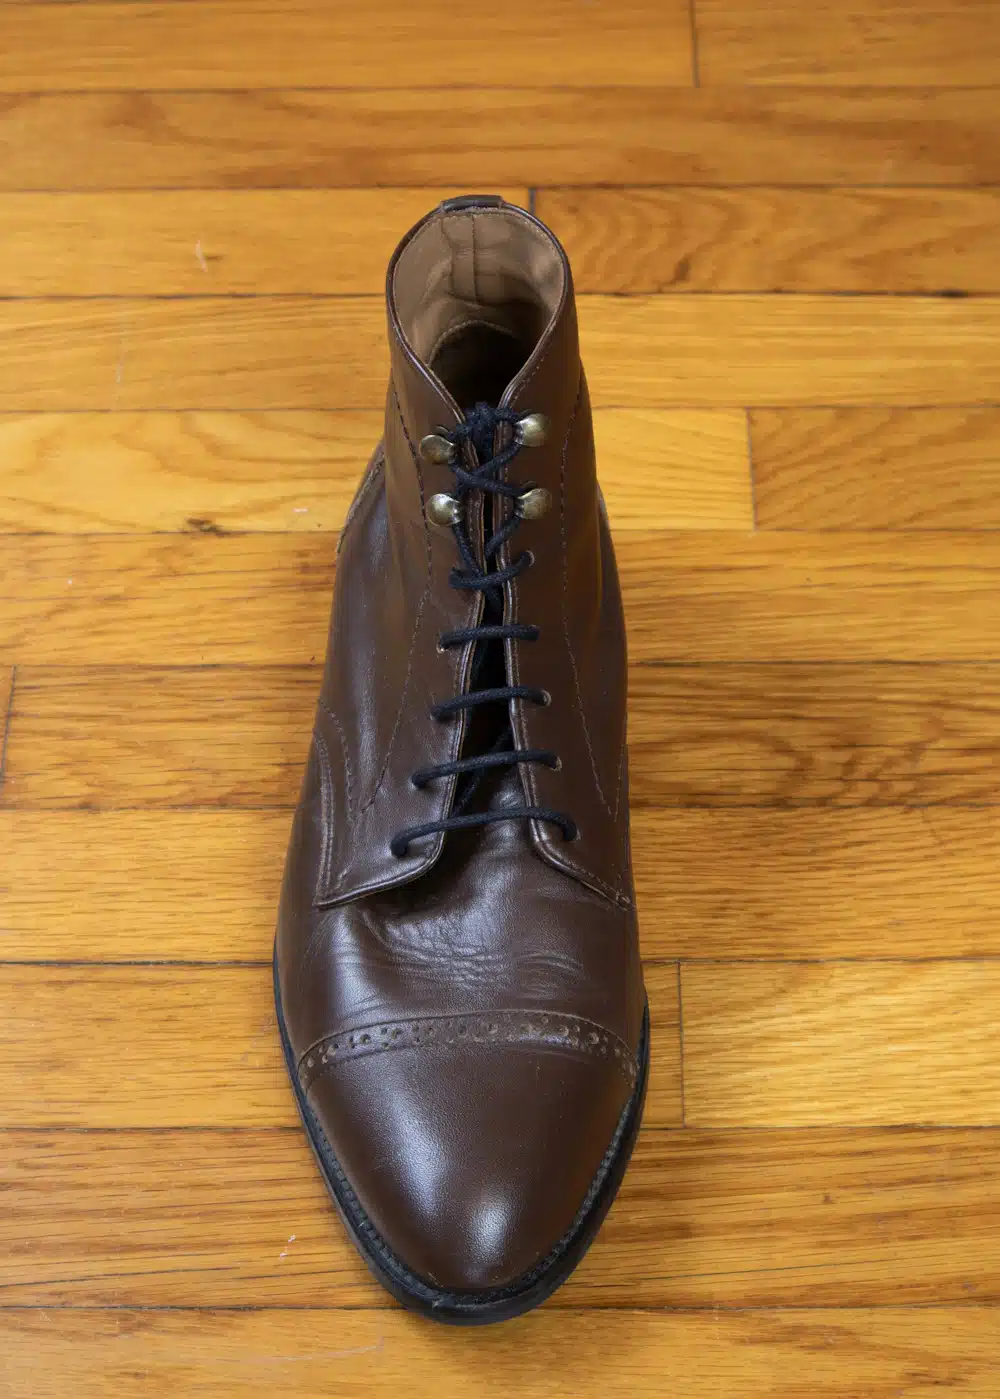
Take special care as you use this pattern; you may be tempted to use it all the time due to its appearance, but although this pattern is the king of simple style, it lacks rigidity, making it the last choice for hiking or other labor intensive duties.
Heel Lock Lacing
The heel lock technique is great to add extra support and hold the boot tighter, preventing things like blisters.
Step #1:
The first step in heel lock lacing was already covered!
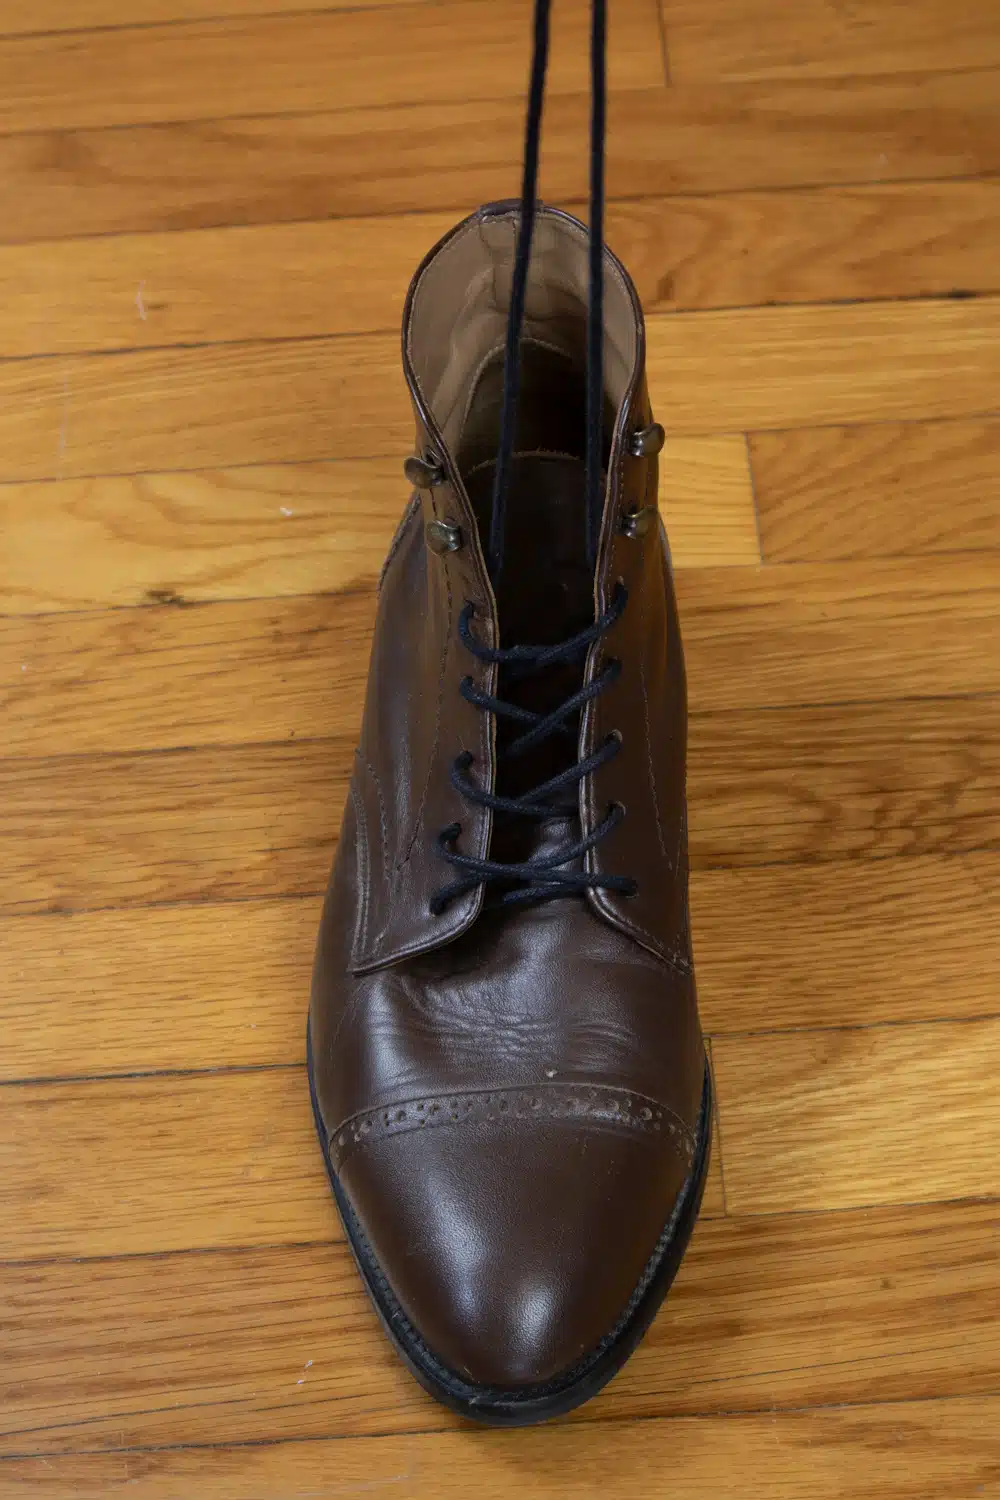
The first step is to perform standard crisscross lacing until the last two pairs of eyelets or speed hooks.
Step #2:
Crisscross the second to last eyelet or hook, then lace vertically for the final one.
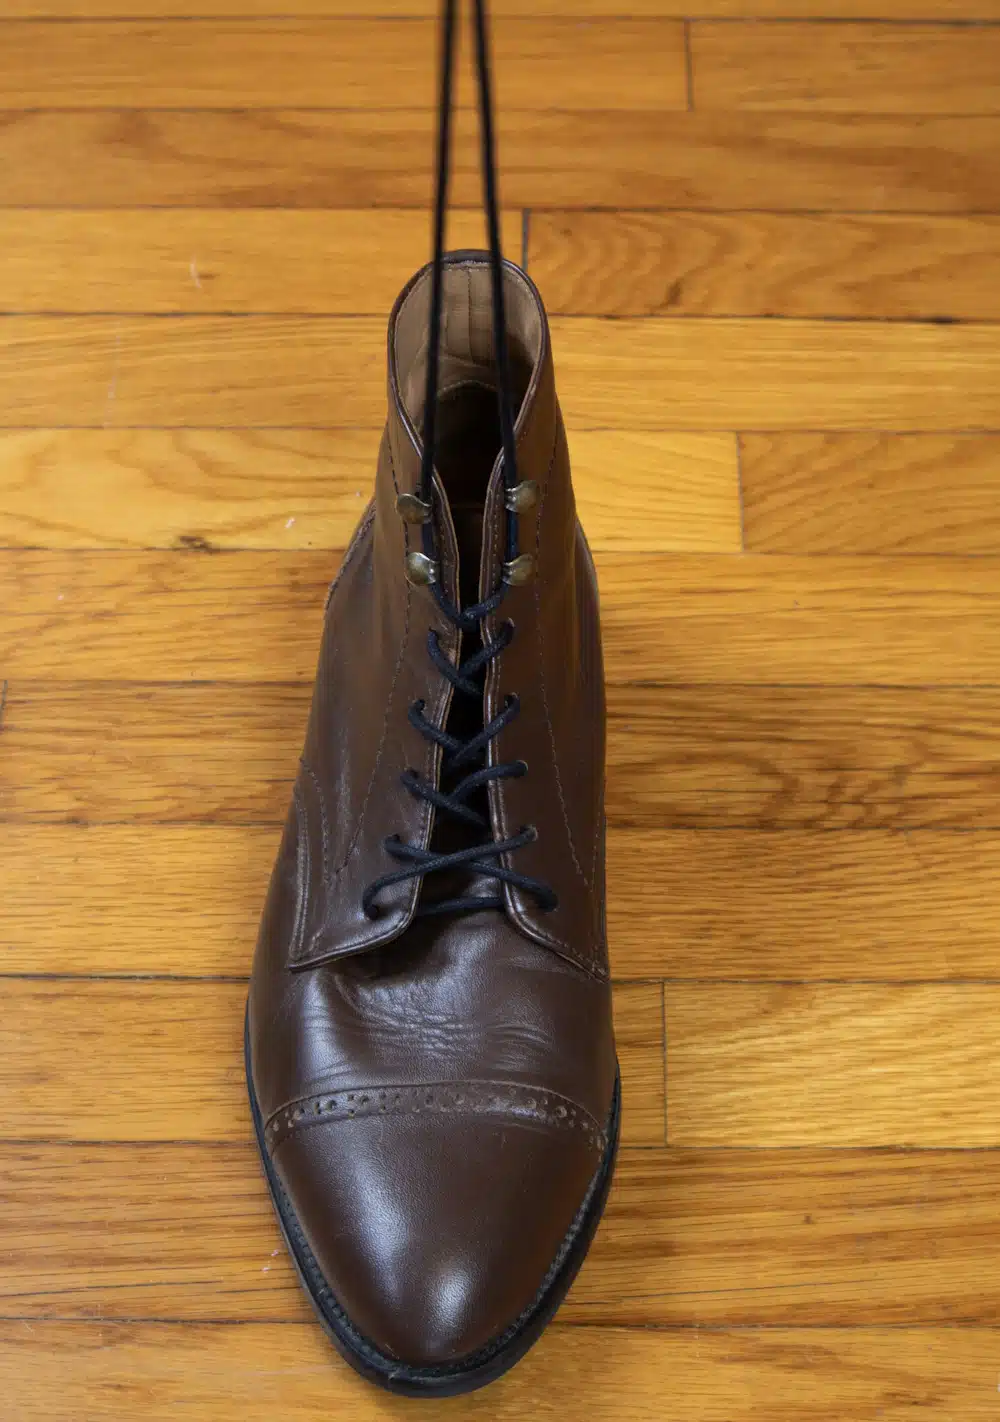
See what I did here?
Step #3:
Identify the vertical bars created in step 2. Take the ends of the lace and pull them under and through the bar opposite.
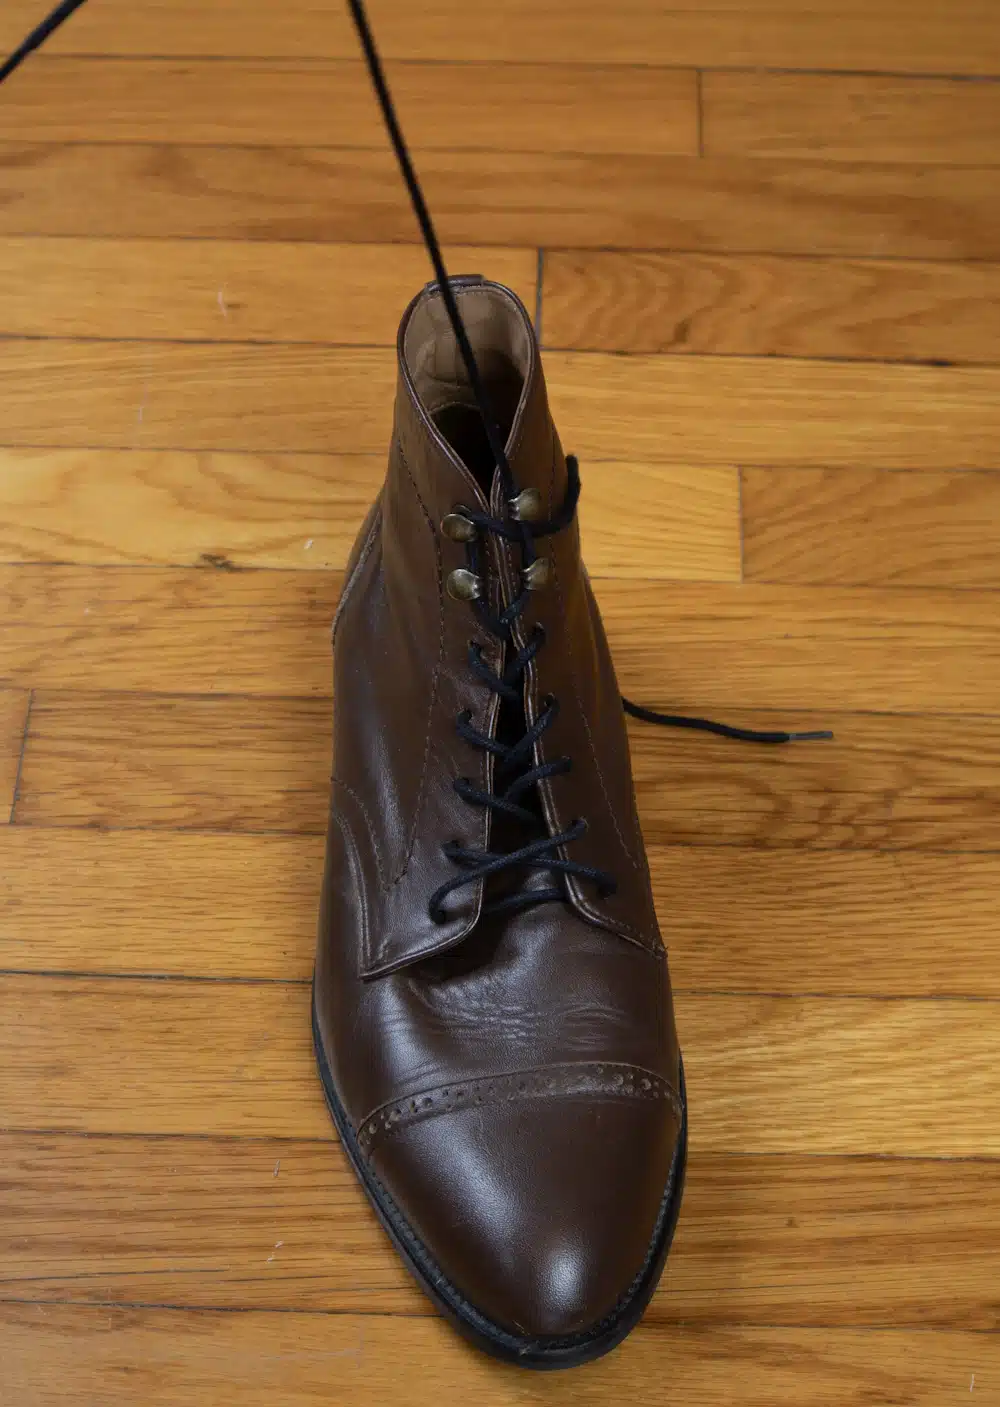
It should look something like this.
Step #4:
If you have enough excess lace and want to add more stability, you could wrap it around the back of the boot before tying it in the front. Tie a knot like normal in the front of the boot.
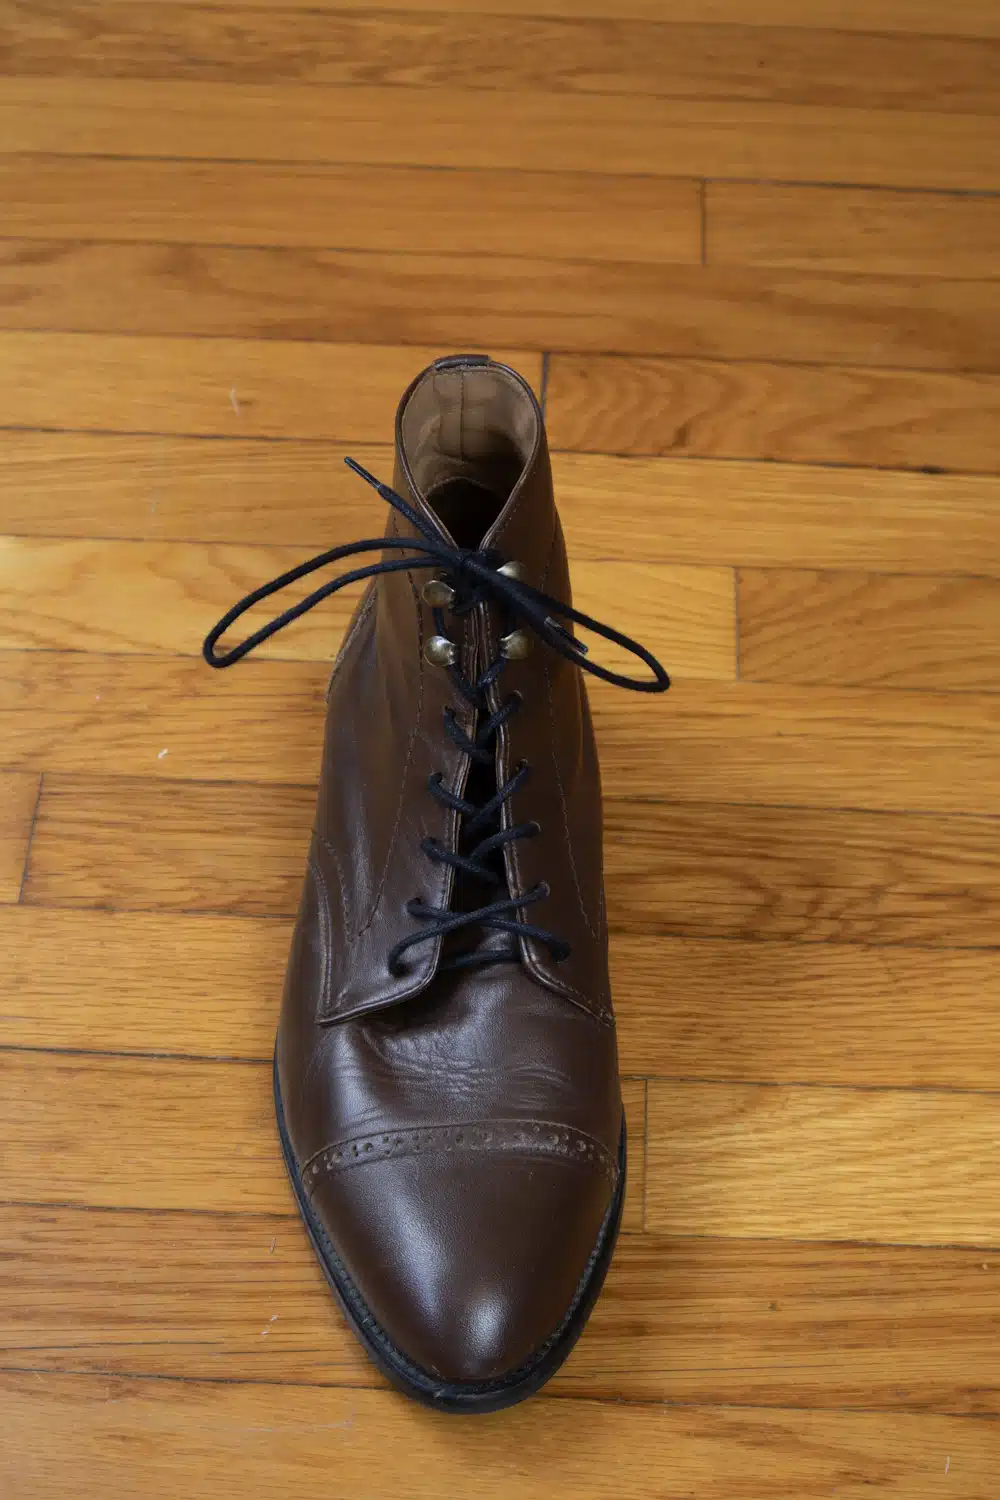
This pattern provides some of the best remedies to common boot problems. Use this pattern to avoid blistering, twisting, and slippage.
It’s not just for boots, it’s commonly used by runners, too!
Ladder Lacing
Made famous by paratroopers, EMTs, and other personnel, ladder lacing looks great and is very practical.
This pattern holds the laces for very long periods of time, but it is not great for quick tightening and loosening.
Step #1:
Begin with the lace coming out from inside the bottom pair of eyelets.

It should look like this.
Step #2:
Lace both ends vertically.
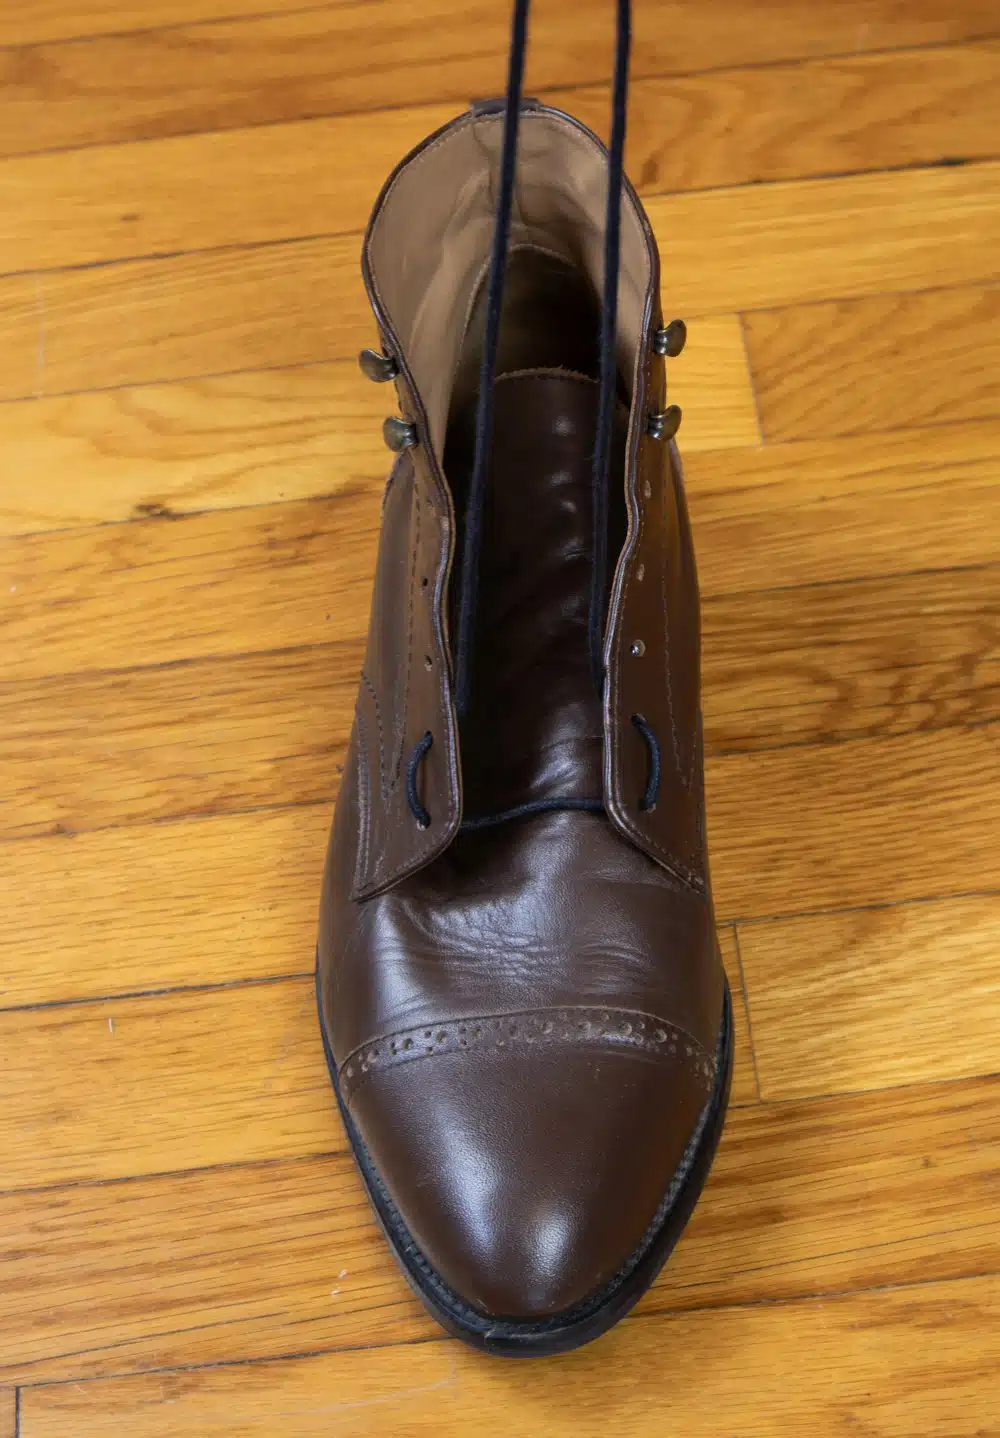
Buckle up because things are about to get a little complicated!
Step #3:
Pass the lace underneath the vertical bar just created on the opposite side from the inside. The lace should appear woven, with one laying on top of the other along the tongue.
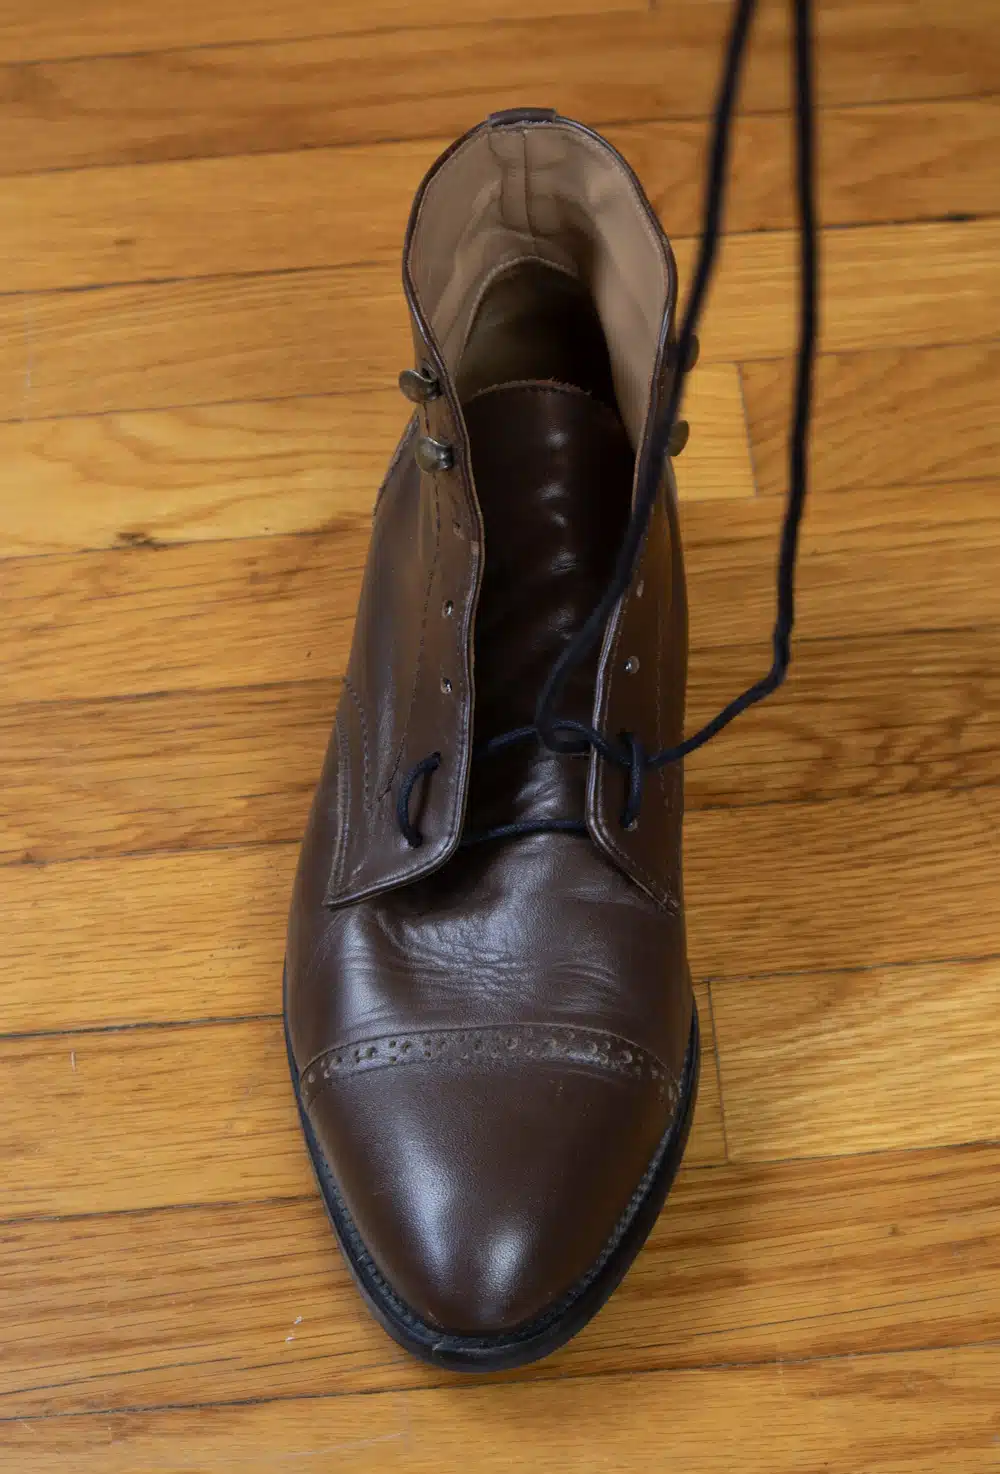
Maintain the same pattern of which direction the laces lay one upon another throughout the pattern.
Step #4:
Repeat step 2 until all eyelets and/or speed hooks have been used.
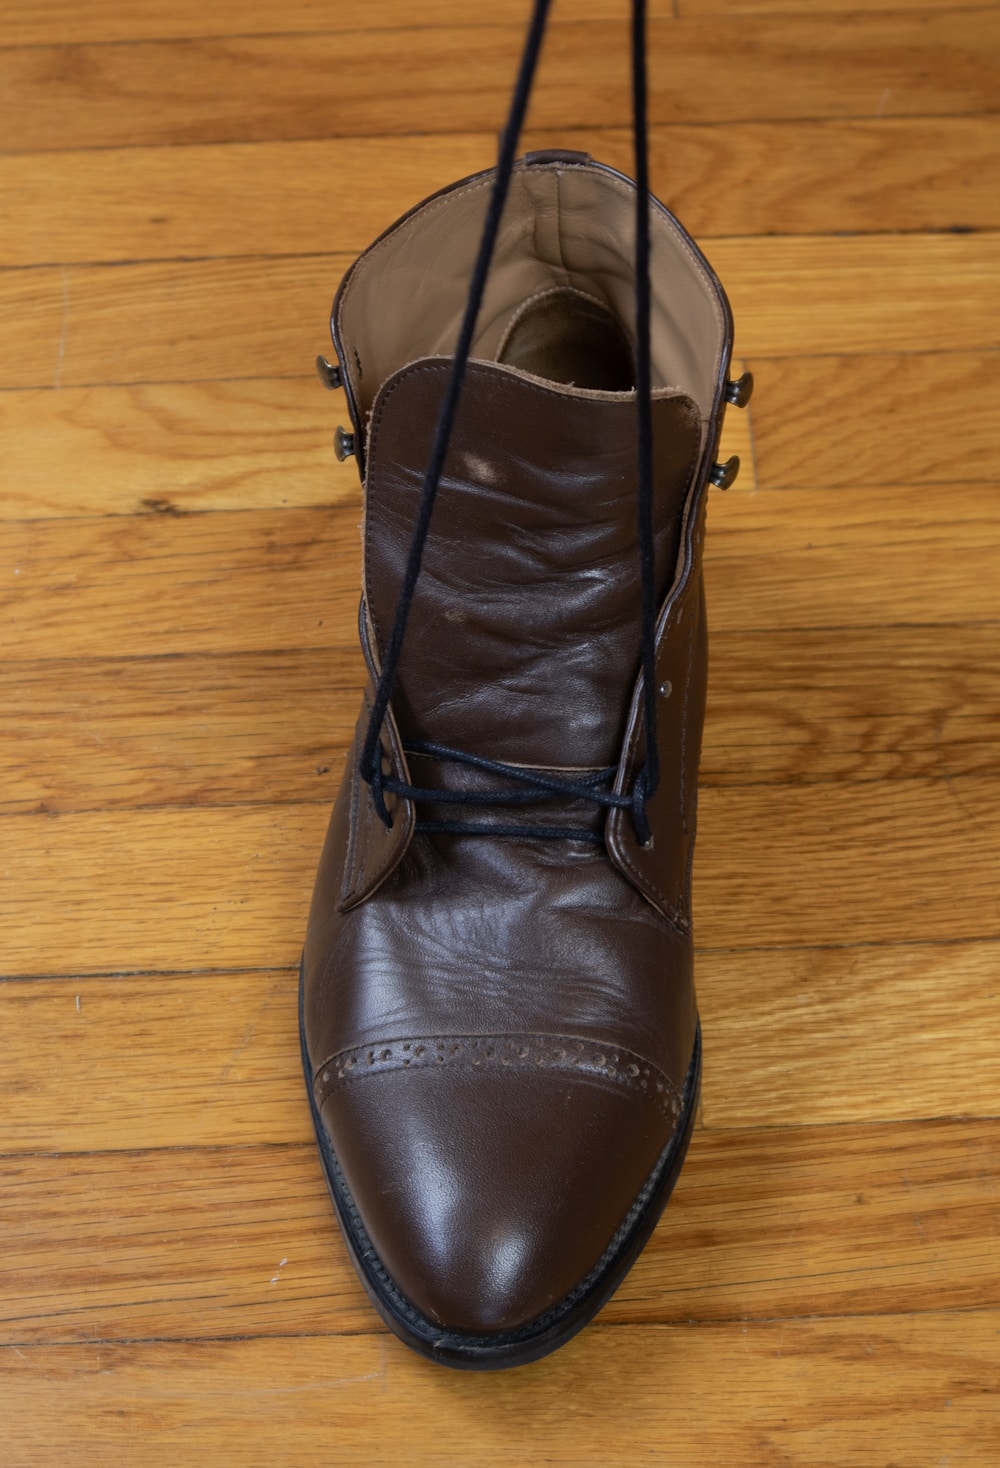
For excess lace, you can follow steps 3 and 4 of the heel lock pattern and lock your laces in this pattern as well.
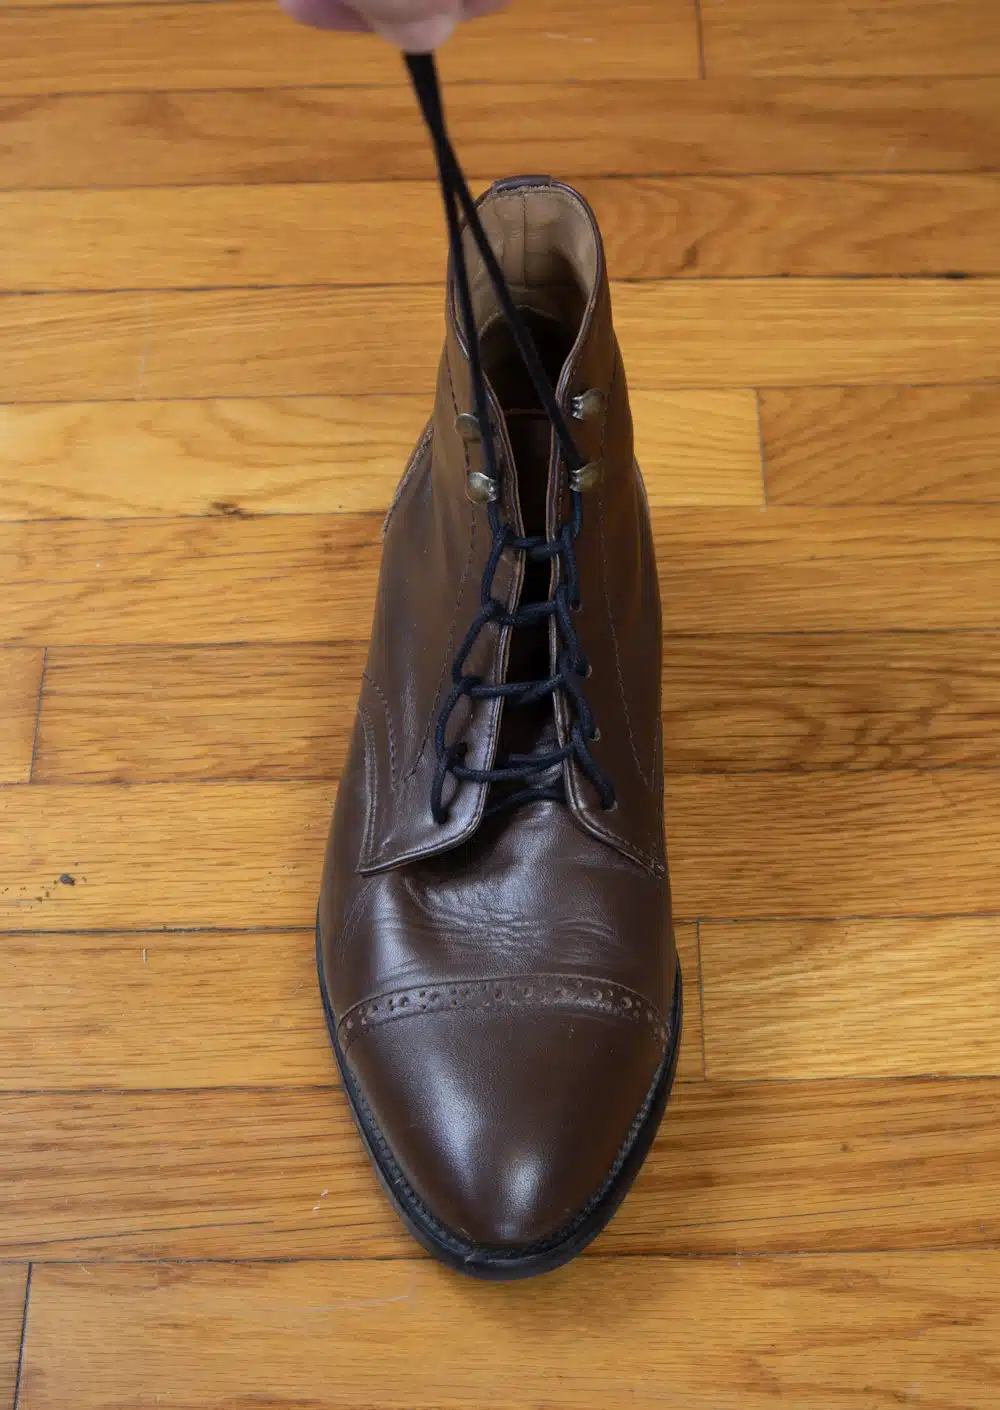
Perfect for hiking or other extended excursions, this pattern is stylish and strong.
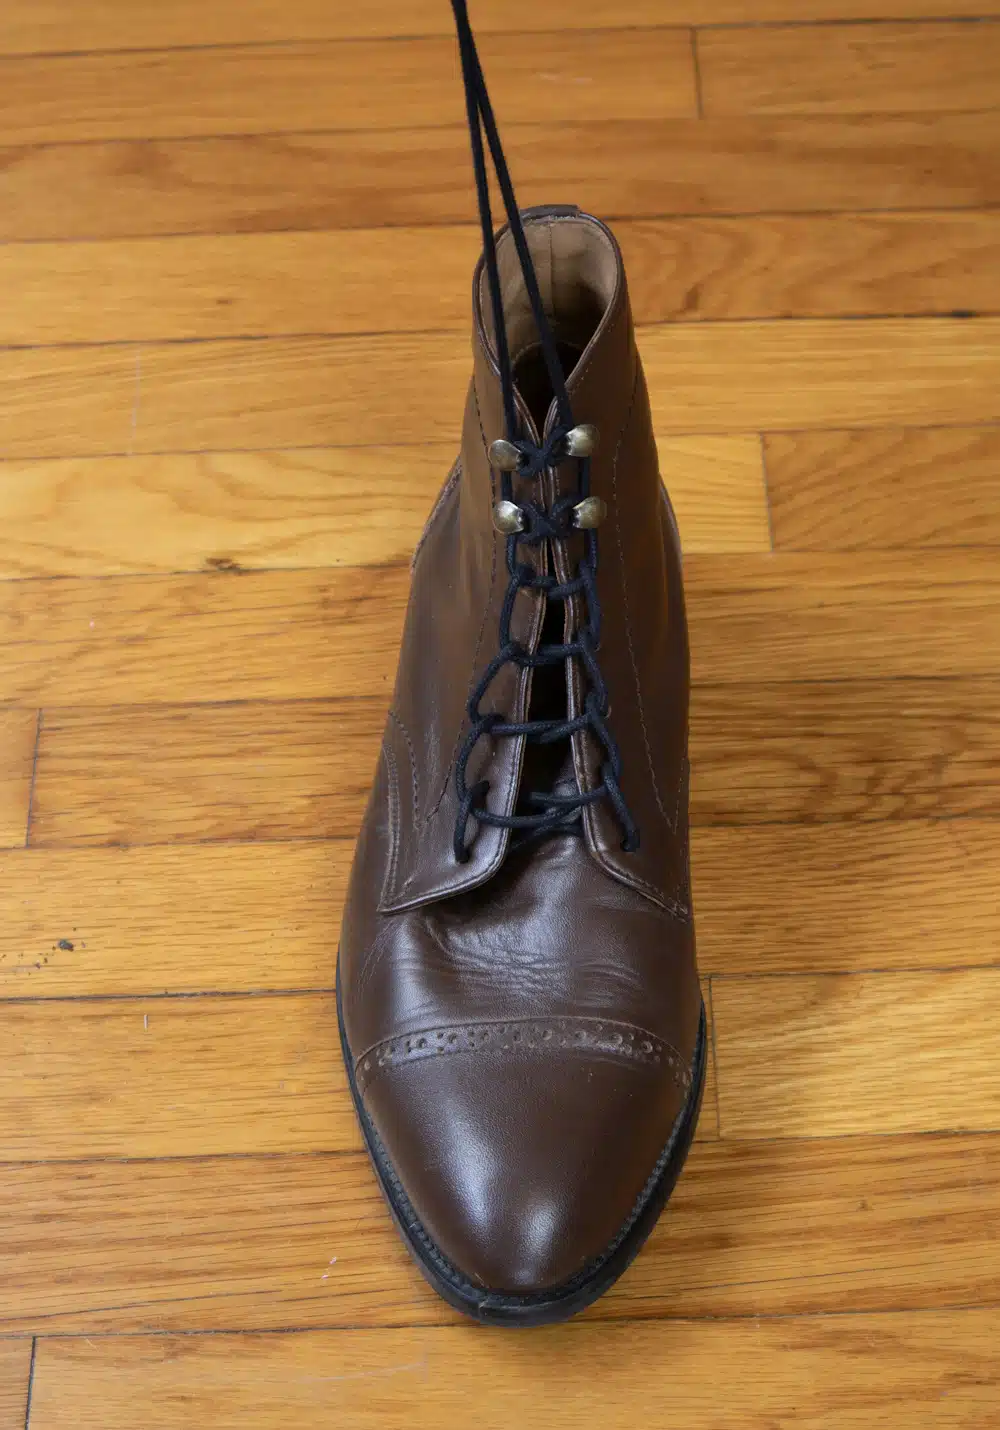
This pattern is especially useful for tall boots with lots of eyelets.
FAQ
Is There a Correct Way to Lace Boots?
Some lacing methods work better for boots better than others. The best method for any given situation depends on the type of boot, the number of eyelets, and the personal preferences. If you follow the steps in this article, you can avoid guesswork.
My laces Are Too Short, What Do I Do?
The recommended guide to lace length is as follows:
For 7-8 pairs of eyelets, 60 in.
For 8-9 pairs of eyelets, 72 in.
For 9-10 pairs of eyelets, 84 in, and so on.
Conclusion
Choosing the right lacing method is almost as important as choosing the right pair of boots.
Selecting the right lace pattern will enhance your boot-wearing experience.
Drop your favorite boot lacing pattern in the comments!

Ask Me Anything